Introduction
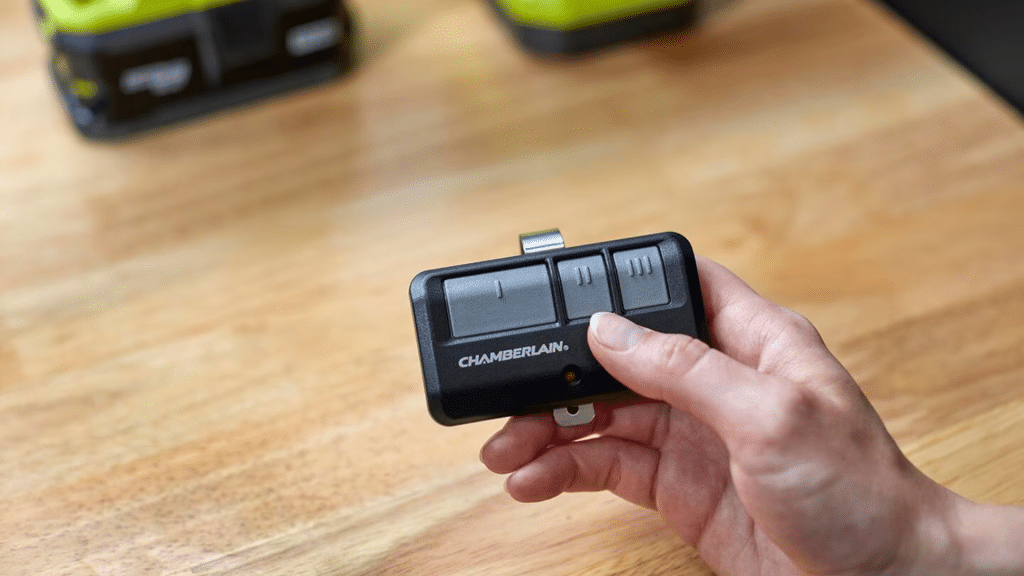
There is nothing quite as frustrating as standing in your driveway, pressing a button repeatedly, and watching your garage door refuse to budge. Whether you have lost an old remote, purchased a replacement, or simply moved into a new home, figuring out how to set up remote for Chamberlain garage door opener systems is a common household hurdle that shouldn’t require a degree in engineering. We understand the urgency of getting back into your garage safely and quickly, which is why we have compiled this comprehensive, empathetic guide to get you synced up without the headache.
In this article, we will walk you through every method, from the traditional “Learn” button process to modern smart integrations, ensuring you have the confidence to manage your home’s primary entry point. Let’s get that door open.
Identify Your Chamberlain Model Before Programming
Before you press any buttons, accurate identification is the foundation of successful programming. Chamberlain has manufactured openers for decades, and the how to set up remote for Chamberlain garage door opener process varies significantly between older DIP-switch models and newer Security+ 2.0 systems.
Check the Learn Button Color
The most reliable way to identify your system’s generation is by locating the “Learn” button on the motor unit (usually on the back or side panel).
| Learn Button Color | System Type | Manufacturing Era | Compatible Remote Type |
|---|---|---|---|
| Purple | Security+ | 1997–2005 | 390MHz Rolling Code |
| Red/Orange | Security+ | 1997–2005 | 390MHz Rolling Code |
| Green | Older Rolling Code | 1993–1996 | 390MHz Fixed/Rolling |
| Yellow | Security+ 2.0 | 2011–Present | 310/315/390 MHz Multi-Freq |
Pro Tip: If your unit lacks a Learn button entirely and instead has a row of tiny sliding switches inside the remote and motor housing, you have a pre-1993 DIP-switch model. These require manual switch matching rather than digital syncing.
According to technical documentation referenced in general automation standards on Wikipedia, modern rolling code technology was adopted widely in the mid-1990s to prevent code grabbing, meaning your setup process is also a critical security verification step. Always verify your frequency compatibility before attempting to program, as mismatched frequencies are the #1 cause of failed setups.
How To Set Up Remote For Chamberlain Garage Door Opener: The Standard Method
For the vast majority of homeowners with units manufactured after 1997, the standard Learn button method is the solution. This process utilizes rolling code technology to securely pair your transmitter to the receiver.
Step-by-Step Programming Instructions
Follow these precise steps to ensure a clean sync. Rushing this process often leads to partial programming where the light blinks but the door doesn’t move.
- Locate the Learn Button: Find the colored button on your motor unit. You may need to remove the light lens cover on some newer models.
- Clear Old Codes (Optional but Recommended): Press and hold the Learn button for approximately 6 seconds until the LED turns off. This wipes previous remotes and keypads, preventing unauthorized access if you are setting up due to lost keys.
- Initiate Learning Mode: Press and release the Learn button firmly. The LED indicator will illuminate steadily or begin blinking, depending on your model. You typically have 30 seconds to complete the next step.
- Transmit the Signal: Within that 30-second window, press and hold the button on your new remote that you wish to program. Hold it for 2–3 seconds.
- Confirm Success: Watch the motor unit lights. They should flash twice or emit two distinct clicks. This confirms the code has been accepted.
- Test Immediately: Press the remote button again to operate the door. Do not assume success without a physical test cycle.
Note: For Security+ 2.0 (Yellow Learn Button) systems, you may need to press the remote button up to three times during step 4 to cycle through compatible frequencies.
Troubleshooting: Why Won’t My Chamberlain Remote Sync?
Even when following instructions perfectly, users frequently encounter issues. Understanding how to set up remote for Chamberlain garage door opener includes knowing what to do when the standard path fails.
Common Failure Points and Fixes
- LED Flashes Once Then Goes Out: This usually indicates incompatible hardware. Verify your remote supports the specific frequency of your opener. A Universal Chamberlain remote is often required for mixed-generation systems.
- Lights Flash But Door Doesn’t Move: The remote is recognized, but the travel limits or force settings are misconfigured. Perform a manual travel limit adjustment using the UP/DOWN arrows on the motor unit.
- Remote Works Only When Standing Directly Under Unit: This is almost always a battery issue or antenna obstruction. Replace the CR2032 or alkaline battery first. Next, ensure the hanging wire antenna is fully extended and not touching metal surfaces or wrapped around mounting brackets.
- Intermittent Operation After Successful Setup: External interference could be the culprit. LED bulbs in the garage opener fixture are notorious for emitting RF noise that blocks remote signals. Switch to incandescent bulbs or Chamberlain-approved LED bulbs specifically designed for garage openers.
Battery Specifications Matter
Not all batteries perform equally in cold garage environments. Use high-quality alkaline or lithium batteries. Avoid zinc-carbon “heavy duty” batteries, as they lack the amperage burst required for the initial handshake signal.
Advanced Setup: Integrating MyQ Smart Technology
Modern Chamberlain openers often feature built-in Wi-Fi via the MyQ platform. While this isn’t strictly about RF remote programming, it represents the evolution of how to set up remote for Chamberlain garage door opener functionality in the smartphone era.
Benefits of Smart Integration vs. Traditional Remotes
| Feature | Traditional RF Remote | MyQ Smartphone Control |
|---|---|---|
| Range | 100–300 feet | Unlimited (Internet Required) |
| Status Feedback | None (Blind Operation) | Real-time Open/Closed Alerts |
| Guest Access | Must physically hand over remote | Share digital access temporarily |
| Security Risk | Low (Rolling Code) | Medium (Dependent on Network Security) |
| Setup Complexity | Low (Button Press) | Medium (App + Wi-Fi Config) |
If your unit has a yellow Learn button and Wi-Fi logo, download the myQ app before programming physical remotes. Setting up the smart hub first can sometimes simplify subsequent remote pairing by establishing a stable baseline configuration. However, remember that MyQ controls the door via internet commands, while your handheld remote uses direct radio frequency; both systems operate independently and should be configured separately for redundancy.
Safety First: Critical Warnings During Setup
Programming your opener involves working near heavy mechanical components. Safety must never be secondary to convenience.
- Disconnect Power When Adjusting Hardware: If you need to access internal wiring or adjust chain tension during troubleshooting, unplug the unit first.
- Never Bypass Safety Sensors: If your door reverses unexpectedly during testing, do not tape over or misalign the photo-eye sensors to “fix” it. This is a federal safety requirement designed to prevent entrapment. Clean the sensor lenses and realign them instead.
- Keep Hands Clear: During the testing phase, keep fingers away from moving sections, rollers, and springs. Torsion springs store lethal amounts of energy and should only be serviced by certified professionals.
- Secure Your Remote: Treat your programmed remote like a house key. Never leave it visible in an unlocked vehicle parked outside.
Frequently Asked Questions (FAQ)
1. Can I program multiple remotes to one Chamberlain opener?
Yes. Most Chamberlain units support between 8 and 32 transmitters depending on the model year. Simply repeat the standard Learn button process for each additional remote. There is no need to reprogram existing devices unless you perform a full factory reset.
2. How do I know if my remote battery needs replacing versus reprogramming?
A weak battery typically manifests as reduced range rather than complete failure. If the remote works at 5 feet but not at 20 feet, replace the battery first. If it doesn’t work at any distance despite fresh batteries and confirmed compatibility, then reprogramming or hardware diagnosis is necessary.
3. Will programming a new remote erase my keypad code?
Only if you hold the Learn button down for 6+ seconds to clear memory. A quick press-and-release to add a new remote preserves all existing codes. Always test your keypad after adding new devices to confirm integrity.
4. What happens if I lose my only working remote?
You can still program a new remote using the Learn button on the motor unit itself; you do not need an existing working remote to initiate pairing. However, if you suspect theft, perform a full memory wipe immediately to invalidate the lost device.
5. Are universal remotes compatible with all Chamberlain models?
Most “universal” remotes cover post-1993 rolling code systems. Pre-1993 DIP-switch models and certain commercial-grade units may require OEM-specific replacements. Always check the compatibility chart on the remote packaging against your Learn button color before purchasing.
6. Why does my remote work intermittently in winter but fine in summer?
Cold temperatures reduce battery voltage output and can stiffen mechanical lubricants, increasing resistance. Upgrade to lithium batteries rated for extreme temperatures and apply synthetic garage door lubricant to rollers and hinges annually to maintain consistent performance year-round.
Conclusion
Mastering how to set up remote for Chamberlain garage door opener empowers you to maintain secure, reliable access to your home without costly service calls. By correctly identifying your system generation, following precise programming sequences, and respecting safety protocols, you transform a frustrating chore into a manageable maintenance task. Remember that proper setup is not just about convenience—it is the first line of defense in your home’s physical security perimeter.
Did this guide help you get back into your garage smoothly? Share this article on Facebook, X (Twitter), or Pinterest to help friends and neighbors avoid the same driveway headaches. Your share might save someone a frozen evening outside their own garage door! Stay safe, stay synced, and enjoy the peace of mind that comes with a properly configured home entry system.
Leave a Reply