Introduction
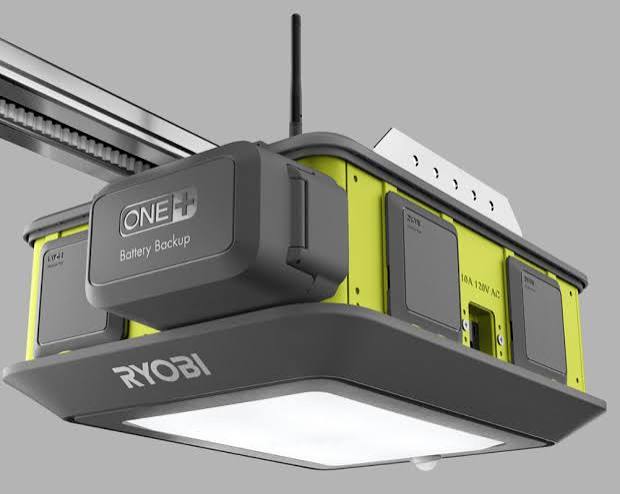
Is your Ryobi garage door opener stopping too short, reversing unexpectedly, or failing to close completely? You are not alone; this is one of the most common frustrations for homeowners with smart openers, but learning how to set travel limits on Ryobi garage door opener models can resolve these safety and convenience issues in minutes. In this comprehensive guide, we will walk you through the exact calibration process to ensure your door opens fully and closes securely every single time.
Understanding Why Travel Limits Matter for Safety
Before diving into the buttons and dials, it is crucial to understand why these settings exist. Travel limits tell the opener’s logic board exactly where the “fully open” and “fully closed” positions are. Without accurate limits, the motor cannot distinguish between a closed door and an obstruction on the floor.
According to safety standards outlined by the Consumer Product Safety Commission and detailed on Wikipedia’s Garage Door Opener entry, modern openers must reverse if they encounter resistance. If your travel limits are set incorrectly, the opener may interpret the ground as an obstruction, causing the dreaded “reverse-after-closing” issue. Conversely, if the open limit is too low, your vehicle might strike the bottom panel of the door. Proper calibration isn’t just about convenience; it is a critical safety protocol that protects your family, your car, and the mechanical lifespan of your Ryobi unit.
Preparation: Tools and Safety Checks
Adjusting travel limits requires zero heavy lifting, but it does require preparation. Before you touch any programming buttons, complete this checklist to ensure accurate results.
Essential Tools
- Stepladder: To safely reach the motor unit mounted on the ceiling.
- Flathead Screwdriver: Some older Ryobi models use physical limit screws rather than digital buttons.
- Smartphone/Tablet: If using the Ryobi GDO app for digital calibration.
- Owner’s Manual: Specific model numbers (e.g., GD200, GD120) have slight variations.
Critical Safety Precautions
- Clear the Area: Ensure no people, pets, or objects are in the path of the door.
- Disconnect Locks: Disable any manual slide locks before testing automatic operation.
- Check Sensors First: Misaligned safety sensors often mimic travel limit problems. Verify the LED lights on both sensors are solid green before adjusting limits.
- Balance Test: Disconnect the opener via the emergency release cord. The door should lift smoothly with one hand and stay in place when released halfway. If it slams down, call a professional for spring adjustment before setting limits.
Step-by-Step: How to Set Travel Limits on Ryobi Garage Door Opener
Ryobi has produced both traditional screw-drive/belt-drive units and newer smart modules. Below are the two primary methods. Identify which applies to your specific model.
Method A: Digital Programming (Smart Models & Newer Units)
Most current Ryobi openers utilize a digital learn button system rather than physical screws.
- Locate the Learn Button: Find the colored learn button on the back or side of the motor head. It is typically yellow, red, or purple.
- Enter Programming Mode: Press and hold the learn button for approximately 6 seconds until the LED indicator begins flashing slowly. This indicates the unit is ready for limit setting.
- Set the Open Limit:
- Press the wall control button to move the door to the desired fully open position.
- Stop the door precisely where you want it.
- Press and release the learn button once to lock in the open limit. The LED should flash rapidly to confirm.
- Set the Close Limit:
- Press the wall control again to lower the door.
- Allow it to rest fully on the concrete floor without bowing the rail.
- Press and release the learn button once to lock in the close limit.
- Test Cycle: The opener will automatically run a complete test cycle. Watch carefully to ensure it stops at both new points without hesitation.
Method B: Physical Limit Screws (Older/Traditional Models)
If your unit has two plastic screws labeled “UP” and “DOWN” on the side panel:
- Identify Direction: Note which screw controls upward travel and which controls downward. Arrows usually indicate direction.
- Adjust Incrementally: Turn the appropriate screw one quarter-turn at a time. Clockwise typically increases travel; counter-clockwise decreases it.
- Test After Each Adjustment: Never make large adjustments at once. Run the door after each quarter-turn to observe the change.
- Fine-Tune the Close: For the down limit, adjust until the door seals evenly against the weatherstripping without compressing it excessively. Over-tightening causes premature wear.
- Secure Settings: Once satisfied, ensure the screws haven’t vibrated loose during testing.
Pro Tip: Temperature changes affect metal doors and springs. Re-check your travel limits seasonally, especially after extreme heat or cold snaps, as thermal expansion can shift alignment by up to half an inch.
Troubleshooting Common Calibration Issues
Even with perfect technique, problems persist. Here is a diagnostic table for frequent post-adjustment failures.
| Symptom | Likely Cause | Recommended Fix |
|---|---|---|
| Door reverses before hitting floor | Down limit set too high OR force setting too low | Increase down travel slightly; check force adjustment separately |
| Door strains/motor hums when closed | Down limit set too far (door over-travels) | Decrease down limit by quarter-turns until strain stops |
| Opens only partially then stops | Up limit set too low OR obstructed track | Reprogram up limit; inspect rollers and track for debris |
| Limits reset after power outage | Capacitor failure OR corrupted logic board | Perform factory reset; replace backup battery/capacitor |
| Erratic stopping points | Dirty encoder wheel OR loose belt/chain | Clean optical sensor; tighten drive mechanism tension |
When to Call a Professional
While setting travel limits is a DIY-friendly task, certain symptoms indicate deeper mechanical failure. If your door exhibits jerky movement, loud grinding noises, or if the cables appear frayed, stop immediately. Torsion springs store lethal energy and should never be adjusted without specialized training. Similarly, if repeated limit adjustments fail to solve reversal issues, the logic board itself may be failing—a repair best handled by certified technicians.
FAQ: Your Top Questions Answered
How often should I recalibrate my Ryobi garage door opener travel limits?
Under normal conditions, annual inspection suffices. However, recalibrate whenever you replace rollers, springs, or weatherstripping, or after significant seasonal temperature shifts. If you notice the door behavior changing gradually, don’t wait—adjust promptly to prevent motor strain.
Can I set travel limits using only the Ryobi smartphone app?
Yes, many newer Ryobi smart openers integrate limit setting directly into the app interface under “Settings” > “Door Calibration.” This offers finer precision than physical buttons and provides real-time feedback. However, always keep the manual override method documented in case of connectivity issues.
What happens if I set the close limit too tightly against the floor?
Excessive downward pressure damages multiple components simultaneously. Weatherstripping compresses permanently, door panels warp, and the motor draws excess amperage trying to push beyond the physical stop. This triggers thermal overload protection and significantly shortens opener lifespan. Always aim for gentle contact, not compression.
Why does my door work fine in summer but reverse in winter?
Cold temperatures contract metal tracks and stiffen lubricants, increasing friction. The opener interprets this added resistance as an obstruction. Apply silicone-based lubricant to rollers and hinges annually, and consider slightly increasing the down travel limit during colder months. Avoid petroleum-based grease, which thickens in cold weather.
Is there a difference between travel limits and force settings?
Absolutely. Travel limits define where the door stops. Force settings determine how hard the motor pushes before assuming an obstruction exists. Both require separate adjustments. Setting correct travel limits first ensures force settings function accurately. Adjusting force without proper limits creates unsafe operating conditions.
My Ryobi opener keeps losing its programmed limits. What’s wrong?
Persistent memory loss typically indicates either a failing capacitor (which maintains volatile memory during brief power fluctuations) or a dying backup battery in smart models. Replace the backup battery first—it’s inexpensive and easy. If problems continue, the main circuit board may need professional diagnosis or replacement.
Conclusion: Secure Your Home with Confidence
Mastering how to set travel limits on Ryobi garage door opener systems empowers you to maintain safe, reliable access to your home while extending equipment longevity. By following the systematic approach outlined above—preparing thoroughly, choosing the correct calibration method, and troubleshooting intelligently—you eliminate guesswork and achieve professional-grade results. Remember that patience during adjustment prevents costly repairs later; those extra quarter-turns make all the difference.
Your garage door is likely the largest moving object in your home. Treat it with respect, maintain it regularly, and it will serve you reliably for decades. Did this guide help you restore smooth operation? Share this article on social media to help fellow homeowners avoid the frustration of malfunctioning garage doors. Tag a friend who’s been battling their Ryobi opener—they’ll thank you! Safe lifting, everyone.
Leave a Reply