Introduction
If cold drafts, rainwater, or creepy crawlies keep sneaking under your garage door, you’re not alone — and you don’t have to live with it. Learning how to seal the bottom of a garage door is one of the most cost-effective home improvement projects you can tackle in a single afternoon. Whether you’re dealing with a stubborn half-inch gap or just want better energy efficiency, this comprehensive guide will walk you through every step so you can get it right the first time.
Why Sealing the Bottom of Your Garage Door Matters
Before we dive into the how-to, let’s talk about why this matters more than you might think.
An unsealed garage door bottom is essentially an open invitation for:
- Energy loss: The U.S. Department of Energy estimates that air leaks around doors and windows can account for up to 25–30% of a home’s heating and cooling costs. If your garage is attached, that gap under the door is bleeding money.
- Water damage: Even a small gap can let rainwater pool inside your garage, damaging stored belongings, vehicles, and the concrete floor over time.
- Pest intrusion: Mice, insects, and even snakes use gaps as small as ¼ inch to enter your garage — and from there, your home.
- Dust and debris: Wind-blown dirt, leaves, and pollen accumulate quickly when there’s no barrier at the bottom of the door.
Sealing this gap isn’t just a comfort upgrade; it’s a protective measure for your property and your wallet.
Types of Garage Door Bottom Seals (Which One Do You Need?)
Not all seals are created equal. Choosing the right type depends on your door style, climate, and the size of the gap. Here’s a breakdown:
1. T-Bottom Seal (T-Style)
This is the most common type for residential sectional garage doors. It slides into a retainer channel at the bottom of the door panel. The rubber “T” shape compresses against the floor to create a tight seal.
Best for: Standard aluminum or steel sectional doors with an existing retainer track.
2. Bulb Seal (Round Bead)
Features a round rubber bulb that presses against the garage floor. It offers excellent compression and works well on uneven surfaces.
Best for: Doors with wider gaps (½ inch or more) and slightly uneven concrete floors.
3. Threshold Seal (Floor-Mounted)
Instead of attaching to the door itself, this rubber strip is adhered directly to the garage floor. It creates a raised barrier that the door closes against.
Best for: Situations where the door bottom cannot accommodate a traditional seal, or where water runoff is a major concern.
4. Brush Seal
Uses dense nylon bristles to block drafts and debris while allowing some flexibility. Less effective against standing water but great for dust and light wind.
Best for: Commercial applications or garages in dry climates.
Quick Comparison Table
| Seal Type | Water Protection | Draft Blocking | Ease of Install | Avg. Cost |
|---|---|---|---|---|
| T-Bottom | ★★★★☆ | ★★★★★ | Moderate | $15–$30 |
| Bulb Seal | ★★★★★ | ★★★★★ | Moderate | $20–$40 |
| Threshold | ★★★★★ | ★★★☆☆ | Easy | $25–$60 |
| Brush Seal | ★★☆☆☆ | ★★★☆☆ | Easy | $10–$25 |
What You’ll Need: Tools and Materials
Gather everything before you start. A typical installation takes 60–90 minutes for a standard two-car garage door (approximately 16 feet wide).
Materials:
- New bottom seal (measure your door width first — most come in 9 ft, 16 ft, or 18 ft lengths)
- Replacement retainer (if your existing one is damaged)
- Silicone-based lubricant spray
Tools:
- Flathead screwdriver or pry bar
- Rubber mallet
- Utility knife
- Tape measure
- Pliers
- Clean rags
- Household cleaner or degreaser
- Safety gloves and eye protection
Pro Tip: Measure the exact width of your garage door opening, not just the door panel. You’ll trim the seal to fit, but starting with the right length saves frustration.
Step-by-Step: How To Seal The Bottom Of A Garage Door
Follow these steps carefully for a professional-quality result.
Step 1: Inspect the Current Seal and Gap
Open your garage door fully and examine the bottom edge. Look for:
- Cracked, brittle, or missing rubber
- A warped or corroded retainer channel
- The size of the gap between the door and the floor (use a ruler — note if it varies across the width)
If the gap is larger than ¾ inch in any spot, you may also need to adjust the door’s travel limits or consider a threshold seal in addition to a bottom seal.
Step 2: Remove the Old Seal
Close the door and disconnect the automatic opener for safety. Then:
- Locate the retainer channel running along the bottom of the door panel.
- Use a flathead screwdriver to gently pry out the old rubber seal from one end.
- Pull the seal steadily along the entire length. If it resists, apply a small amount of silicone lubricant to loosen it.
- Once removed, inspect the retainer channel for rust, dents, or debris. Clean it thoroughly with a degreaser and rag.
Warning: If the retainer itself is bent or severely corroded, replace it before installing the new seal. A damaged retainer will prevent a proper fit and waste your effort.
Step 3: Prepare the New Seal
- Unroll the new seal and lay it flat on the ground for 15–20 minutes to allow it to relax (rubber tends to curl after packaging).
- Measure your door width and mark the seal accordingly.
- Using a utility knife, cut the seal to the exact length. Cut at a slight angle for cleaner insertion.
Step 4: Insert the New Seal Into the Retainer
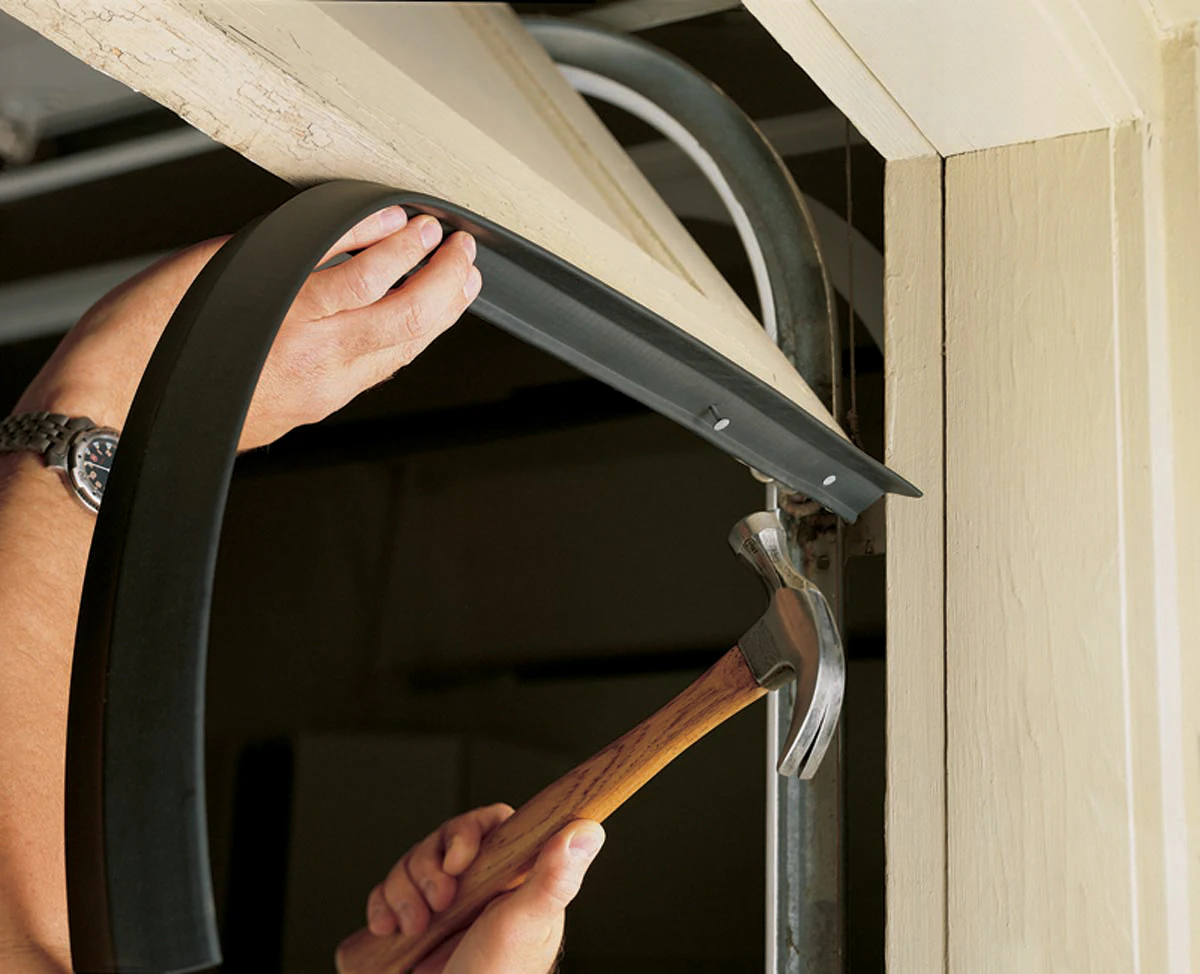
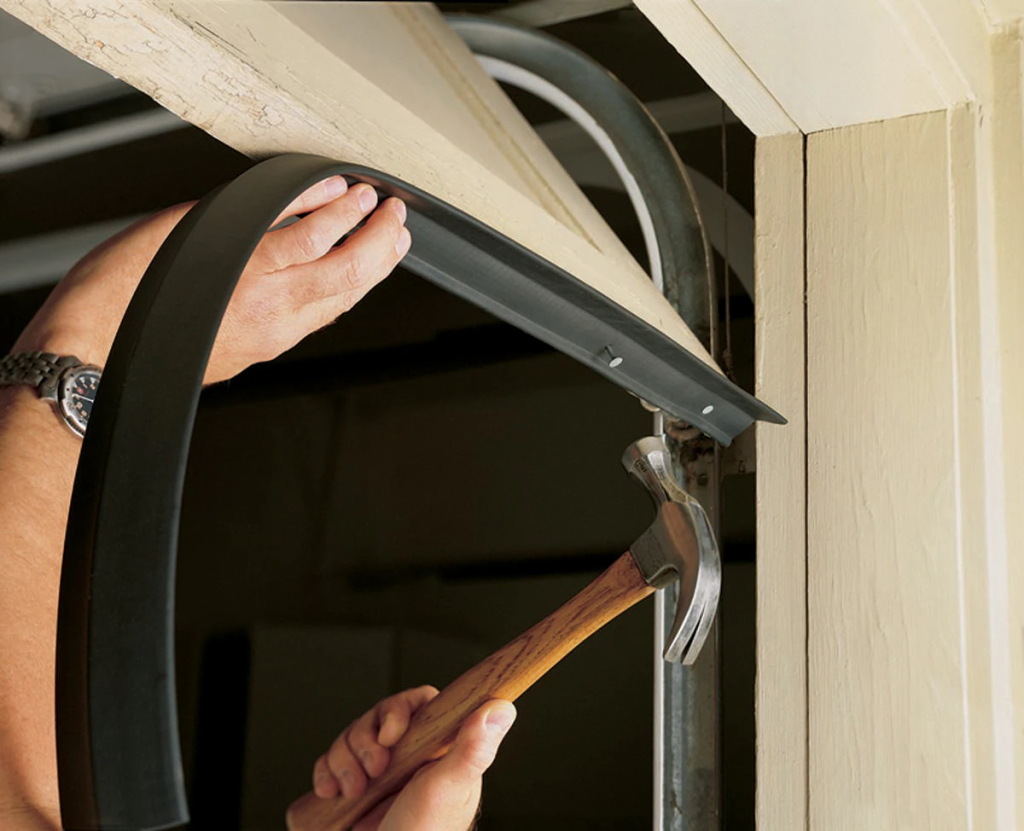
- Starting at one end of the door, push the T-shaped or bead-shaped edge of the seal into the retainer channel.
- Use a rubber mallet to gently tap the seal into place along the full length. Work slowly — forcing it can tear the rubber.
- If the seal feels tight, apply a thin coat of silicone lubricant to the retainer channel to ease insertion.
- Ensure the seal sits evenly with no bunching or twisting.
Step 5: Test the Seal
- Reconnect the garage door opener.
- Lower the door slowly and observe how the seal contacts the floor.
- The rubber should compress slightly (about ¼ to ½ inch) across the entire width. If sections aren’t touching, the floor may be uneven — consider adding a threshold seal for those spots.
- Perform the “light test”: close the door, turn off the garage lights, and look for daylight leaking underneath. No light means a solid seal.
Step 6: Optional — Install a Threshold Seal for Extra Protection
If you live in a flood-prone area or your driveway slopes toward the garage, pair your new bottom seal with a floor-mounted threshold. These adhesive-backed rubber strips (typically 3–4 inches wide) create a secondary barrier against water intrusion. Simply clean the floor, peel the backing, and press firmly into place. Allow 24 hours for the adhesive to cure before driving over it.
For more background on weatherization techniques and their impact on home energy performance, you can explore the topic further on Wikipedia’s Weatherization page.
Common Mistakes to Avoid
Even experienced DIYers stumble on these pitfalls:
- Skipping the cleaning step. Dirt and old adhesive residue prevent the new seal from seating properly. Always degrease the retainer channel.
- Using the wrong seal profile. A T-seal won’t fit a door designed for a bulb seal, and vice versa. Check your door manufacturer’s specifications.
- Cutting the seal too short. It’s easier to trim excess than to stretch a short piece. Leave an extra inch on each side during initial fitting.
- Ignoring the door alignment. If your door is crooked or the tracks are misaligned, no seal will compensate. Address mechanical issues first.
- Over-tightening the retainer screws. This can warp the channel and create new gaps. Snug is enough.
How Often Should You Replace Your Garage Door Bottom Seal?
Most rubber seals last 3–5 years, depending on your climate and usage frequency. In areas with extreme temperature swings (think Minnesota winters or Arizona summers), UV exposure and thermal cycling accelerate deterioration.
Inspect your seal at least twice a year — once in spring and once in fall. Replace it immediately if you notice:
- Visible cracks or splits
- Hardened, inflexible rubber
- Gaps forming despite a seemingly intact seal
- Increased drafts or water entry
Frequently Asked Questions (FAQ)
Q1: Can I seal the bottom of my garage door without replacing the whole seal?
Yes, for minor gaps you can use a foam backer rod combined with a flexible caulk as a temporary fix. However, this is not a long-term solution. A proper rubber bottom seal replacement is always recommended for durability and effectiveness. Foam and caulk degrade within months under the friction of a moving garage door.
Q2: How much does it cost to seal the bottom of a garage door?
For a DIY project, expect to spend $15–$60 on materials depending on the seal type and door width. Professional installation typically runs $100–$250, including labor and parts. Given the simplicity of the job, most homeowners save significantly by doing it themselves.
Q3: Will sealing my garage door help lower my energy bills?
Absolutely. If your garage is attached to your home, sealing gaps — especially the large one at the bottom of the door — can reduce heating and cooling costs by 5–15% annually, according to energy efficiency studies. The effect is most noticeable in homes with living spaces above or adjacent to the garage.
Q4: What is the best seal for an uneven garage floor?
A bulb seal combined with a threshold seal provides the best results on uneven concrete. The bulb compresses to fill irregularities, while the threshold creates a uniform raised barrier on the floor. For severe unevenness (more than 1 inch variation), consider having the concrete leveled professionally before sealing.
Q5: Can I install a bottom seal on a wooden garage door?
Yes, but the process differs slightly. Wooden doors often lack a metal retainer channel, so you’ll need to attach a universal retainer bracket using wood screws before inserting the seal. Pre-drill holes to avoid splitting the wood, and use stainless steel screws to resist corrosion.
Q6: Is a garage door threshold seal worth it?
In most cases, yes. A threshold seal adds an extra layer of water protection that a door-mounted seal alone cannot provide, especially during heavy rainstorms or snowmelt. They’re particularly valuable if your driveway slopes toward the garage opening. The modest cost ($25–$60) pays for itself quickly in prevented water damage.
Conclusion
Learning how to seal the bottom of a garage door is a straightforward weekend project that delivers outsized returns: fewer drafts, lower energy bills, a drier garage, and peace of mind knowing pests can’t waltz in through a gaping hole. With the right seal type, basic tools, and about an hour of your time, you can transform one of your home’s biggest vulnerabilities into a tightly sealed barrier.
Don’t wait for the next storm or the next mouse sighting to take action. Grab your tape measure, order the right seal, and knock this project out before the season changes.
Found this guide helpful? Share it with friends, family, or neighbors on Facebook, X (Twitter), or Pinterest who might be battling the same drafty garage door problem. A quick share could save someone hundreds in energy costs and repair bills — and that’s what good neighbors do! 🏠🔧
Leave a Reply