Have you ever stood in your driveway, pressing the remote button repeatedly, only to watch your garage door remain stubbornly closed? Or perhaps you recently moved into a new home and feel uneasy knowing that previous owners might still have access to your garage. Learning how to reset code on Liftmaster garage door opener is not just a technical fix; it is a crucial step in securing your home and restoring peace of mind. This guide will walk you through the process simply and safely.
Why You Might Need to Reset Your Liftmaster Opener
Before diving into the technical steps, it is helpful to understand why resetting is necessary. A garage door opener is often the most vulnerable entry point to a home. According to security experts, failing to update access codes after moving into a new property is one of the most common security oversights homeowners make.
There are several common scenarios where a reset is required:
- New Homeownership: Ensuring previous residents or their contractors no longer have access.
- Lost or Stolen Remote: Preventing unauthorized entry if a remote falls into the wrong hands.
- Interference Issues: Clearing old codes can sometimes resolve signal interference from neighbors using similar frequencies.
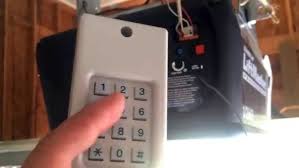
- Malfunctioning Keypad: If your external keypad stops responding, a full reset often recalibrates the system.
By taking control of your opener’s memory, you ensure that only trusted devices can open your garage.
Step-by-Step: How to Reset Code on Liftmaster Garage Door Opener
Liftmaster (and its parent company, Chamberlain) uses a few different methods for resetting depending on the age and model of your unit. However, the “Learn Button” method is the standard for most modern units produced after 1993.
Step 1: Locate the Learn Button
First, you need to find the main motor unit mounted on your garage ceiling. Look for a small panel on the back or side of the unit. You will see a button labeled “Learn” or “Smart.” It is usually colored yellow, purple, orange, or red.
Note: If your opener has an antenna wire hanging down, the Learn button is typically located next to it.
Step 2: Clear the Existing Memory
To perform a hard reset and erase all previously programmed remotes and keypads:
- Press and hold the Learn button for approximately 6 to 10 seconds.
- Watch the indicator LED light next to the button. It will turn on and then blink off.
- Once the light goes out, release the button.
At this point, all previous codes are deleted. Your garage door will not respond to any existing remotes until they are reprogrammed.
Step 3: Reprogram Your Remotes
Now that the slate is clean, you must add your devices back.
- Press the Learn button once briefly. The LED light will illuminate or blink, indicating the unit is in “programming mode.” You typically have 30 seconds to complete this step.
- Within those 30 seconds, press and hold the button on your handheld remote that you wish to use.
- Hold it until the garage door opener’s lights flash or you hear two clicks. This confirms the code has been accepted.
- Repeat this process for each additional remote or wireless keypad you own.
Step 4: Test the System
After programming all devices, test each remote from inside and outside the garage. Ensure the door opens and closes smoothly. If a remote fails, repeat Step 3 for that specific device.
Troubleshooting Common Reset Issues
Even with clear instructions, things can go wrong. Here are some frequent hurdles and how to overcome them.
| Issue | Possible Cause | Solution |
|---|---|---|
| LED Light Does Not Turn On | Power issue or burnt-out bulb | Check if the unit is plugged in. Replace the logic board if necessary. |
| Remote Won’t Program | Dead battery in remote | Replace the remote’s battery (usually CR2032) and try again. |
| Door Reverses Immediately | Sensor misalignment | Check the safety eyes near the floor. Ensure they are aligned and clean. |
| Learn Button Unresponsive | Lock feature enabled | Some models have a lock mode. Consult your manual to disable it. |
If you continue to face issues, it may be time to consult the official Liftmaster support page or contact a professional technician. For more general information on garage door mechanisms, you can also refer to Wikipedia’s entry on garage door openers, which provides a solid technical overview of how these systems operate.
Security Best Practices After Resetting
Resetting your code is just the first step. To maximize security, consider these expert recommendations:
- Change Codes Regularly: If you lend your remote to a neighbor or service provider, consider resetting and reprogramming afterward.
- Use Smart Features: Modern Liftmaster models connect to Wi-Fi via the MyQ app. This allows you to monitor access logs and receive alerts if the door is left open.
- Secure the Emergency Release: Burglars sometimes use a coat hanger to pull the emergency release cord from outside. Install a shield over the release mechanism to prevent this.
- Keep Firmware Updated: If you have a smart opener, ensure its firmware is up to date to protect against digital vulnerabilities.
FAQ Section
Q1: Will resetting my Liftmaster opener affect my Wi-Fi connection?
No, resetting the remote codes does not disconnect your opener from Wi-Fi. However, if you perform a factory reset via the app or a specific hard reset sequence, you may need to reconnect the device to your network through the MyQ app.
Q2: How do I know if my Liftmaster opener is compatible with this reset method?
Most Liftmaster openers manufactured after 1993 use the Learn button method described above. If your unit has dip switches (small rows of tiny switches) inside the remote and motor unit, it is an older model. For those, you must match the dip switch positions manually instead of using the Learn button.
Q3: Can I reset the code without climbing a ladder?
If you have a wireless keypad installed outside your garage, you can often use it to initiate a reset or change the PIN code without accessing the motor unit. However, to clear all remotes, you usually need physical access to the Learn button on the motor head.
Q4: What should I do if I lose all my remotes after resetting?
If you reset the system and realize you have no working remotes, you will need to purchase a universal Liftmaster-compatible remote. Follow the programming instructions included with the new remote to sync it with your opener’s Learn button.
Q5: Is it safe to reset the opener myself?
Yes, resetting the code is a safe, low-voltage procedure. However, always exercise caution when using a ladder. Ensure the garage door is closed before starting, and keep hands clear of moving parts during testing.
Conclusion
Learning how to reset code on Liftmaster garage door opener is a simple yet powerful way to take control of your home’s security. Whether you are a new homeowner or simply troubleshooting a glitchy remote, following these steps ensures that your garage remains accessible only to you and your trusted family members.
Remember, a secure garage is a safer home. By clearing old codes and reprogramming your devices, you eliminate unknown access points and reduce the risk of unauthorized entry. Don’t let technical jargon intimidate you; with the right guidance, you can handle this task in under 15 minutes.
Did you find this guide helpful? Share it with your neighbors or friends who might be struggling with their garage door security. Together, we can build safer communities, one garage at a time
Leave a Reply