Introduction
There is nothing quite as frustrating as pulling the emergency release cord during a power outage or malfunction, only to realize later that your automatic opener refuses to engage. If you are currently staring at a disconnected system and wondering how to reset a garage door after opening it manually, you are not alone; this is one of the most common homeowner maintenance issues. This guide provides a safe, empathetic, and technically accurate walkthrough to help you restore your garage door’s automatic function without risking injury or damaging your expensive opener equipment.
Why Your Garage Door Won’t Close Automatically After Manual Use
Before diving into the reset process, it is vital to understand why the door stopped working. When you pull the red emergency release cord, you physically disengage the trolley (the part attached to the opener arm) from the carriage (the part that moves along the rail).
The opener motor still runs, but it is no longer connected to the door. The system does not automatically “know” when you have lifted the door back up; it requires a manual re-engagement of the latch mechanism. Understanding this mechanical separation helps prevent the common mistake of repeatedly pressing the remote button in frustration, which can overheat the motor capacitor.
Safety First: Critical Precautions Before Resetting
Garage doors are heavy mechanical systems under high tension. According to industry safety standards, improper handling causes thousands of injuries annually. Before attempting any reset:
- Disconnect Power: Unplug the opener or turn off the circuit breaker to prevent accidental activation while your hands are near moving parts.
- Secure the Door: Ensure the door is fully closed and resting on the floor before re-engaging. Never attempt to reconnect the trolley while the door is partially open.
- Wear Protection: Use safety glasses and work gloves to protect against pinch points and sharp metal edges.
- Check Springs: Visually inspect torsion or extension springs for gaps or damage. If a spring is broken, do not proceed; call a professional immediately.
Expert Note: “The emergency release is designed for temporary access, not daily operation. Repeated manual use without proper re-engagement checks can wear out the latch assembly prematurely.” — Certified Garage Door Technician Association Guidelines.
Step-by-Step: How To Reset A Garage Door After Opening It Manually
Follow these precise steps to safely reconnect your opener. This process typically takes less than five minutes if performed correctly.
1. Lower the Door Completely
The trolley latch can only engage when the door is in the fully closed position. Gently lower the door by hand until it sits flush against the garage floor. If the door feels excessively heavy or slams down, your springs may be unbalanced—stop and consult a professional. For more background on counterbalance mechanics, refer to the Garage Door Wikipedia entry, which details the physics of torsion and extension spring systems.
2. Locate the Emergency Release Cord and Latch
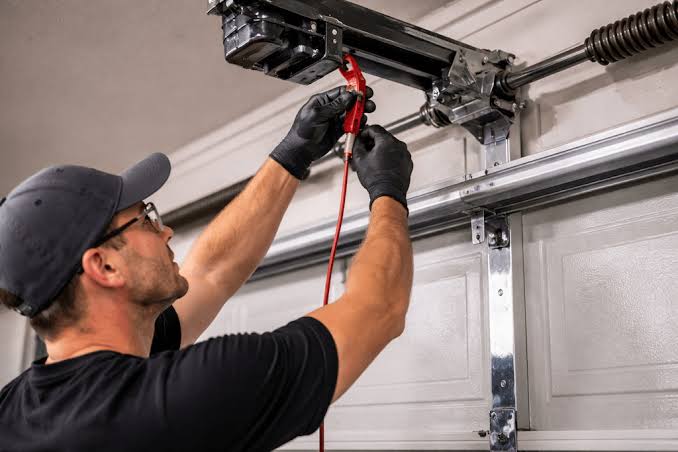
Find the red cord hanging from the opener rail. Follow it to the trolley assembly. You will see a spring-loaded latch lever that was pulled downward during disengagement. This lever must be returned to its original position to catch the carriage.
3. Re-engage the Trolley Latch
With the power still disconnected, firmly push the latch lever upward (or toward the motor unit, depending on your model) until you hear or feel a distinct click. This indicates the latch has locked onto the carriage.
- Chamberlain/LiftMaster Models: Push the latch toward the motor until it clicks.
- Genie Models: Slide the carriage lock tab back into the engaged position.
- Older Chain-Drive Units: May require pulling the cord slightly while pushing the lever up.
4. Verify Mechanical Connection
Gently tug on the door handle or bottom bracket while holding the trolley steady. The door should move in unison with the trolley. If there is slack or independent movement, the latch is not fully seated. Repeat Step 3.
5. Restore Power and Test
Plug the opener back in or restore breaker power. Press the wall-mounted control button (not the remote) to test. Observe the first cycle closely:
- The trolley should move smoothly with the door.
- No grinding, clicking, or binding noises should occur.
- The door should reverse immediately upon contacting an obstruction (test with a 2×4 board on the floor per CPSC guidelines).
If the motor runs but the door doesn’t move, the latch did not engage. Disconnect power and repeat Steps 2–4.
Troubleshooting: When the Reset Doesn’t Work
Even after following the correct procedure, some systems fail to reset. Use this diagnostic table to identify the issue:
| Symptom | Likely Cause | Solution |
|---|---|---|
| Motor hums, door doesn’t move | Latch not fully engaged | Re-disconnect power; verify audible click during re-engagement |
| Door reverses mid-cycle | Force limit misadjusted | Adjust force settings per manufacturer manual (usually dials on motor housing) |
| Opener lights flash 5x | Safety sensor misalignment | Clean lenses; ensure both sensors show solid LED (no blinking) |
| Grinding noise during travel | Worn gear/sprocket or dry chain | Lubricate chain/belt with white lithium grease; inspect nylon gears |
| Door opens/closes unevenly | Spring tension imbalance | Professional service required – do not adjust springs yourself |
Secondary Keyword Integration: Garage Door Opener Reconnection Tips
When performing a garage door opener reconnection, always check the travel limits afterward. Manual operation can sometimes shift the door’s resting position, causing the opener to over-travel or under-travel upon reset. Most modern units have electronic limit adjustments via buttons on the motor housing; older models use screw-type limit switches on the rail. Consult your specific model’s manual for calibration values.
Preventive Maintenance to Avoid Future Resets
Resetting shouldn’t be a monthly chore. Implement these practices to maintain reliable automatic operation:
- Monthly Balance Test: Disconnect the opener and lift the door halfway. It should stay in place. If it drifts, springs need adjustment.
- Quarterly Lubrication: Apply silicone-based lubricant to rollers, hinges, and tracks. Avoid WD-40, which attracts dust.
- Annual Professional Inspection: Have a certified technician check spring tension, cable integrity, and opener torque settings.
- Battery Backup Installation: Consider adding a battery backup to your opener to avoid manual operation during power outages entirely.
Frequently Asked Questions (FAQ)
Can I reset my garage door without unplugging the opener?
While technically possible, it is strongly discouraged. Keeping power connected risks accidental activation while your fingers are near the trolley mechanism, which can cause severe crushing injuries. Always disconnect power as a non-negotiable safety step.
How often should I test the emergency release cord?
Test the emergency release cord every six months to ensure it hasn’t seized due to rust or debris. Pull it gently to verify smooth operation, then immediately re-engage following the steps above. A stuck release cord during a real emergency defeats its purpose.
Will resetting the garage door erase my programmed remotes and keypads?
No. The emergency release is purely mechanical and does not affect the opener’s electronic memory. Your remotes, keypads, and smart home integrations will remain programmed after a manual reset. Only a full factory reset (usually holding the “Learn” button for 10+ seconds) erases codes.
My garage door keeps disconnecting after resetting. What’s wrong?
Repeated disengagement usually indicates a worn latch spring, bent trolley arm, or misaligned rail. These components degrade over time and cannot be reliably fixed through adjustment alone. Schedule a professional inspection to replace worn hardware before complete failure occurs.
Is it safe to operate the garage door manually long-term instead of resetting?
Manual operation bypasses critical safety features like auto-reverse and photoelectric sensors. It also places undue strain on springs and cables not designed for frequent manual cycling. Treat manual operation as a temporary emergency measure only, never a permanent solution.
What if my opener model doesn’t have a visible release cord?
Some newer direct-drive and wall-mount openers use alternative disengagement mechanisms, such as a rotating collar or slide-lock. Refer to your owner’s manual or manufacturer website for model-specific instructions. Never force a component that doesn’t match standard release designs.
Conclusion: Restore Function Safely and Confidently
Knowing how to reset a garage door after opening it manually empowers you to handle unexpected disruptions without panic or unnecessary service calls. By prioritizing safety, understanding the mechanical linkage, and following systematic re-engagement steps, you protect both yourself and your investment. Remember: patience and precision beat speed every time when working with garage door systems.
Found this guide helpful? Share it on Facebook, X (Twitter), or Pinterest to help fellow homeowners avoid garage door frustration! Tag someone who just moved into a new home—they’ll thank you later. Safe lifting! 🏠🔧
Leave a Reply