Is your garage door completely stuck, leaving your car trapped inside? Learning how to replace the spring on a garage door can save you a hefty service fee, though it requires strict safety measures. Let’s walk through this repair together so you can get your daily routine back on track safely.
How To Replace The Spring On A Garage Door: Safety First
Before grabbing any tools, we must address the elephant in the room: garage door springs are under extreme tension. According to the comprehensive overview on Wikipedia’s garage door page, the springs are the most critical and dangerous components of the entire system.
Torsion springs (mounted above the door) store immense kinetic energy and can cause severe injury if they unwind incorrectly. For this guide, we will focus on the safer DIY approach of replacing extension springs (the ones that stretch along the horizontal tracks). If you have torsion springs, we highly recommend hiring a certified professional.
Always wear safety glasses and heavy-duty gloves. Never remove a safety cable, and always keep your face out of the spring’s direct line of fire.
Torsion vs. Extension Springs: Which One Do You Have?
Before buying parts, you need to identify your spring system. Here is a quick comparison to help you understand what you are working with.
| Feature | Extension Springs | Torsion Springs |
|---|---|---|
| Location | Parallel to the horizontal tracks on both sides. | Mounted on a metal shaft directly above the closed door. |
| Mechanism | They physically stretch and contract to lift the door. | They twist and wind to store rotational energy. |
| DIY Friendliness | Moderate (Much safer for beginners to handle). | Low (Highly dangerous; requires specialized winding bars). |
| Average Lifespan | Roughly 10,000 open/close cycles. | Roughly 20,000 to 100,000 cycles depending on quality. |
What Tools Do You Need for Garage Door Spring Replacement?
Having the right tools makes the job significantly easier and safer. Gather these items before you begin:
- Sturdy Stepladder: You need stable footing to reach the horizontal tracks safely.
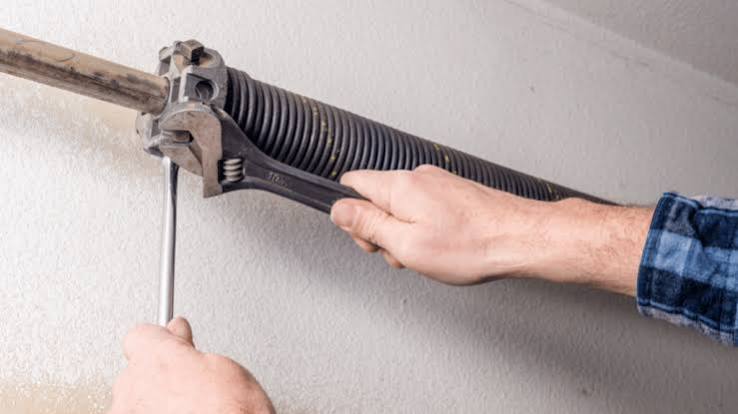
- Adjustable Wrenches: Typically, you will need a 7/16-inch or 1/2-inch wrench for the bolts.
- Vise-Grips or Locking Pliers: Essential for clamping the track to secure the door.
- Safety Glasses and Gloves: Non-negotiable for protecting your eyes and hands from snapping metal.
- A Reliable Helper: Garage doors are heavy and awkward; never attempt this repair completely alone.
Step-by-Step Guide to Replacing an Extension Spring
Follow these concrete steps to ensure a smooth and secure replacement. Take your time and double-check your work at every stage.
Step 1: Disconnect the Opener and Secure the Door
Pull the red emergency release cord on your garage door opener to disconnect it. Manually close the door completely until it rests on the floor. Take your locking pliers and clamp them firmly onto the vertical track exactly 2 inches below the bottom roller on both sides. This prevents the door from shooting up while you work.
Step 2: Release the Tension Safely
Extension springs use a steel safety cable that runs directly through their center to prevent them from flying off if they break. Locate the bottom bracket near the floor and carefully unhook the spring. Caution: Keep your body positioned to the side, not directly behind the spring, as it may still hold slight residual tension.
Step 3: Remove the Old Spring and Inspect Hardware
Unhook the other end of the spring from the bracket near the top horizontal track. Pull the old spring down and remove it. While you are up there, inspect the pulley and the safety cable. If the pulley is cracked or the cable is frayed, replace them now to avoid future breakdowns.
Step 4: Install the New Extension Spring
Take your new spring and hook the top loop onto the top bracket near the horizontal track. Ensure the safety cable is still threaded perfectly through the center of the new spring. Pull the bottom of the spring down and attach it securely to the bottom bracket near the floor.
Step 5: Reconnect, Balance, and Test
Remove the locking pliers from the tracks. Reconnect the garage door opener by pulling the release handle toward the motor. Test the door manually first by lifting it halfway up. A properly balanced door will stay in place. If it slides down, your spring tension needs a slight adjustment.
Pros and Cons of DIY Spring Replacement
Is fixing it yourself the right choice for you? Let’s weigh the advantages and disadvantages.
The Advantages:
- Significant Cost Savings: You can save anywhere from $150 to $300 on professional labor fees.
- Immediate Resolution: You fix the problem instantly without waiting days for a technician’s appointment.
- Skill Building: You gain valuable confidence in handling basic home maintenance and repairs.
The Disadvantages:
- Inherent Safety Risks: There is a high risk of injury if you ignore safety protocols or use the wrong tools.
- Time-Consuming: For a beginner, the entire process can take 1 to 2 hours of careful work.
- Potential Warranty Issues: DIY repairs might void your garage door manufacturer’s existing warranty.
Frequently Asked Questions (FAQ)
How much does it cost to replace a garage door spring?
If you choose the DIY route, a high-quality replacement spring costs between $15 and $40. However, hiring a professional typically costs between $150 and $350, which includes both parts and labor.
How long do garage door springs actually last?
One “cycle” equals one complete opening and closing of the door. Standard extension springs are rated for about 10,000 cycles. For an average household that uses the door 4 times a day, this translates to roughly 7 to 10 years of reliable use.
Can I replace just one garage door spring?
While it is physically possible, industry experts strongly advise against it. If one spring has reached its breaking point, the spring on the opposite side is likely near the end of its lifespan. Replacing both simultaneously ensures perfectly balanced tension and prevents premature wear on your garage door opener.
What are the warning signs that my spring is about to break?
Pay attention to your door’s behavior. Loud bangs or popping noises during operation are major red flags. Additionally, if the door struggles to open, stops halfway, or leaves a visible gap in a torsion spring, it is time for an immediate replacement.
Is it dangerous to replace a garage door spring myself?
Yes, it can be, particularly if you have a torsion spring system. The stored kinetic energy is immense and unforgiving. Extension springs are much safer for DIY enthusiasts, but wearing safety glasses and ensuring a safety cable is installed is absolutely mandatory.
Conclusion
Learning how to replace the spring on a garage door empowers you to handle unexpected breakdowns, saves you significant money, and keeps your household running smoothly. By prioritizing safety, using the correct tools, and following a methodical step-by-step process, you can successfully restore your garage door’s balance.
Leave a Reply