Introduction
Is your garage door making screeching noises or sticking when it opens? You are not alone; worn-out rollers are one of the most common causes of garage door malfunction, affecting nearly 30% of residential doors older than five years. Knowing how to replace the rollers on a garage door can save you hundreds of dollars in service fees and restore peace to your home. In this guide, we will walk you through the process safely and efficiently.
Why Do Garage Door Rollers Need Replacement?
Before diving into the tools, it is essential to understand why this maintenance task is critical. Garage door rollers bear the entire weight of your door as it moves along the tracks. Over time, friction, dust, and temperature changes cause them to wear down.
According to industry standards, steel rollers typically last 5–7 years, while nylon rollers can last up to 10 years with proper lubrication. Ignoring worn rollers can lead to:
- Track Damage: Worn rollers can derail, bending the metal tracks.
- Opener Strain: Your motor has to work harder, shortening its lifespan.
- Safety Hazards: A derailed door can fall unexpectedly, posing a severe risk to people and pets.
For a deeper understanding of garage door mechanics and safety standards, you can refer to the general overview on Wikipedia.
Tools and Materials You Will Need
Preparation is key to a successful DIY project. Gathering the right tools before you start ensures you won’t have to climb down the ladder mid-repair.
Essential Tools:
- Socket Wrench Set: Specifically 7/16″ and 9/16″ sockets (most common sizes).
- Vise Grips or Locking Pliers: To clamp the track and hold the door steady.
- Flathead Screwdriver: For prying out old rollers if they are stuck.
- Rubber Mallet: To gently tap new rollers into place without damaging them.
- Ladder: A sturdy stepladder that reaches the height of the top roller.
- Safety Glasses & Gloves: Protect your eyes from debris and hands from sharp metal edges.
Materials:
- New Rollers: Choose between nylon (quiet) or steel (durable). Note: Ensure you buy the correct stem length (usually 4″ or 7″) and diameter (2″ or 3″).
- Silicone-Based Lubricant: Avoid WD-40 as it attracts dust; use a dedicated garage door lubricant.
Safety First: Securing the Garage Door
This is the most critical step. Garage doors are under high tension, especially if they have torsion springs. Never attempt to replace rollers on a door that is not fully secured.
- Close the Door Completely: Ensure the door is all the way down.
- Disconnect the Opener: Pull the red emergency release cord to disconnect the door from the automatic opener. This prevents the motor from accidentally activating.
- Clamp the Track: Use your vise grips to clamp the track just below the bottom roller on both sides. This prevents the door from sliding up or down while you work.
- Pro Tip: If you are replacing top rollers, you may need to open the door slightly and clamp the track above the roller you are working on, but only if you have professional-grade clamps and experience. For beginners, stick to bottom and middle rollers first.
Step-by-Step: How to Replace the Rollers on a Garage Door
Follow these steps carefully. If you encounter resistance, do not force it. Re-check your clamps and alignment.
Step 1: Remove the Old Roller
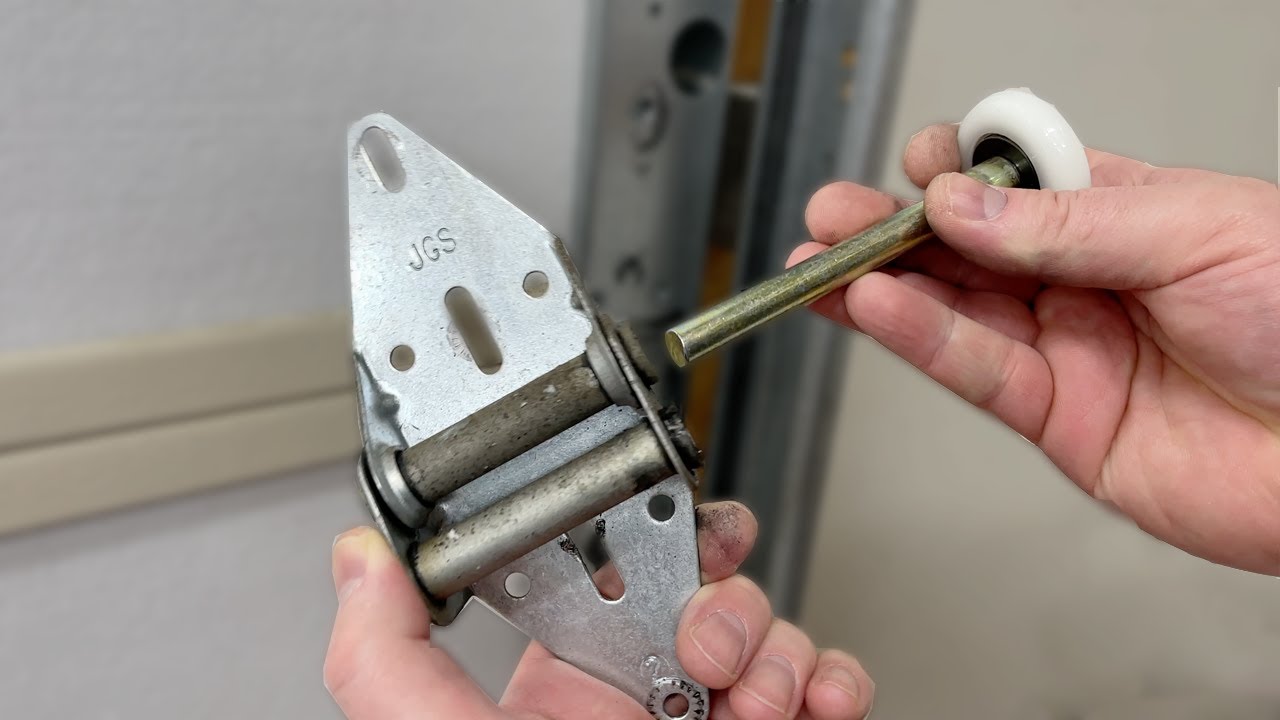
Locate the bracket holding the roller in place. Most residential doors use brackets held by two or three bolts.
- Use your socket wrench to loosen the bolts securing the bracket to the door panel.
- You do not need to remove the bolts completely; just loosen them enough to slide the bracket out of the track.
- Gently pull the bracket away from the track. The old roller should slide out easily. If it is rusted, use your flathead screwdriver to pry it loose gently.
Step 2: Clean the Track
While the roller is out, take a moment to inspect the track.
- Wipe away any dirt, grime, or old grease with a rag.
- Check for dents or bends. If the track is damaged, replacing the rollers will not solve the problem, and you may need a professional to realign or replace the track section.
Step 3: Install the New Roller
- Insert the new roller into the bracket. Ensure the stem is seated correctly.
- Slide the bracket back into the track. Make sure the roller sits snugly within the channel.
- Tighten the bolts securely. Do not overtighten, as this can strip the threads in the door panel.
Step 4: Repeat for All Rollers
It is recommended to replace all rollers at once. Mixing old and new rollers can cause uneven movement and premature wear on the new parts.
- Work from the bottom up.
- Move the clamps up as you progress if necessary, always ensuring the door is supported.
Step 5: Lubricate and Test
Once all rollers are replaced:
- Apply a silicone-based lubricant to each roller bearing and the inside of the tracks.
- Remove the vise grips.
- Manually lift the door halfway and let go. It should stay in place (balanced). If it slams shut or flies up, your springs are unbalanced, and you should call a professional.
- Reconnect the opener and test the automatic cycle. Listen for smooth, quiet operation.
Nylon vs. Steel Rollers: Which Should You Choose?
Choosing the right material is crucial for long-term satisfaction. Here is a quick comparison to help you decide.
| Feature | Nylon Rollers | Steel Rollers |
|---|---|---|
| Noise Level | Very Quiet | Noisy |
| Durability | Good (can crack in extreme cold) | Excellent (very strong) |
| Maintenance | Low (self-lubricating options) | High (needs regular oiling) |
| Cost | Slightly Higher | Lower |
| Best For | Attached garages, bedrooms nearby | Detached garages, heavy doors |
Expert Recommendation: For most US homeowners, nylon rollers with sealed bearings are the best choice. They significantly reduce noise and require less maintenance.
Common Mistakes to Avoid
Even experienced DIYers can make mistakes. Here are the top pitfalls to avoid:
- Ignoring the Springs: Never touch the torsion springs (the large spring above the door). They are under extreme tension and can cause severe injury if mishandled. If your door balance is off after replacing rollers, call a pro.
- Using the Wrong Size: Rollers are not universal. Measure your existing rollers’ stem length and diameter before buying replacements.
- Over-Lubricating: More is not better. Excess grease attracts dust and grit, creating a abrasive paste that wears out rollers faster. A light coat is sufficient.
- Skipping the Track Cleaning: Installing new rollers in a dirty track will ruin them quickly. Always clean the track first.
FAQ Section
1. How much does it cost to replace garage door rollers?
If you do it yourself, the cost is primarily for the parts. A set of 10 high-quality nylon rollers costs between $30 and $50. If you hire a professional, expect to pay between $150 and $250, including labor and service fees.
2. Can I replace just one broken roller?
While technically possible, it is not recommended. Old rollers have worn down over time, and mixing them with a new, smooth roller can cause uneven movement. This puts extra strain on the new roller and the garage door opener. Replace them in sets.
3. How often should I replace my garage door rollers?
Generally, you should inspect your rollers annually. Replacement is typically needed every 5–7 years for steel rollers and 7–10 years for nylon rollers. However, if you hear grinding noises or see visible chips and cracks, replace them immediately regardless of age.
4. What size rollers do I need?
The most common sizes are 2-inch diameter with a 4-inch stem or 3-inch diameter with a 7-inch stem. To be sure, remove one existing roller and measure the stem length and wheel diameter before purchasing.
5. Is it dangerous to replace garage door rollers?
It can be if you do not secure the door properly. The main danger comes from the door falling or the springs snapping. By using vise grips to clamp the track and avoiding any contact with the springs, you can perform this task safely. If you are unsure about the spring system, consult a professional.
6. Why is my garage door still noisy after replacing the rollers?
If the noise persists, check the following:
- Loose Hardware: Tighten all bolts on the tracks and brackets.
- Lubrication: Ensure the hinges and springs are also lubricated.
- Track Alignment: The tracks may be misaligned.
- Opener Chain/Belt: The noise might be coming from the opener unit itself, not the door.
Conclusion
Learning how to replace the rollers on a garage door is a valuable skill that enhances home safety and comfort. By following this step-by-step guide, you can eliminate annoying squeaks, prevent costly repairs, and ensure your door operates smoothly for years to come. Remember, safety is paramount—always secure the door and never tamper with the springs.
Did you find this guide helpful? Share it with your neighbors or on social media to help others tackle their DIY garage repairs with confidence! If you have any questions or tips of your own, leave a comment below
Leave a Reply