Introduction
Is cold air sneaking into your garage, or are you noticing small critters finding their way under the door? A worn-out bottom seal is often the culprit, leading to higher energy bills and potential water damage. Learning how to replace rubber seal on bottom of garage door is a simple, cost-effective DIY project that can restore your garage’s insulation and security in under an hour.
You don’t need to be a professional mechanic to fix this. With the right tools and a bit of patience, you can achieve a tight, weatherproof fit that looks professional. This guide will walk you through every step, ensuring you get it right the first time.
Why Is Your Garage Door Seal Important?
Before we dive into the replacement process, it is crucial to understand why this small strip of rubber matters so much. The bottom seal, also known as the “threshold seal” or “weatherstrip,” acts as the primary barrier between your garage interior and the outside elements.
The Hidden Costs of a Broken Seal
Many homeowners ignore minor gaps until major issues arise. According to the U.S. Department of Energy, air leaks can account for 25–30% of residential heating and cooling costs. While a garage might not be climate-controlled like your living room, a sealed garage protects stored items from humidity, prevents freezing pipes in winter, and stops exhaust fumes from entering your home if the garage is attached.
| Issue | Consequence of Poor Seal | Benefit of New Seal |
|---|---|---|
| Energy Efficiency | Heat loss in winter; heat gain in summer | Stabilized temperature; lower HVAC load |
| Pest Control | Entry point for mice, insects, and snakes | Complete barrier against small pests |
| Water Damage | Rainwater pooling inside during storms | Dry floor; protection for stored goods |
| Noise Reduction | Outside traffic noise enters easily | Quieter indoor environment |
Tools and Materials You Will Need
Preparation is half the battle. Gathering these items before you start ensures the job goes smoothly without unnecessary trips to the hardware store.
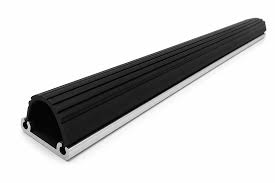
- New Garage Door Bottom Seal: Measure your door width first. Standard sizes are 9ft, 16ft, or 18ft. Choose a bulb-style or T-style seal depending on your door’s channel.
- Utility Knife or Box Cutter: For trimming excess rubber.
- Screwdriver Set: Usually Phillips-head, but check your retainer clips.
- Pliers: To remove old nails or stubborn clips.
- Rubbing Alcohol and Rag: To clean the channel thoroughly.
- Silicone Lubricant (Optional): Helps the new seal slide into place easier.
- Ladder: If your door is tall, though most bottom seals are accessible from the ground.
Pro Tip: Always buy a seal made from EPDM rubber. It withstands extreme temperatures better than vinyl and resists cracking from UV exposure.
Step-by-Step Guide: How To Replace Rubber Seal On Bottom Of Garage Door
Follow these detailed steps to ensure a secure and long-lasting installation.
Step 1: Remove the Old Seal
Start by opening your garage door fully so you have clear access to the bottom edge. Look at how the current seal is attached. Most modern doors use a metal or plastic retainer channel that holds the rubber in place.
- Locate the ends of the seal. If it is nailed or screwed in, use your pliers or screwdriver to remove the fasteners.
- Gently pull the old rubber out of the channel. If it is brittle and breaks, remove it in sections.
- Clean the Channel: This is the most skipped step. Use your rag soaked in rubbing alcohol to wipe out the entire channel. Remove all dirt, rust, and old adhesive residue. A clean surface ensures the new seal sits flat and tight.
Step 2: Measure and Cut the New Seal
Do not assume the new seal fits perfectly out of the package. Garage doors vary slightly in width.
- Measure the exact width of your garage door from the outside edge of one vertical track to the other.
- Lay your new seal flat on the ground.
- Using your utility knife, cut the seal to match your measurement. It is better to cut it 1/4 inch shorter than too long. A seal that is too long will bunch up at the ends, creating gaps where pests can enter.
Step 3: Install the New Seal
Now comes the main event. Depending on your door type, you will either slide the seal into a channel or attach it with screws/nails.
For Channel-Type Doors (Most Common):
- Apply a small amount of silicone lubricant to the inside of the metal channel. This reduces friction significantly.
- Start at one end of the door. Insert the lip of the rubber seal into the channel.
- Work your way across the door, pushing the seal firmly into the groove. You may need to use a rubber mallet or the handle of your screwdriver to tap it gently into place.
- Ensure the “bulb” or flexible part of the seal hangs down evenly along the entire length.
For Screw-On/Nail-On Types:
- Align the seal with the bottom edge of the door.
- Start securing it from the center and work your way out to the edges to prevent warping.
- Space screws or nails approximately every 6–8 inches.
Step 4: Trim and Adjust
Once the seal is installed, close the garage door slowly. Observe how the seal compresses against the concrete floor.
- Too Tight? If the door struggles to close or bounces back up, the seal might be too thick or installed incorrectly. Check for twists in the rubber.
- Too Loose? If you still see light coming through, the seal may not be seated deep enough in the channel. Push it in further.
If the ends of the seal stick out past the door frame, trim them flush with your utility knife for a clean, professional look.
Step 5: Test the Seal
Perform a final inspection.
- Close the door completely.
- Shine a flashlight from the inside along the bottom edge. If no light escapes from underneath, your seal is effective.
- Try to slide a piece of paper under the door. It should meet significant resistance.
For more technical details on garage door components, you can refer to general structural standards on Wikipedia.
Common Mistakes to Avoid
Even experienced DIYers can make errors. Here is what to watch out for:
- Ignoring the Track Alignment: If your garage door tracks are misaligned, the door won’t sit flat, rendering even the best seal useless. Check track alignment before replacing the seal.
- Buying the Wrong Profile: There are T-seals, bulb seals, and flap seals. Match the profile to your existing door channel. Taking a photo of the old seal to the hardware store is a smart move.
- Over-Tightening Screws: If using screws, do not overtighten them. This can distort the rubber, creating gaps rather than sealing them.
FAQ Section
Q1: How often should I replace my garage door bottom seal?
A: Generally, you should inspect your seal annually. Most high-quality EPDM rubber seals last between 5 to 7 years. However, if you live in an area with extreme temperature fluctuations or high UV exposure, you may need to replace it every 3–4 years. Replace it immediately if you see cracks, tears, or hardening.
Q2: Can I use silicone caulk instead of a rubber seal?
A: No. Silicone caulk is not designed to withstand the friction and compression of a moving garage door. It will crack and peel within weeks. A flexible rubber seal is engineered to compress and rebound thousands of times without losing its shape.
Q3: My garage door reverses when it hits the new seal. What do I do?
A: This indicates that the safety sensors or the force settings on your garage door opener need adjustment. The new seal adds slight resistance. Consult your opener’s manual to slightly increase the “close force” setting. Never disable the safety sensors.
Q4: Is it better to hire a professional or do it myself?
A: Replacing the bottom seal is one of the easiest garage door repairs. It requires no heavy lifting or dangerous spring tension adjustments. Unless your door mechanism is severely damaged, DIY is highly recommended to save on labor costs, which typically range from $100 to $200.
Q5: What is the difference between a bulb seal and a T-seal?
A: A bulb seal has a round, hollow bottom that compresses against uneven floors, making it ideal for older concrete. A T-seal has a flat bottom with a T-shaped top that slides into a specific channel. Check your door’s existing hardware to determine which type you need.
Conclusion
Learning how to replace rubber seal on bottom of garage door is a small task with big rewards. By spending less than $30 and an hour of your time, you can protect your home from pests, water damage, and energy loss. Remember to clean the channel thoroughly, measure twice, and choose high-quality EPDM rubber for the best longevity.
Don’t let a small gap compromise your home’s comfort. Take action today, and enjoy a tighter, quieter, and cleaner garage.
Did you find this guide helpful? Share this article with your neighbors or on social media to help others tackle their home maintenance projects with confidence!
Leave a Reply