Introduction
Is your Chamberlain garage door opener making a grinding noise or refusing to lift the door smoothly? A worn or snapped drive belt is often the culprit, leaving you stranded and frustrated. Learning how to replace drive belt on Chamberlain garage door opener models is a manageable DIY task that can save you hundreds of dollars in service calls while restoring safe, quiet operation to your home’s most used entryway.
Why Does My Chamberlain Drive Belt Need Replacement?
Before grabbing your toolbox, it helps to understand why belts fail. Chamberlain belt-drive openers are renowned for their whisper-quiet performance, but the reinforced rubber belt is a wear item. According to industry maintenance data, residential garage door opener belts typically last between 7 to 10 years, depending on usage frequency and environmental conditions like humidity or temperature extremes.
Common signs your belt needs replacing include:
- Visible fraying or cracking along the belt edges.
- Slipping or jerking motion when the door opens or closes.
- A loud snapping sound followed by total opener failure.
- Excessive slack even after tension adjustments.
Ignoring these signs can lead to motor strain or complete system failure. As noted in general mechanical engineering principles regarding power transmission systems, proper tension and material integrity are critical for efficient torque transfer and preventing premature component wear.
Tools and Parts You Will Need
Preparation is half the battle. Having the correct parts prevents mid-project trips to the hardware store. Always verify your specific model number (found on the motor unit) before ordering, as Chamberlain uses different belt lengths for various rail sizes.
Essential Tool List
| Tool | Purpose |
|---|---|
| Stepladder | Safe access to the motor unit and rail |
| Socket Wrench Set | Removing motor cover and trolley bolts |
| Flathead Screwdriver | Prying off belt retainer clips |
| Needle-Nose Pliers | Handling small pins and retainers |
| Tape Measure | Verifying belt length and tension |
| Safety Glasses | Protecting eyes from debris and snap-back |
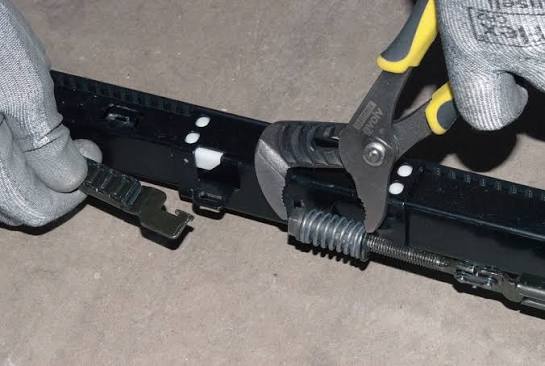
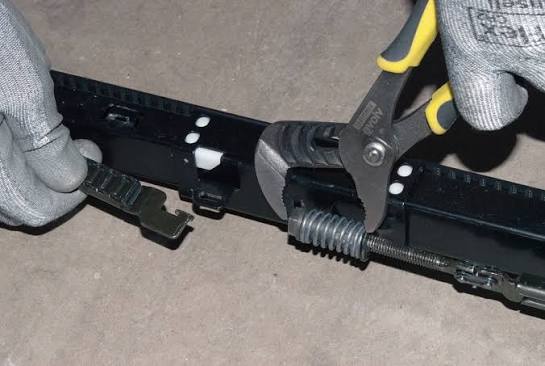
| Locking Pliers (Vise-Grips) | Securing the trolley during removal |
Choosing the Right Replacement Belt
Chamberlain primarily uses two types of belts:
- Standard Reinforced Belt: Suitable for most residential 7-foot and 8-foot doors. Features steel-reinforced fibers for durability.
- Heavy-Duty Premium Belt: Designed for taller doors or high-cycle commercial use. Offers superior tensile strength and longer lifespan.
⚠️ Critical Safety Warning: Before starting any work, disconnect power to the opener at the circuit breaker or unplug the unit. Garage door springs are under extreme tension; never attempt to adjust springs yourself. This guide covers belt replacement only. If your spring system appears damaged, contact a certified professional immediately.
Step-by-Step: How To Replace Drive Belt On Chamberlain Garage Door Opener
Follow this detailed tutorial precisely. Rushing can damage the trolley assembly or misalign the rail.
Step 1: Disconnect Power and Release Tension
Unplug the opener or flip the dedicated circuit breaker. Pull the emergency release cord (usually red) to disengage the trolley from the carriage. Manually lower the garage door to the fully closed position. This removes load from the belt system and makes removal safer.
Step 2: Remove the Motor Unit Cover
Using your socket wrench, remove the screws securing the outer lens and motor housing cover. Set screws aside in a magnetic tray to prevent loss. Locate the belt sprocket on the motor shaft and the idler pulley at the opposite end of the rail. Take a photo of the current belt routing—this visual reference is invaluable during reassembly.
Step 3: Loosen Belt Tension and Remove Old Belt
Locate the tension adjustment bolt near the front idler pulley. Turn it counterclockwise to create maximum slack. Slide the old belt off the motor sprocket first, then carefully work it off the idler pulley and trolley attachment points. Inspect the sprocket teeth and pulley bearings for wear; if they show grooves or wobble, replace them simultaneously to avoid damaging your new belt.
Step 4: Install the New Drive Belt
Thread the new belt onto the motor sprocket, ensuring the ribbed side faces inward toward the sprocket teeth. Route the belt along the top channel of the rail, matching the path documented in your reference photo. Attach the belt ends to the trolley connector plate using the provided retaining pins or clips. Do not force components; if alignment feels wrong, double-check your routing.
Step 5: Apply Correct Belt Tension
This is the most critical step. Tighten the tension adjustment bolt clockwise until the belt has approximately 1/4 inch to 1/2 inch of vertical deflection when pressed firmly at the midpoint between the motor and idler pulley. Overtightening causes premature bearing failure; undertightening leads to slipping and noise. Recheck tension after cycling the door 3–5 times, as new belts stretch slightly during initial use.
Step 6: Reassemble and Test Operation
Reinstall the motor cover and secure all fasteners. Restore power at the breaker. Operate the door through 3 complete open-close cycles, observing for smooth travel, consistent speed, and quiet operation. Listen for unusual vibrations or rubbing sounds. Adjust limit switches if the door doesn’t fully open or close, referencing your owner’s manual for calibration procedures.
Common Mistakes to Avoid During Belt Replacement
Even experienced DIYers stumble on these pitfalls:
- Skipping the Photo Reference: Belt routing varies between models. Relying on memory invites errors.
- Ignoring Sprocket Wear: A new belt on a worn sprocket will fail within months. Always inspect mating components.
- Incorrect Tension: Using “feel” instead of measured deflection is unreliable. Use a ruler or tension gauge.
- Forgetting to Re-engage the Carriage: After testing belt-only operation, ensure the emergency release is reset so the trolley reconnects to the door carriage.
- Neglecting Lubrication: While belts don’t require lubricant, the trolley rollers and rail contact points do. Apply white lithium grease to moving metal parts during reassembly.
FAQ: Frequently Asked Questions About Chamberlain Belt Replacement
How long does it take to replace a Chamberlain drive belt?
For a prepared DIYer with the right tools, expect 45 to 90 minutes. First-timers should budget 2 hours to account for learning curves and careful verification. Professional technicians typically complete the job in 30–45 minutes due to familiarity and specialized tools.
Can I use a generic belt instead of an OEM Chamberlain part?
While aftermarket belts exist, OEM Chamberlain belts are strongly recommended. Generic belts often have incorrect tooth profiles, inferior reinforcement, or incompatible lengths that cause premature failure or void your warranty. The $15–$25 savings rarely justifies the risk of repeated repairs or motor damage.
How do I know if my belt is too tight or too loose?
A properly tensioned belt deflects 1/4″ to 1/2″ vertically at the rail midpoint under firm thumb pressure. Excessive tightness produces a high-pitched whine and accelerates bearing wear. Visible sagging, slapping noises, or intermittent slipping indicate insufficient tension. When in doubt, err slightly toward tighter and re-evaluate after break-in.
Should I replace both the belt and chain on a hybrid opener?
Chamberlain belt-drive openers use only a belt; there is no chain. If you own a chain-drive model, this guide does not apply. Confirm your opener type via the model label before purchasing parts. Hybrid systems are rare in residential Chamberlain lines and require manufacturer-specific service procedures.
What causes a new belt to fail prematurely?
Premature failure usually stems from misalignment, overtightening, or defective sprockets. Environmental factors like extreme heat, chemical exposure (gasoline, solvents), or rodent damage also degrade belt material. Ensure the rail is straight, tension is correct, and the installation area is clean and dry. Document installation date for future maintenance tracking.
Is it worth repairing vs. replacing the entire opener?
If your opener is under 10 years old and otherwise functional, belt replacement is cost-effective ($30–$60 in parts). However, if the motor hums without turning, the logic board is faulty, or the unit exceeds 12 years, replacement may be wiser. Modern Chamberlain openers offer enhanced safety sensors, battery backup, and smart-home integration that older units lack. Compare repair costs against current unit pricing before deciding.
Conclusion: Restore Quiet Confidence to Your Garage
Replacing the drive belt on your Chamberlain garage door opener isn’t just about fixing a broken part—it’s about reclaiming the reliable, silent convenience your home deserves. By following this guide on how to replace drive belt on Chamberlain garage door opener, you’ve invested in safety, saved money, and extended your system’s lifespan. Remember: patience during tension adjustment and thorough component inspection separate successful repairs from frustrating callbacks.
Found this guide helpful? Share it with fellow homeowners on Facebook, Pinterest, or Nextdoor who might be battling a noisy garage door! Tag us in your repair photos—we love celebrating DIY wins. Safe lifting, and may your garage door always open smoothly! 🛠️🏡
Leave a Reply