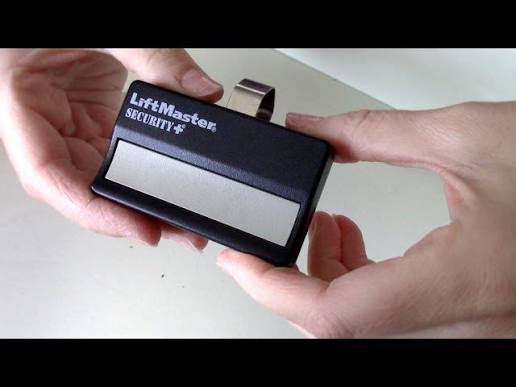
Losing or breaking your garage remote can be incredibly frustrating, especially when you just want to get inside your home after a long day. Fortunately, learning how to replace a Liftmaster garage door opener remote is a straightforward process that takes just a few minutes. This comprehensive guide will walk you through every step, ensuring your new remote works perfectly and your home stays secure.
How To Replace A Liftmaster Garage Door Opener Remote: Identifying Compatibility
Before you can program a new device, you must ensure it is compatible with your specific garage door opener model. The easiest and most reliable way to determine compatibility is by checking the color of the “Learn” button on your motor unit.
LiftMaster uses different radio frequencies and encryption technologies, which are clearly indicated by this button’s color
support.chamberlaingroup.com. Here is a quick breakdown of what each color means for your replacement search:
- Yellow: Indicates Security+ 2.0 technology (rolling code), typically found on newer, highly secure models heritagedoor.com.
- Purple: Represents older Security+ rolling code models operating at a 315 MHz frequency support.chamberlaingroup.com.
- Red or Orange: Denotes 390 MHz rolling code technology, common in mid-2000s models utahgaragedoors.net.
- Green: Signifies the older “Billion Code” fixed-code systems, which are now largely discontinued utahgaragedoors.net.
Pro Tip: If your opener has a yellow Learn button, you must purchase a remote specifically labeled as compatible with Security+ 2.0
www.amazon.com. Using an incompatible remote will result in pairing failures and wasted money.
| Learn Button Color | Technology Type | Frequency | Compatible Remote Series |
|---|---|---|---|
| Yellow | Security+ 2.0 | 310, 315, 390 MHz | 882LM, 374UT, 373LM |
| Purple | Security+ | 315 MHz | 371LM, 373LM |
| Red / Orange | Security+ Rolling | 390 MHz | 373LM, Universal HERO |
| Green | Billion Code (Legacy) | 300-400 MHz | Legacy 370LM (Discontinued) |
Step-by-Step Guide: Programming Your New Remote
Now that you have the correct replacement remote, it is time to sync it with your motor unit. Follow these concrete, step-by-step instructions to guarantee a successful setup.
Step 1: Gather Your Tools and Ensure Safety
You will need your new Liftmaster remote, a sturdy step ladder, and a fresh CR2032 lithium battery (just in case the new remote’s battery has depleted on the store shelf). Ensure the garage door is fully closed before you begin to prevent any accidental injuries or security breaches
qualityoverheaddoor.com.
Step 2: Locate the Learn Button on the Motor Unit
Climb your step ladder and locate the motor unit mounted on your garage ceiling. The Learn button is typically situated on the back or side panel, often right next to the hanging antenna wire
www.liftmaster.com. It is usually accompanied by a small LED indicator light.
Step 3: Clear Old Remotes (Highly Recommended)
If you are replacing a lost or stolen remote, you must erase all previously programmed remotes to maintain your home’s security. Press and hold the Learn button for approximately 6 to 10 seconds until the indicator LED turns off completely
aboveandbeyonddoorsystems.com. Note: This will erase all remotes and keypads, so you will need to reprogram all of them.
Step 4: Program the New Remote
- Press and immediately release the Learn button on the motor unit. The LED indicator light will turn on or begin to blink, signaling that the opener is in programming mode aboveandbeyonddoorsystems.com.
- Within 30 seconds, take your new replacement remote and press and hold the desired button.
- Hold the button firmly for 2 to 3 seconds, then release it.
- Observe the motor unit: the LED light will blink or turn off, confirming that the new remote has been successfully synced to the opener.
Step 5: Test the New Remote
Stand about 10 feet away from the garage door and press the programmed button on your new remote. The door should activate smoothly and quietly. If it does, your replacement is officially complete!
Understanding Rolling Code Technology for Enhanced Security
Modern Liftmaster openers utilize advanced encryption to prevent unauthorized access and protect your home. This is known as rolling code technology, where the remote and the opener synchronize a new, unique code every single time the button is pressed
www.liftmaster.com.
To understand why this is critical for your home’s safety, you can read more about how rolling code encryption thwarts signal interception and “replay” attacks on Wikipedia’s Rolling Code article. This technology ensures that even if a thief records your remote’s signal, they cannot replay it to open your garage.
Troubleshooting Common Replacement Issues
Even with careful attention to instructions, minor hiccups can occasionally occur. Here are practical solutions to the most frequent problems:
- Remote Will Not Sync: Ensure you are pressing the remote button within the strict 30-second window after hitting the Learn button. Also, verify that the remote’s battery is properly installed and has a fresh charge.
- LED on Motor Unit Does Not Light Up: Your opener might be in “Lock” mode. Check the wall console for a lock icon and disable it before attempting to program the remote.
- Interference from LED Bulbs: Some aftermarket LED garage door bulbs emit electromagnetic interference that blocks remote signals. If your remote only works when you are very close to the door, try replacing the bulb with a Liftmaster-approved LED bulb.
- Antenna Wire is Obstructed: Ensure the hanging antenna wire on the motor unit is pointing straight down and is not tucked behind metal tracks, insulation, or stored items.
Frequently Asked Questions (FAQ)
Q1: Can I use any universal remote for my Liftmaster opener?
A: Not all universal remotes are compatible. You must match the universal remote’s compatibility list with your opener’s Learn button color. For example, a universal remote designed for green Learn buttons will not work with a yellow Security+ 2.0 opener
www.amazon.com.
Q2: How do I know if my Liftmaster remote battery is dead or if the remote is broken?
A: If the LED light on the remote does not illuminate when you press the button, the battery is likely dead. Replace it with a new CR2032 battery. If the light turns on but the door still does not respond after reprogramming, the remote’s internal circuitry may be damaged and require full replacement.
Q3: Do I need to reprogram my wall console when replacing the handheld remote?
A: No. The wall-mounted console is wired directly to the motor unit or paired independently. Replacing or reprogramming a handheld remote does not affect the wall console’s operation or memory.
Q4: How many remotes can I program to a single Liftmaster opener?
A: Most modern Liftmaster garage door openers can store up to 50 to 75 different remote controls and keyless entry devices in their memory simultaneously
support.chamberlaingroup.com.
Q5: What should I do if I lost my only remote and do not know the model number?
A: You can still purchase a universal “Learn Button” compatible remote. Simply check the color of the Learn button on the motor unit and buy a universal remote that explicitly states compatibility with that specific color
www.justanswer.com.
Conclusion
Replacing your garage door remote does not have to be a stressful or confusing experience. By identifying your Learn button color, selecting the correct compatible model, and following a simple 5-step programming process, you can restore seamless access to your garage in minutes. Upgrading to a modern Security+ 2.0 remote also ensures your home benefits from the latest rolling code encryption, keeping your property safe from unauthorized access.
Did you find this guide helpful? Please share this article on Facebook, Twitter, or Pinterest to help friends and family who might be struggling with their own garage door opener replacements!
Leave a Reply