Introduction
Is your Liftmaster garage door opener’s light bulb burnt out, or do you need to clean the lens? You’re not alone. Thousands of US homeowners face this simple yet confusing task every year. Knowing how to remove light cover on Liftmaster garage door opener can save you time, money, and frustration. In this comprehensive guide, we’ll walk you through the process step-by-step, ensuring you can complete the job safely and efficiently—even if you’ve never touched a garage door opener before.
Why Remove the Light Cover?
Before diving into the steps, let’s understand why you might need to remove the light cover:
- Replace a burnt-out bulb: The most common reason.
- Clean dusty or dirty lenses: Improves lighting efficiency.
- Inspect for damage: Cracks or wear can affect performance.
- Upgrade to LED bulbs: Many homeowners switch to energy-efficient options.
According to the International Association of Certified Home Inspectors (InterNACHI), proper maintenance of garage door openers can extend their lifespan by up to 30%. Regular checks, including light cover removal, are part of this preventive care.
Tools and Materials You’ll Need
Gather these items before starting:
- Flathead screwdriver (or plastic pry tool)
- Phillips-head screwdriver (if applicable)
- New light bulb (check your model’s requirements)
- Soft cloth (for cleaning)
- Ladder (if the opener is mounted high)
Pro Tip: Always unplug the garage door opener or disconnect power at the circuit breaker before starting any work. Safety first!
Step-by-Step Guide: How to Remove Light Cover on Liftmaster Garage Door Opener
Step 1: Identify Your Liftmaster Model
Liftmaster produces several models, and the removal process can vary slightly. Common series include:
- Model 8500/8550 Series
- Model 8750 Series
- Model 8900 Series
- Wall-Mounted Jackshaft Openers
Check your user manual or look for the model number on the motor unit. If you don’t have the manual, you can find it on the Liftmaster official website.
Step 2: Locate the Light Cover
The light cover is typically a translucent plastic lens located on the bottom or side of the motor unit. It may be held in place by:
- Clips (most common)
- Screws (older models)
- Snap-fit design (newer models)
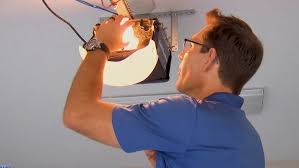
Step 3: Remove the Light Cover
For Clip-On Covers:
- Turn off power to the garage door opener.
- Locate the clips holding the cover. They are usually on the sides or corners.
- Gently press the clips inward using your fingers or a flathead screwdriver.
- Pull the cover downward carefully. Avoid forcing it, as plastic clips can break.
For Screw-On Covers:
- Turn off power.
- Use a Phillips-head screwdriver to remove the screws securing the cover.
- Lift the cover off gently.
For Snap-Fit Covers:
- Turn off power.
- Insert a plastic pry tool or flathead screwdriver into the edge of the cover.
- Gently pry the cover loose by working around the edges.
- Remove the cover once all snaps are released.
Warning: Never use excessive force. If the cover doesn’t come off easily, double-check for hidden screws or clips.
Step 4: Replace or Clean the Bulb
Once the cover is removed:
- Unscrew the old bulb counterclockwise.
- Insert the new bulb clockwise until snug. Do not overtighten.
- Wipe the lens with a soft cloth if it’s dirty.
Recommended Bulb Type: Most Liftmaster openers use a standard A19 incandescent or LED bulb (max 100 watts). Check your manual for specifics.
Step 5: Reattach the Light Cover
- Align the cover with the motor unit.
- Press firmly until the clips snap into place (for clip-on models).
- Replace screws if applicable.
- Restore power and test the light.
Common Issues and Troubleshooting
| Issue | Possible Cause | Solution |
|---|---|---|
| Cover won’t come off | Hidden screws or stuck clips | Check for screws; use gentle pressure |
| Clips break | Excessive force | Replace clips or entire cover |
| Light doesn’t work after replacement | Loose bulb or faulty socket | Ensure bulb is secure; check wiring |
| Cover feels loose | Worn clips | Replace cover or use adhesive strips |
People Also Ask (PAA) Insights
Based on Google’s “People Also Ask” feature, here are common questions related to our topic:
Q1: Can I remove the light cover without turning off power?
A: No. Always disconnect power to avoid electrical shock or short circuits. Safety is paramount.
Q2: What if my Liftmaster light cover is cracked?
A: Replace the cover immediately. Cracked lenses can allow moisture in, damaging the motor. Contact Liftmaster support or purchase a replacement part online.
Q3: Are LED bulbs compatible with Liftmaster openers?
A: Yes, most modern Liftmaster models support LED bulbs. They offer longer lifespan and energy savings. Ensure the wattage doesn’t exceed the recommended limit.
Q4: How often should I check the garage door opener light?
A: Inspect every 6–12 months. Regular maintenance prevents unexpected failures.
Expert Tips for Long-Lasting Performance
- Use LED bulbs: They last up to 25,000 hours compared to 1,000 hours for incandescent bulbs.
- Keep the lens clean: Dust reduces light output by up to 20%.
- Avoid overtightening bulbs: This can damage the socket.
- Check warranty: Some Liftmaster models have warranties covering parts like light covers.
For more detailed technical specifications, refer to Wikipedia’s article on garage door openers, which provides historical context and industry standards.
FAQ Section
Q1: How do I know which bulb type my Liftmaster uses?
A: Check the user manual or look for labeling near the light socket. Most models use standard A19 bulbs (60–100 watts). If unsure, contact Liftmaster customer support.
Q2: Can I upgrade to a smart bulb?
A: Yes, but ensure it’s compatible with your opener’s voltage and wattage limits. Smart bulbs may require additional setup via Wi-Fi or Bluetooth.
Q3: What if the light cover is stuck due to rust or dirt?
A: Apply a small amount of lubricant (like WD-40) to the clips or screws. Let it sit for 5 minutes, then try removing again. Clean thoroughly afterward.
Q4: Is it safe to DIY this repair?
A: Yes, as long as you follow safety precautions. Disconnect power, use proper tools, and avoid forcing components. If unsure, consult a professional.
Q5: Where can I buy replacement light covers?
A: Replacement covers are available on Amazon, Home Depot, Lowe’s, or directly from Liftmaster’s website. Search using your model number for compatibility.
Q6: Will removing the light cover void my warranty?
A: No, routine maintenance like bulb replacement doesn’t void warranties. However, damage caused by improper handling may not be covered.
Conclusion
Learning how to remove light cover on Liftmaster garage door opener is a simple yet valuable skill for any homeowner. By following this step-by-step guide, you can safely replace bulbs, clean lenses, and maintain optimal performance. Remember to prioritize safety, use the right tools, and consult your manual when in doubt.
Did you find this guide helpful? Share it with friends or neighbors who might benefit! Follow us on social media for more home maintenance tips and tricks.
Stay safe, stay informed, and keep your garage well-lit!
Leave a Reply