Introduction
There are few things more frustrating than standing in your driveway with a new remote that refuses to talk to your garage door opener. If you are struggling to sync a device or reset your system, understanding how to put Chamberlain garage door opener in learn mode is the essential first step to restoring convenience and security to your home. This guide provides clear, empathetic instructions to help you get your system working perfectly without the need for an expensive service call.
Understanding Chamberlain Learn Mode Technology
Before pressing any buttons, it is vital to understand what “Learn Mode” actually does. On Chamberlain openers (including LiftMaster and Craftsman models), the Learn button acts as the digital handshake between the motor unit and your accessories. It clears old codes or accepts new ones depending on how long you hold it.
According to technical documentation referenced in general automation standards on Wikipedia, modern rolling-code technology changes the access code every time the remote is used to prevent unauthorized entry. The Learn button is the physical interface that manages this encrypted communication. Without activating this mode correctly, your remote will simply be ignored by the receiver logic board.
Why You Might Need Learn Mode
- Programming a New Remote: Adding a replacement clicker or universal remote.
- Syncing a Wireless Keypad: Setting up exterior PIN access.
- Pairing Smart Home Devices: Connecting MyQ hubs or Wi-Fi adapters.
- Clearing Memory: Removing lost remotes or moving into a new home.
- Resetting Safety Sensors: Re-establishing the infrared beam connection.
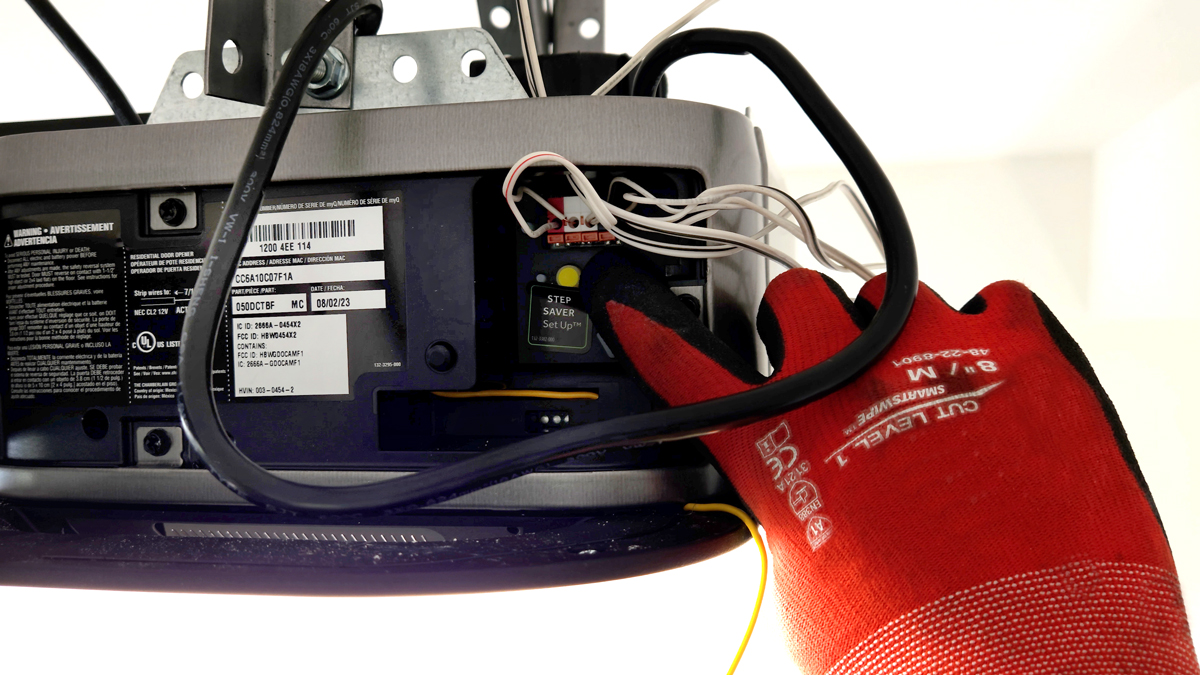
Locating Your Learn Button: Color Matters
Chamberlain uses color-coded Learn buttons to indicate frequency and compatibility. Identifying your button color prevents wasted time trying incompatible steps.
| Learn Button Color | Frequency/Era | Compatible Accessories |
|---|---|---|
| Yellow | 315 MHz (2011–Present) | Security+ 2.0 Remotes & Keypads |
| Purple | 315 MHz (2006–2014) | Security+ Rolling Code Devices |
| Orange/Red | 390 MHz (1997–2005) | Older Security+ Systems |
| Green | 390 MHz (Pre-1997) | Fixed Code / DIP Switch Era |
⚠️ Safety Note: Always keep hands and tools away from the chain/belt drive while reaching for the Learn button. Disconnect power if you feel unsafe accessing the motor housing.
Step-by-Step: How To Put Chamberlain Garage Door Opener In Learn Mode
Follow these precise steps to program a standard remote control. Accuracy here ensures a stable connection.
1. Prepare Your Equipment
Ensure your remote has fresh batteries. Weak batteries are the #1 cause of programming failure. Have a stepladder ready if your motor unit is mounted high.
2. Access the Motor Unit
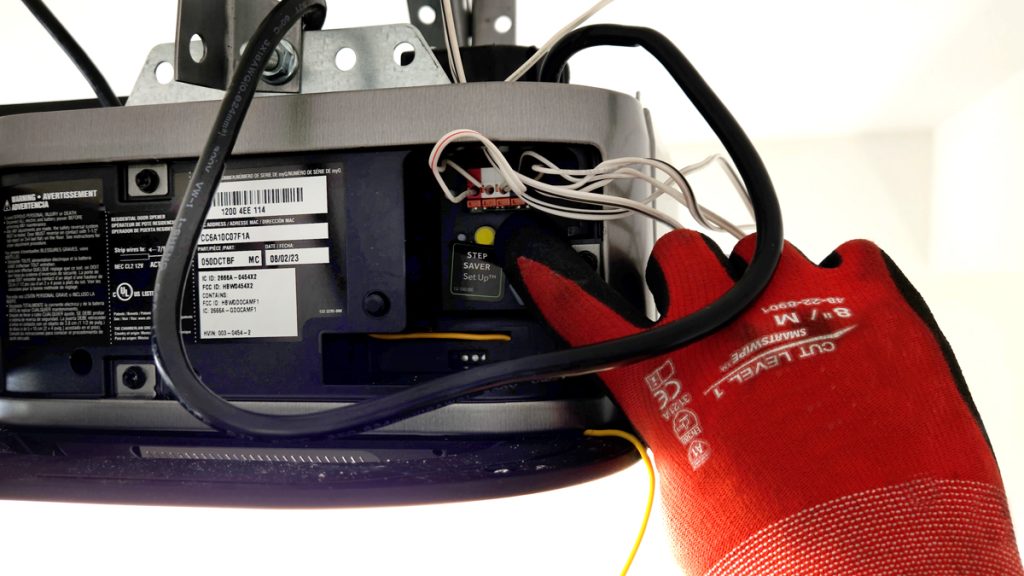
Locate the Learn button on the back or side panel of the overhead motor. It is typically near the antenna wire or light lens. Remove the plastic cover if necessary.
3. Activate Learn Mode
Press and release the Learn button firmly.
- For Programming: Press once briefly (less than 1 second). The LED indicator will illuminate steadily for 30 seconds.
- For Erasing All Codes: Press and hold for 6–10 seconds until the LED turns off completely.
4. Transmit the Signal
Within the 30-second window, press and hold the button on your remote that you wish to program. Hold it until the motor unit lights flash or you hear two distinct clicks. This confirms the code has been accepted.
5. Test the Connection
Press the remote button again to operate the door. If the door responds immediately, you have successfully learned how to put Chamberlain garage door opener in learn mode. If not, repeat steps 3–4, ensuring you are within range.
Programming Wireless Keypads vs. Remotes
While the core process is similar, keypads require a specific sequence that differs slightly from handheld remotes.
Keypad Specific Instructions
- Enter your desired 4-digit PIN on the keypad.
- Press and hold the ENTER button.
- While holding ENTER, press the Learn button on the motor unit.
- Release ENTER when the motor light flashes.
- Test by entering the PIN and pressing ENTER.
Expert Tip: Unlike remotes, keypads often require you to enter the PIN before initiating the learn sequence at the motor. Always consult your specific model’s manual for variations.
Troubleshooting Common Learn Mode Failures
Even professionals encounter hiccups. Use this diagnostic checklist before calling support.
The LED Won’t Stay Lit
- Cause: Logic board capacitor failure or power surge damage.
- Fix: Unplug the opener for 60 seconds to perform a hard reset. Plug back in and retry. If the LED still fails to illuminate, the receiver module may need replacement.
Remote Programs But Doesn’t Work
- Cause: Frequency mismatch or locked-out memory.
- Fix: Verify your remote matches the Learn button color chart above. Clear all codes by holding the Learn button for 10 seconds, then reprogram all devices from scratch.
Intermittent Operation
- Cause: LED bulb interference or antenna obstruction.
- Fix: Replace LED bulbs with Chamberlain-approved RF-shielded bulbs. Ensure the antenna wire hangs vertically and isn’t touching metal surfaces.
FAQ: Mastering Chamberlain Learn Mode
Q1: How long do I hold the Chamberlain Learn button to erase all remotes?
To factory reset and erase all programmed remotes and keypads, press and hold the Learn button for approximately 6 to 10 seconds. Release when the LED indicator light goes out completely. This wipes the memory clean, requiring you to reprogram every device.
Q2: Can I put my Chamberlain opener in learn mode without a ladder?
Generally, no. The Learn button is located directly on the motor unit mounted to the ceiling. However, some newer Wi-Fi enabled models allow limited programming through the MyQ smartphone app, though physical button access is still required for initial pairing and safety sensor resets.
Q3: What does it mean if the Learn button blinks continuously?
A blinking Learn button usually indicates a safety sensor misalignment or obstruction. Before attempting to program new devices, check that both photo-eye sensors at the floor level are aligned, clean, and showing solid lights (not flashing). Programming mode cannot be entered while safety faults exist.
Q4: Is there a difference between “Learn” and “Program” buttons?
On Chamberlain units, they are the same button. Some older manuals use the term “Smart/Learn,” while newer documentation simply says “Learn.” Do not confuse this with the “Set” or “Limit” adjustment screws on the side of the unit, which control travel distance, not wireless coding.
Q5: Will putting my opener in learn mode disconnect my existing remotes?
Only if you hold the button for 6+ seconds (erase function). A quick press-and-release to add a new remote preserves all previously programmed devices. Always use the short press unless you intentionally want to wipe memory for security reasons.
Q6: My Learn button is black/unmarked. What should I do?
Unmarked or black buttons typically appear on commercial or very old residential units. Check the model number sticker on the motor housing and search Chamberlain’s official compatibility database. These units may require proprietary programmers or dip-switch matching rather than rolling-code learn procedures.
Conclusion
Mastering how to put Chamberlain garage door opener in learn mode empowers you to maintain your home’s security and convenience independently. Whether you’re adding a new remote, setting up a keypad, or clearing old access codes, the process is straightforward when you follow the correct color-coded procedures and timing windows. Remember to prioritize safety, verify compatibility, and troubleshoot methodically using the guidelines above.
Your garage door is your home’s largest moving appliance—keeping its access systems updated is part of responsible homeownership. Found this guide helpful? Share it on Facebook, Pinterest, or your neighborhood Nextdoor group to help fellow homeowners avoid costly service calls. A well-programmed garage door means peace of mind for everyone!
Leave a Reply