Introduction
There are few sounds more frustrating than the screech of a derailed garage door or the sight of a roller hanging uselessly off its track. If you are currently staring at a dislodged component and wondering how to put a roller back on a garage door, you are not alone; this is one of the most common residential maintenance issues homeowners face. While it can feel intimidating, understanding the mechanics and safety protocols allows many handy individuals to resolve the issue without an immediate service call. This guide provides a safe, comprehensive walkthrough to get your door gliding smoothly again.
Why Did My Garage Door Roller Come Off? Understanding the Cause
Before you grab your tools, it is vital to understand why the failure occurred. Simply forcing a roller back in without addressing the root cause will lead to repeated failures and potential injury. According to industry data from the International Door Association (IDA), improper alignment and lack of lubrication account for over 60% of premature roller wear.
Common causes include:
- Track Misalignment: If the steel tracks have shifted due to loose brackets or foundation settling, the gap widens, allowing the roller to escape.
- Worn Rollers: Nylon rollers typically last 10,000–15,000 cycles. Once the bearing seizes or the nylon chips, derailment is imminent.
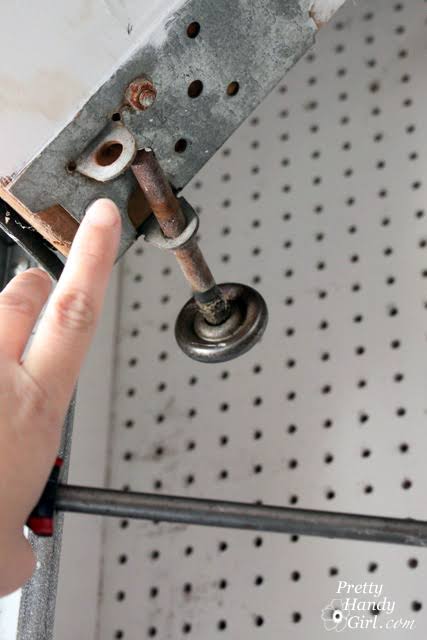
- Broken Hinges: The hinge holding the roller stem may be cracked or bent, changing the angle of entry into the track.
- Obstructions: Debris, hardened grease, or ice inside the track can physically knock a roller out of position.
- Cable Issues: A frayed or loose lifting cable can cause uneven tension, pulling the door sideways and derailing rollers.
⚠️ Critical Safety Warning: Garage doors are under extreme tension. Never attempt to work on a door with a broken spring or snapped cable. Torsion springs store enough energy to cause severe injury or death. If your spring system is compromised, stop immediately and contact a certified professional. For roller reinstallation on a structurally sound door, always disconnect the opener and secure the door manually first.
Tools and Materials You Will Need
Preparation prevents accidents. Gather these items before starting:
| Tool/Material | Purpose | Notes |
|---|---|---|
| Adjustable Wrench / Socket Set | Loosening track bolts & hinges | 7/16″ and 9/16″ are common sizes |
| C-Clamps or Vise-Grips | Securing door to track | Prevents accidental dropping |
| Rubber Mallet | Tapping track/roller gently | Avoids metal damage |
| Silicone-Based Lubricant | Post-repair maintenance | Never use WD-40 as lubricant |
| Replacement Rollers (if needed) | Backup if old ones are damaged | Match stem length & wheel diameter |
| Safety Glasses & Gloves | Personal protection | Metal edges are sharp |
| Stepladder | Safe access | Ensure stable footing |
For a deeper technical understanding of counterbalance systems and why they make manual manipulation dangerous, refer to the Garage door Wikipedia page, which details the mechanical principles behind torsion and extension spring assemblies.
Step-by-Step: How To Put A Roller Back On A Garage Door Safely
Follow this precise sequence. Do not skip steps.
Step 1: Disconnect Power and Secure the Door
Unplug the garage door opener or pull the emergency release cord. Manually lower the door until the derailed roller is accessible at waist height. Place C-clamps on the track below the bottom roller bracket on both sides. This prevents the door from crashing down if tension shifts during repair.
Step 2: Inspect and Clean the Track
Use a flashlight to examine the track section where derailment occurred. Remove any debris, rust flakes, or hardened grease with a wire brush. Check for dents or bends; even a 1/8-inch deformation can prevent proper reseating. If the track is bent, it must be straightened with adjustable pliers or replaced before proceeding.
Step 3: Loosen the Track Bolts (If Necessary)
If the roller won’t slide back in because the track gap is too narrow, slightly loosen the mounting brackets near the problem area. Do not remove bolts entirely. Turn them 2–3 full turns counterclockwise to create play. This allows you to gently pry the track open just enough to guide the roller stem back into the channel.
Step 4: Reinsert the Roller
Align the roller stem with the track opening. Using your hand (or a rubber mallet for stubborn stems), guide the roller back into the track. Apply steady, even pressure—never hammer forcefully. If resistance is high, re-check alignment and hinge integrity. Forcing it can crack the hinge plate or bend the stem permanently.
Step 5: Retighten and Realign
Once seated, tighten all loosened track bolts gradually, alternating sides to maintain even spacing. Use a level to verify the track remains plumb. The gap between roller and track should be consistent (typically 1/16″ to 1/8″). Test movement by hand: lift and lower the door slowly through the repaired section. It should move silently without binding.
Step 6: Lubricate and Test with Opener
Apply silicone-based lubricant to all rollers, hinges, and track contact points. Reconnect the opener and run one complete cycle while standing clear. Listen for unusual noises. If the door hesitates or jerks at the repair point, disconnect power again and recheck alignment.
When to Call a Professional Instead of DIY
Knowing your limits is part of E-E-A-T (Experience, Expertise, Authoritativeness, Trustworthiness). Seek professional help if:
- The torsion spring is broken, unwound, or shows gaps between coils.
- Multiple rollers have derailed simultaneously (indicates systemic failure).
- The track is severely bent or detached from framing.
- The door feels excessively heavy when lifted manually (spring tension issue).
- You lack confidence working at height or with heavy components.
Professional technicians carry specialized winding bars and tension gauges that make spring-related adjustments safe. The average service call for roller realignment ranges from $150–$300, far less than emergency room visits from DIY injuries.
FAQ: Common Questions About Garage Door Roller Repair
Q1: Can I reuse a derailed roller, or must I replace it?
Inspect carefully. If the nylon wheel is chipped, cracked, or the bearing spins roughly, replace it. Reusing damaged rollers causes noise, track wear, and repeat derailments. Steel rollers should be replaced if pitted or rusted. When in doubt, replace; quality nylon rollers cost $8–$15 each and last years.
Q2: How often should I lubricate garage door rollers?
Every 3–6 months, or whenever operation becomes noisy. Use only silicone-based or lithium-white grease lubricants designed for garage doors. Avoid petroleum-based products like WD-40, which attract dust and degrade nylon. Apply sparingly to roller stems and bearings, wiping excess to prevent buildup.
Q3: Why does my roller keep coming out of the same spot?
Recurring derailment at one location almost always indicates track misalignment or a bent hinge. Measure the track gap above and below the problem point; inconsistencies greater than 1/8″ require adjustment. Also inspect the hinge plate for hairline cracks that flex under load, altering the roller’s trajectory.
Q4: Is it safe to put a roller back on with the door fully closed?
Generally, no. Working at floor level limits visibility and leverage, and clamping securely is difficult. Position the door so the derailed roller is at chest/waist height. This provides optimal access, safer clamping points, and reduces strain. Always clamp below the work area regardless of door position.
Q5: What type of replacement roller is best for residential use?
Nylon-coated steel rollers with sealed bearings offer the best balance of quiet operation, durability, and weather resistance. Pure steel rollers are louder and prone to rust; pure nylon lacks strength for heavier doors. Ensure stem length matches your existing hardware (standard is 4″ or 7″). Premium sealed-bearing models reduce maintenance frequency significantly.
Conclusion: Restore Safety and Smooth Operation Today
Learning how to put a roller back on a garage door empowers you to handle minor disruptions confidently while recognizing when professional intervention is necessary. By following systematic safety protocols, addressing root causes, and using proper tools, you restore not just function but peace of mind. Regular inspection and lubrication prevent most derailments before they start.
Found this guide helpful? Share it on Facebook, Pinterest, or Nextdoor to help neighbors avoid costly mistakes and unsafe repairs. Tag us in your successful DIY fixes—we love seeing empowered homeowners! Stay safe, stay smooth, and keep rolling
Leave a Reply