Introduction
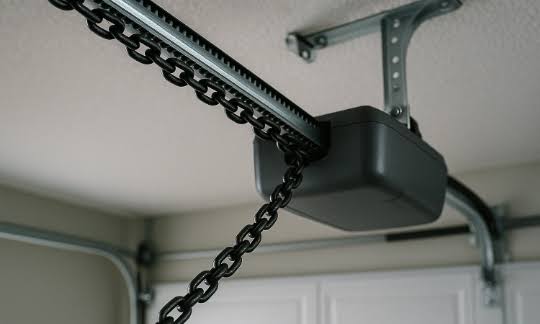
There are few things more frustrating than pressing your garage remote and hearing the motor hum while the door stays stubbornly shut. If your trolley has disconnected from the drive mechanism, you are likely wondering how to put a garage door back on the chain without calling an expensive technician. This common issue usually stems from a pulled emergency release cord or worn carriage components, but fortunately, it is often a manageable DIY task. In this comprehensive guide, we will walk you through the safe, systematic process of re-engaging your system so you can get back to your day with confidence and peace of mind.
Understanding Why Your Garage Door Detached From The Chain
Before grabbing tools, it is vital to understand why the disconnection occurred to prevent immediate recurrence. The most frequent cause is the accidental activation of the emergency release cord (usually a red rope hanging from the trolley). This safety feature is designed to disconnect the door from the opener during power outages or entrapment emergencies, allowing manual operation.
However, other mechanical failures can mimic this symptom:
- Worn Trolley Carriage: Over years of use, the internal latch mechanism can wear down, preventing it from locking onto the chain or belt.
- Misaligned Rails: If the track is bent or loose, the trolley may bind and forcibly detach under pressure.
- Broken Chain Links: Though rarer, metal fatigue can cause the chain to snap or skip teeth on the sprocket.
- Improper Limit Settings: If the opener’s travel limits are set incorrectly, the motor may push the trolley past its engagement point.
Expert Insight: According to industry data from the International Door Association (IDA), nearly 30% of residential garage door service calls are related to opener carriage or release mechanism issues rather than motor failure. Proper diagnosis saves homeowners an average of $150–$250 in unnecessary part replacements.
For a deeper technical understanding of how these counterbalance and drive systems interact, refer to the Garage Door Opener entry on Wikipedia.org, which details the evolution and mechanics of modern trolley-drive systems.
Safety First: Critical Precautions Before Starting
Working with garage doors involves high-tension springs and heavy moving parts. Never skip these safety steps.
- Disconnect Power: Unplug the opener unit or turn off the dedicated circuit breaker to prevent accidental activation.
- Secure the Door: Manually lower the door completely and clamp locking pliers onto the track below the bottom roller to prevent unexpected movement.
- Wear PPE: Safety glasses and work gloves are mandatory. Metal edges on chains and trolleys are sharp.
- Avoid Spring Contact: Do not touch, adjust, or loosen torsion or extension springs. These store lethal energy and require professional handling.
- Use Proper Lighting: Ensure the work area is well-lit to see small latch mechanisms clearly.
Step-by-Step: How To Put A Garage Door Back On The Chain
Follow these precise instructions to re-engage your trolley safely. This process applies to most standard chain-drive and belt-drive openers (e.g., Chamberlain, LiftMaster, Genie).
Step 1: Verify Manual Operation Smoothness
Before reattaching, ensure the door moves freely by hand. Lift it halfway; it should stay in place or move with minimal resistance. If it binds, sticks, or feels excessively heavy, stop. Track alignment or spring tension issues must be resolved first, or reattachment will fail again.
Step 2: Locate the Emergency Release Lever
Find the red handle/cord assembly on the trolley (the part that rides the rail). You will see a lever or latch mechanism near where the arm connects to the door. Identify whether it is currently in the “disengaged” (down/out) position.
Step 3: Reset the Release Mechanism
Firmly pull the release lever toward the motor head (or upward, depending on model) until you hear/feel a distinct click. This resets the internal spring-loaded latch. On some models, you may need to slide a collar or rotate a knob. Consult your opener’s manual if the mechanism isn’t obvious.
Step 4: Align Trolley With Drive Sprocket Position
Manually move the trolley along the rail until it aligns directly beneath the drive sprocket/belt pulley at the motor head. The chain/belt should have slight slack here. Do not force alignment; if resistance occurs, recheck track obstructions.
Step 5: Re-Engage and Test Latch Security
With the trolley aligned and the reset lever held in the engaged position, gently rock the trolley forward/backward until the latch snaps fully into the chain link or belt tooth. Visually confirm the latch is seated flush—not partially hooked. Tug downward lightly on the trolley; it should not dislodge.
Step 6: Restore Power and Conduct Safety Test
Remove track clamps, restore power, and operate the opener via wall button (stand clear). Observe the first full cycle. Listen for grinding, clicking, or hesitation. Immediately test auto-reverse: Place a 2×4 board flat on the floor under the door center. The door must reverse within 2 seconds of contact. If it doesn’t, adjust the force/sensitivity settings per manufacturer specs before regular use.
Troubleshooting: When Reattachment Fails
| Symptom | Likely Cause | Solution |
|---|---|---|
| Latch won’t click into place | Worn trolley carriage internals | Replace trolley assembly ($25–$45 part) |
| Door re-detaches mid-cycle | Misaligned rail or bent track | Inspect/straighten track; tighten brackets |
| Motor runs but trolley doesn’t move | Stripped sprocket or broken chain | Inspect drive components; replace if damaged |
| Excessive noise after reattachment | Dry chain or loose hardware | Lubricate chain with lithium grease; tighten bolts |
| Door reverses immediately upon closing | Force setting too low or sensor misalignment | Adjust close-force limit; realign safety sensors |
Note: If you’ve replaced the trolley twice in under two years, the root cause is likely track misalignment or improper spring balance—not the trolley itself. Address underlying issues to avoid recurring costs.
Maintenance Tips To Prevent Future Disconnections
Prevention is far cheaper than repair. Incorporate these into biannual maintenance:
- Lubricate Quarterly: Apply white lithium grease to chain links, rollers, and hinges. Avoid WD-40—it attracts grime.
- Test Release Cord Monthly: Pull and reset the emergency release to ensure it doesn’t seize from disuse.
- Inspect Rail Alignment: Use a level to verify tracks are plumb and parallel. Tighten mounting brackets annually.
- Check Travel Limits Annually: Doors that over-travel stress the trolley latch. Adjust open/close limits if gaps appear at top/bottom.
- Balance Test Biannually: Disconnect opener and lift door manually. It should stay open at 3–4 feet. If not, call a pro for spring adjustment.
Frequently Asked Questions (FAQ)
Q1: Can I put my garage door back on the chain without unplugging the opener?
No. Always disconnect power first. An accidental button press while your hands are near the chain or trolley can cause severe injury or damage. The 30 seconds spent unplugging is non-negotiable for safety.
Q2: How do I know if my trolley needs replacement versus just resetting?
If the release lever feels mushy, lacks a positive click, or the latch visibly cracks/deforms, replace the trolley. Resetting only works when the internal spring mechanism is intact. Most trolleys last 7–10 years; beyond that, proactive replacement prevents strandings.
Q3: My door keeps coming off the chain every few weeks—what’s wrong?
Recurring detachment almost always indicates track misalignment or spring imbalance. The trolley is being forced sideways or overloaded. Have a certified technician inspect rail straightness and spring tension. Continuing to reattach without fixing the root cause risks motor burnout or door collapse.
Q4: Is it safe to use vice grips to hold the trolley in place temporarily?
Absolutely not. Vice grips can deform the trolley housing, damage the rail, or slip unexpectedly. Use only the manufacturer-designed latch mechanism. Temporary fixes with improvised tools create hazardous failure points and void warranties.
Q5: How long should reattachment take for a beginner?
For a straightforward reset (no parts replacement), expect 15–25 minutes including safety checks. If troubleshooting or part replacement is needed, budget 45–90 minutes. Rushing increases error risk; patience ensures lasting results.
Q6: Does reattaching the chain affect my opener’s warranty?
Generally, no—if performed correctly using OEM procedures. However, damage caused by improper technique (e.g., forcing components, skipping safety tests) may void coverage. Document your steps with photos if concerned, and retain purchase receipts for any replacement parts.
Conclusion
Knowing how to put a garage door back on the chain empowers you to resolve one of the most common opener issues quickly, safely, and cost-effectively. By following the systematic steps outlined above—prioritizing safety verification, precise latch engagement, and post-repair testing—you restore reliable function while extending your system’s lifespan. Remember: if the problem recurs or mechanical components show wear, professional assessment is a wise investment, not a failure.
Found this guide helpful? Share it on Facebook, X (Twitter), or Nextdoor to help a neighbor avoid a stranded car! Tag us with your success story—we love seeing DIY wins. Safe lifting, and may your garage door always open smoothly! 🚪✨
Leave a Reply