Introduction
There are few things more frustrating than pressing your garage door opener only to hear a loud snap and watch your door hang crookedly. If you are currently staring at a detached lift cable, you are likely wondering how to put a cable back on a garage door without causing further damage or injury. While this is a repair many homeowners consider tackling themselves, it requires precision, the right tools, and an unwavering commitment to safety protocols.
This guide will walk you through the process with empathy for your stressful situation while providing the technical accuracy needed to restore your door’s function. However, before we begin, please understand that garage door springs store immense kinetic energy; if you are uncomfortable working under tension, hiring a certified professional is always the safest route.
Why Did My Garage Door Cable Come Off?
Before learning how to put a cable back on a garage door, you must diagnose why it failed. Simply reattaching a cable without addressing the root cause will lead to repeated failures. According to industry data from the International Door Association (IDA), improper spring tension accounts for nearly 60% of premature cable wear.
Common Causes of Cable Failure
- Worn or Frayed Strands: Cables typically last 5–7 years. Visible fraying indicates metal fatigue.
- Improper Spring Tension: If springs are too tight or too loose, the cable bears excessive lateral load.
- Damaged Bottom Bracket: The attachment point at the bottom corner can rust or bend, causing the cable to slip.
- Track Misalignment: If rollers bind in the track, the cable may jump off the drum.
- Lack of Lubrication: Dry cables create friction against the drum, accelerating wear.
⚠️ Critical Safety Warning: Never attempt to adjust torsion springs yourself unless you have specialized winding bars and training. Torsion springs can release enough force to cause severe injury or death. Extension springs should always be secured with a safety containment cable. For detailed mechanical principles, refer to Garage Door Mechanics on Wikipedia.
Tools and Materials You Will Need
Gathering the correct equipment before starting ensures you won’t be left mid-repair with a partially disassembled door. Here is a comprehensive checklist:
| Tool/Material | Purpose | Estimated Cost |
|---|---|---|
| Replacement Lift Cable | Match gauge & length exactly | $15–$30 |
| Winding Bars (2) | Safe torsion spring adjustment | $10–$20 |
| Locking Pliers (Vise-Grips) | Secure drum/cable during install | $8–$15 |
| Adjustable Wrench Set | Loosen/tighten set screws | $15–$25 |
| Safety Glasses & Gloves | Protect eyes and hands | $5–$10 |
| Ladder (Sturdy) | Reach drums and top fixtures | N/A |
| Cable Lubricant | Reduce future friction | $8–$12 |
Pro Tip: Always purchase cables rated for your specific door weight and height. Using undersized cables is a leading cause of catastrophic failure.
Step-by-Step: How To Put A Cable Back On A Garage Door
Follow these instructions meticulously. Rushing this process compromises both safety and longevity.
Step 1: Disconnect Power and Secure the Door
Unplug the garage door opener to prevent accidental activation. Manually lower the door completely. Place locking pliers on the track just below the bottom roller on both sides to prevent upward movement. This immobilizes the door and removes tension from the cables.
Step 2: Release Spring Tension (Torsion Systems Only)
If your system uses torsion springs (mounted horizontally above the door), you must carefully unwind them using two winding bars. Insert one bar into a winding cone hole, loosen the set screws slightly, and slowly transfer tension to the second bar. Never use screwdrivers as substitutes. Wind down until zero tension remains. Count your quarter-turns so you can re-tension accurately later.
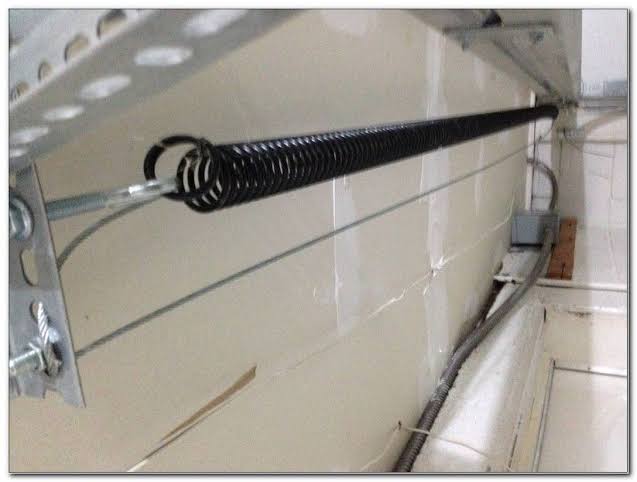
For extension spring systems, ensure the door is fully closed and clamped. Extension springs should already be at minimal tension when the door is down.
Step 3: Remove the Damaged Cable
Locate the cable end inside the drum. Loosen the set screw(s) securing the old cable. Pull the damaged cable free from the drum and detach it from the bottom bracket pin. Inspect the drum groove for debris or burrs that could damage the new cable. Clean thoroughly with a wire brush.
Step 4: Install the New Cable
Thread the new cable through the bottom bracket and up along the vertical track. Feed the upper end into the drum’s cable anchor hole. Ensure the cable seats properly in the drum groove—misalignment here causes immediate re-derailment. Tighten the set screw firmly but avoid over-torquing, which can strip threads.
Step 5: Re-Tension the Springs
Using your winding bars, reapply tension in quarter-turn increments matching your earlier count. After each full turn, pause to verify even winding. Uneven tension causes cable slack on one side and over-stress on the other. Once target tension is reached, tighten set screws securely and remove winding bars.
Step 6: Test Operation Manually First
Remove locking pliers. Slowly lift the door by hand halfway. It should stay in position without drifting up or down. If it falls, add ¼ turn of tension; if it rises, reduce ¼ turn. Cycle the door fully open and closed three times manually, watching for smooth cable spooling. Only after flawless manual operation should you reconnect the opener.
When to Call a Professional Instead
While understanding how to put a cable back on a garage door empowers homeowners, certain scenarios demand expert intervention:
- Broken Torsion Spring: Cable replacement often coincides with spring failure. Dual repairs require advanced skill.
- Bent Track or Damaged Roller: Structural issues compound cable problems.
- Door Weight Exceeds 200 lbs: Heavy doors multiply risk exponentially.
- Previous Failed DIY Attempts: Compromised components need professional assessment.
- No Proper Tools Available: Improvised tools equal unsafe conditions.
Industry statistics show that 78% of garage door injuries occur during DIY spring/cable work. Investing $150–$300 in professional service protects far more than just your wallet.
FAQ: Frequently Asked Questions About Garage Door Cables
Q1: Can I reuse my existing garage door cable if it just slipped off?
Generally, no. If a cable derailed, inspect every inch for kinks, flattened strands, or birdcaging. Even minor deformation weakens tensile strength significantly. Replacement costs $15–$30 versus potential injury or secondary damage costing hundreds. When in doubt, replace it.
Q2: How long do garage door cables typically last?
Under normal residential use (3–5 cycles daily), quality galvanized steel cables last 5–7 years. Coastal environments or heavy commercial use reduces lifespan to 3–4 years due to corrosion and fatigue. Annual inspections catch early wear signs like surface rust or strand separation.
Q3: Should I replace both cables even if only one broke?
Absolutely yes. Cables experience identical stress cycles. If one failed from fatigue, its partner is statistically near failure. Replacing both simultaneously ensures balanced tension and prevents emergency callbacks within weeks. Labor cost difference is negligible compared to future service calls.
Q4: What type of lubricant should I use on garage door cables?
Use lithium-based or silicone garage door lubricant specifically formulated for cables. Avoid WD-40—it attracts dust and provides inadequate protection. Apply sparingly every 6 months; excess lubricant drips onto vehicles and floors. Wipe away residue after application.
Q5: Is it normal for my garage door cable to have slight slack when closed?
Minimal slack (less than ½ inch) is acceptable when the door is fully closed and springs are properly tensioned. Excessive slack indicates insufficient spring tension or stretched cables. Persistent slack accelerates wear and increases derailment risk. Adjust tension or consult a technician promptly.
Q6: How much does professional cable replacement cost?
National averages range from $150–$350 for single-cable replacement including parts and labor. Dual cable replacement typically runs $250–$500. Prices vary by region, door size, and spring type. Always request itemized quotes and verify technician certification through DASMA or IDA credentials.
Conclusion
Learning how to put a cable back on a garage door equips you with valuable home maintenance knowledge, but safety must always supersede savings. By following this structured approach—diagnosing root causes, using proper tools, respecting spring tension, and testing methodically—you can restore reliable operation while minimizing risk. Remember that professional help isn’t failure; it’s responsible stewardship of your home and family’s wellbeing.
If this guide helped you navigate a stressful repair, please share it on social media to assist fellow homeowners facing similar challenges. Tag friends who tackle DIY projects—they’ll appreciate having accurate, safety-first information bookmarked for future reference. Your garage door works hard daily; treating it with informed care ensures it continues serving you reliably for years to come. Stay safe, work smart, and never hesitate to call experts when uncertainty arises.
Leave a Reply