Introduction
There is nothing quite as frustrating as standing in your driveway with a new remote, only to realize it won’t sync with your garage. If you are currently searching for how to program universal remote to LiftMaster garage door opener, you are likely dealing with this exact headache, but rest assured that the solution is usually just a few button presses away. This comprehensive guide will walk you through the process safely and efficiently, ensuring you get back into your garage without needing to call an expensive technician.
Understanding Compatibility Before You Start
Before diving into the programming steps, it is vital to confirm that your universal remote is actually compatible with your specific LiftMaster model. Not all remotes speak the same language, even if they look similar.
LiftMaster has evolved its security technology over the decades. According to Wikipedia, modern garage door openers utilize rolling code technology to prevent unauthorized access, which differs significantly from older fixed-code systems.
Check Your Frequency and Technology
- Security+ 2.0 (Yellow Learn Button): Manufactured after 2011. Requires 315 MHz or dual-band remotes.
- Security+ (Orange/Red/Purple Learn Button): Manufactured between 1997–2011. Uses 390 MHz or 315 MHz.
- DIP Switches (No Learn Button): Manufactured before 1993. Requires matching physical switch positions.
Expert Tip: Always check the back of your motor head or the user manual for the “Learn” button color. This is the single most important identifier when learning how to program universal remote to LiftMaster garage door opener successfully.
Step-by-Step: How to Program Using the Learn Button
For 90% of users, this is the method you need. It applies to Security+ and Security+ 2.0 units.
Tools You Will Need
- A compatible universal remote (with fresh batteries).
- A stepladder (if the learn button is high up).
- The original LiftMaster owner’s manual (optional but helpful).
The Programming Sequence
Follow these precise steps to ensure synchronization:
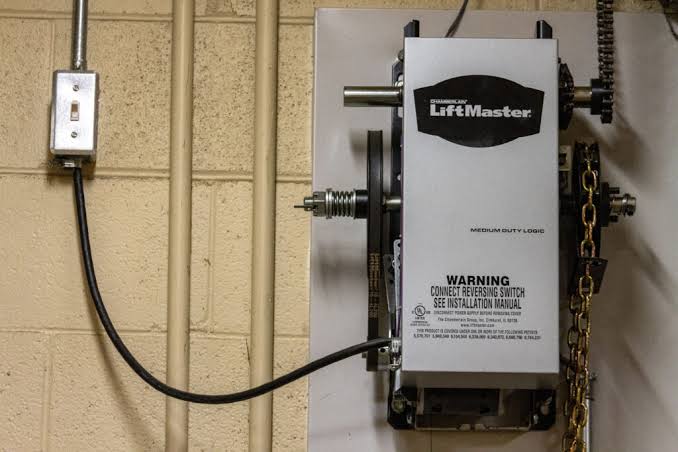
- Locate the Learn Button: Find the colored square or circular button on the back or side of the garage door opener motor unit. It is typically yellow, orange, red, or purple.
- Clear Old Codes (Optional): If the remote was previously used, hold the Learn button for 6–10 seconds until the LED goes out to wipe memory. Skip this if adding a new remote to existing ones.
- Press the Learn Button: Press and release the Learn button firmly. The LED indicator light will turn on or begin blinking, indicating the unit is in “pairing mode.” You typically have 30 seconds to complete the next step.
- Activate the Remote: Within the 30-second window, press and hold the button on your universal remote that you wish to program. Hold it for 2–3 seconds, then release.
- Confirm Success: Watch the motor unit lights. They should flash twice or emit two distinct clicks. This confirms the code has been accepted.
- Test Immediately: Step back and press the remote button again to verify the door activates reliably.
Alternative Method: Programming DIP Switch Remotes
If your LiftMaster is a vintage model (pre-1993) without a Learn button, the process for how to program universal remote to LiftMaster garage door opener involves hardware matching rather than digital syncing.
| Feature | Learn Button Models | DIP Switch Models |
|---|---|---|
| Era | 1993 – Present | Pre-1993 |
| Security | Rolling Code / Fixed | Fixed Code Only |
| Setup Time | < 1 Minute | 5–10 Minutes |
| Method | Digital Sync | Physical Switch Matching |
| Compatibility | High | Limited to Vintage |
Matching the Switches
- Open the battery compartment of both the old remote (or receiver) and the new universal remote.
- Locate the row of tiny sliding switches (usually 8–12).
- Use a small screwdriver or pen tip to slide the switches on the new remote to match the exact pattern of the old one.
- Test the door operation immediately after closing the battery compartments.
Troubleshooting Common Programming Failures
Even when following instructions perfectly, issues arise. Here are data-backed solutions for common failures.
The Remote Won’t Sync
- Battery Issue: 40% of programming failures are due to weak batteries in the new remote. Replace with premium alkaline batteries before retrying.
- Distance: Stand within 5 feet of the motor during programming. Signal strength can be insufficient at greater distances during the pairing handshake.
- Memory Full: Most LiftMaster units store a maximum of 5–8 remotes. If full, perform a factory reset (hold Learn button for 10 seconds) and reprogram all devices.
Remote Works Intermittently
- LED Bulb Interference: Some LED bulbs emit radio frequency interference that blocks remote signals. Try unscrewing nearby garage LEDs to test.
- Antenna Damage: Inspect the hanging wire antenna on the motor unit. If severed or touching metal, signal range drops dramatically.
- Rolling Code Desync: If the remote works sometimes but not others, press the programmed button rapidly 3–4 times while near the motor to resynchronize the rolling code counter.
Lights Flash But Door Doesn’t Move
This often indicates successful programming but a mechanical safety lockout. Check that the safety sensors at floor level are aligned and unobstructed. The sensor LEDs should be solid green (receiving) and solid amber (sending). Blinking sensors indicate misalignment, preventing operation regardless of remote programming status.
Safety Considerations During Programming
When learning how to program universal remote to LiftMaster garage door opener, never bypass safety protocols.
- Keep Clear: Never stand directly under the door while testing. Position yourself to the side where you can see the entire travel path.
- Sensor Verification: After programming, always test the auto-reverse feature by placing a 2×4 board flat on the floor in the door’s path. The door must reverse upon contact.
- Disconnect Power for Hardware Work: If you need to inspect wiring or replace the logic board, unplug the opener first to prevent electrical shock.
- Secure Your Remote: Treat your programmed remote like a house key. Lost remotes should be erased from the system immediately via the Learn button reset procedure.
Frequently Asked Questions (FAQ)
Can I program multiple universal remotes to one LiftMaster opener?
Yes, absolutely. Most LiftMaster openers manufactured after 1993 can store between 5 and 8 individual remote codes, plus keypad entries. Simply repeat the Learn button sequence for each additional remote. There is no need to erase previous remotes unless you have reached the maximum capacity.
Why does my universal remote work outside but not inside the garage?
This is almost always caused by radio frequency interference. Common culprits include LED light bulbs, Wi-Fi routers, baby monitors, or power strips plugged into the same circuit as the opener. Try turning off nearby electronics one by one to identify the source. Shielded LED bulbs specifically rated for garage door openers can resolve this permanently.
Do I need to reprogram my remote after changing the opener’s batteries?
No. The remote codes are stored in the opener’s non-volatile memory, not dependent on backup batteries. However, if you performed a hard reset or replaced the logic board, reprogramming will be necessary. Regular battery changes in the remote itself also do not require reprogramming.
What if my universal remote brand isn’t listed as compatible?
Many universal remotes support multiple brands through different code sets. Consult your remote’s manual for alternative programming sequences or code lists. Some remotes have an “auto-search” function that cycles through frequencies until finding a match. If none work, the remote may simply lack the required frequency or protocol for your specific LiftMaster generation.
How often should I replace my universal remote batteries?
For optimal performance, replace remote batteries every 12–18 months, or immediately if you notice reduced range or delayed response. Cold temperatures in garages accelerate battery drain. Lithium batteries often outperform alkaline in extreme temperature environments and provide more consistent voltage throughout their lifespan.
Is it safe to buy a used universal remote for my LiftMaster?
It can be safe, but precautions are essential. Ensure the seller confirms the remote has been factory reset and is fully functional. Upon receiving it, program it to your opener and immediately verify that no other unknown remotes remain in your system’s memory by performing a Learn button reset and reprogramming only your trusted devices.
Conclusion
Mastering how to program universal remote to LiftMaster garage door opener empowers you to maintain home security and convenience independently. By identifying your opener’s generation, following the correct programming sequence, and applying systematic troubleshooting, you can resolve most issues in under ten minutes without professional assistance. Remember that compatibility verification and safety testing are just as important as the programming steps themselves.
Found this guide helpful? Share it with friends, family, or neighbors who might be struggling with their own garage door remotes! Tag us on social media or send this link to someone who needs quick, reliable answers. Together, we can make home maintenance less stressful for everyone. Happy programming!
Leave a Reply