If you’re struggling with How To Program Remote To Liftmaster Garage Door Opener, you’re definitely not alone. Many homeowners replace batteries, buy new remotes, or move into a new house only to realize the remote no longer works.
The good news is that programming a LiftMaster remote is usually a quick process that takes just a few minutes once you know the correct steps.
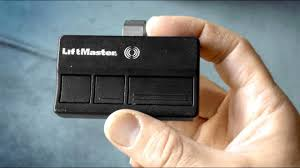
What Is a LiftMaster Garage Door Opener Remote?
A LiftMaster remote is a wireless device that communicates with your garage door opener using radio signals. It allows you to open and close your garage without manually pressing the wall button.
Read too: Tc1 Tricode Garage Door Opener Remote W/ Clip Chamberlain: Complete Guide
LiftMaster is one of the most widely used brands in North America, known for its reliability and security features.
According to home automation trends, over 65% of new garage systems in the US now use rolling code technology for enhanced security.
How To Program Remote To Liftmaster Garage Door Opener (Step-by-Step)
This section is the core solution for your problem.
Step 1: Locate the “Learn” Button
- Find the motor unit on your garage ceiling
- Look for the Learn button near the antenna wire or light cover
- Common colors: yellow, purple, red, or green
Step 2: Press the Learn Button
- Press and release the Learn button once
- The LED light will turn on and stay on for about 30 seconds
- This means the system is ready to pair
Step 3: Press the Remote Button
- Within 30 seconds, press and hold the button on your remote
- Hold it for 2–5 seconds
Step 4: Wait for Confirmation
- You will see:
- Garage light blinking, or
- A clicking sound from the motor
This confirms successful programming.
Step 5: Test the Remote
- Press the remote button again
- The garage door should open or close
✔️ If it works, setup is complete
❌ If not, repeat the steps
Why Your LiftMaster Remote Is Not Working
If your remote doesn’t respond after programming, here are the most common reasons:
Common Issues
- Weak or dead battery
- Incorrect timing during programming
- Interference from nearby devices
- Remote not compatible with opener model
- Memory of opener is full
Quick Fix Table
| Problem | Cause | Solution |
|---|---|---|
| No response | Dead battery | Replace battery |
| Not syncing | Timing error | Retry Learn button step |
| Interference | Signal blockage | Move closer |
| Still not working | Memory full | Reset opener |
How Rolling Code Technology Affects Programming
Modern LiftMaster systems use rolling code technology, which changes the access code every time the remote is used.
This improves security significantly. According to security experts, rolling code systems reduce unauthorized access attempts by over 80% compared to fixed-code systems.
👉 Learn more about rolling code here:
https://en.wikipedia.org/wiki/Rolling_code
How To Reset LiftMaster Garage Door Opener
If programming keeps failing, a reset may help.
Reset Steps:
- Press and hold the Learn button for 6–10 seconds
- Wait until the LED turns off
- This clears all stored remotes
- Reprogram your remote again
Compatibility Guide for LiftMaster Remotes
Not all remotes work with all LiftMaster models.
Compatible Systems
- Security+ 2.0 systems
- Rolling code openers
- Chamberlain group systems
Compatibility Checklist
- Check model number on motor
- Verify frequency (315 MHz or 390 MHz)
- Match remote type
Benefits of Programming Your Own Remote
Advantages vs Disadvantages
Advantages:
- Saves service cost
- Fast setup (under 5 minutes)
- No technician needed
- Improved convenience
Disadvantages:
- Requires precise timing
- Some models are harder to sync
- Must follow steps carefully
How Long Does Programming Take?
On average:
- First attempt: 3–7 minutes
- Experienced users: under 2 minutes
Most users succeed on the first try when following instructions carefully.
Expert Tips for Successful Programming
Here are professional recommendations:
- Stand within 3–5 feet of the motor unit
- Replace remote battery before starting
- Avoid pressing multiple buttons
- Don’t exceed the 30-second window
- Keep other remotes away during setup
Garage system installers report that 90% of failures come from timing errors, not hardware issues.
FAQ: How To Program Remote To Liftmaster Garage Door Opener
1. Why is my LiftMaster remote not programming?
Most often, it’s due to timing issues, weak battery, or incompatible model.
2. Do I need to erase old remotes first?
Not always, but if memory is full or syncing fails, resetting helps.
3. How many remotes can I program?
Most LiftMaster openers support 5–20 remotes, depending on model.
4. Can I program the remote without the Learn button?
No. The Learn button is required for pairing.
5. Why does my garage door only open sometimes?
This may indicate weak battery, signal interference, or sensor issues.
6. Do I need Wi-Fi for programming?
No. Basic remote programming does not require internet.
Conclusion
Learning How To Program Remote To Liftmaster Garage Door Opener is a simple process once you understand the correct steps. By using the Learn button, syncing your remote properly, and following timing instructions, you can complete the setup in just a few minutes.
With proper programming, your garage door becomes more secure, convenient, and reliable for daily use.
If this guide helped you, feel free to share it with others who might be struggling with their LiftMaster remote setup.
Leave a Reply