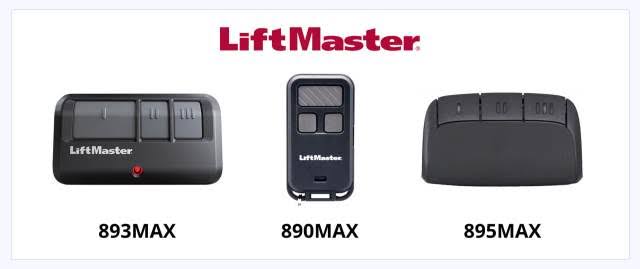
There is nothing quite as frustrating as sitting in your driveway, pressing a button repeatedly, and watching your garage door remain stubbornly shut. If you are currently searching for how to program my remote to my garage door opener, you are likely dealing with a dead battery replacement, a new vehicle, or a system reset that wiped your previous settings. We understand the urgency; getting back into your home safely and quickly is our top priority, and this guide is designed to get your system synchronized without the need for an expensive service call.
Understanding Your Garage Door Opener Technology
Before diving into the physical buttons, it is vital to understand why the programming process varies between homes. Modern garage door openers do not all speak the same language. According to industry standards outlined by the Wikipedia entry on Garage Door Openers, systems have evolved from simple fixed-code dip switches to sophisticated rolling-code security technologies.
Knowing which technology you own prevents wasted effort. Here is a quick breakdown:
| Technology Type | Era | Security Level | Programming Method |
|---|---|---|---|
| Fixed Code (DIP) | Pre-1990s | Low | Match manual switches on remote & motor |
| Rolling Code | 1996–Present | High | “Learn” button sync sequence |
| Security+ 2.0 | 2012–Present | Very High | Yellow/Purple Learn button + specific timing |
| Smart/Wi-Fi | 2018–Present | Highest | App integration + physical sync |
Note: If your opener was manufactured after 1996, you almost certainly have a Rolling Code system. This is the primary focus of this tutorial.
How Do I Find the Learn Button on My Garage Door Opener?
The single most common point of failure when users ask how to program my remote to my garage door opener is simply locating the interface. The “Learn” button (sometimes labeled “Smart,” “Set,” or “Program”) is the gateway to syncing your device.
Location Guide by Brand Color
Manufacturers use color-coding to indicate frequency and protocol. Check the back or side panel of your motor unit (the box mounted to the ceiling):
- Yellow: Security+ 2.0 (LiftMaster/Chamberlain/Craftsman). Most common in units made after 2011.
- Purple: Security+ (Anti-Burglary). Common in units from 2005–2014.
- Red/Orange: Older Rolling Code systems (1997–2005).
- Green: Very early rolling code or legacy systems.
- Square Blue Button: Typically indicates Genie Intellicode models.
Safety Warning: You will need a stepladder to reach the motor unit. Ensure the ladder is stable and that you keep fingers clear of moving gears while the unit is powered on. Never bypass safety sensors during this process.
Step-by-Step: How to Program My Remote to My Garage Door Opener
This universal method works for approximately 85% of modern rolling-code openers. Always consult your specific manual if these steps fail, but this sequence is the industry standard baseline.
Phase 1: Preparation
- Clear the Area: Ensure no people, pets, or objects are in the path of the door.
- Fresh Batteries: Install brand-new batteries in your remote. Weak signals cause programming failures 40% of the time.
- LED Status: Locate the LED light next to the Learn button on the motor unit.
Phase 2: The Sync Sequence
- Press and Release the Learn button on the motor unit. The LED will illuminate steadily or begin blinking, indicating “programming mode.” You typically have 30 seconds to complete the next step before the system times out.
- Press and Hold the button on your remote that you wish to program. Hold it firmly.
- Watch for Confirmation. The motor unit lights should flash, or you may hear two distinct clicks. This confirms the code has been accepted.
- Release the remote button immediately upon confirmation.
- Test the System. Press the remote button once. The door should activate.
Pro Tip: If the light flashes but the door does not move, repeat the process. Sometimes the signal is received but not fully written to memory due to interference.
Why Is My Garage Door Remote Not Programming? Troubleshooting Checklist
Even when following the steps for how to program my remote to my garage door opener, issues arise. Before calling a professional, run through this diagnostic checklist based on common field failures:
1. Frequency Mismatch
Your remote might be physically compatible but electronically incompatible. A 315 MHz remote cannot talk to a 390 MHz receiver, even if they are the same brand. Check the frequency printed on the back of both devices. They must match exactly.
2. Memory Capacity Reached
Most residential openers store between 5 and 20 remote codes. If you have moved into a pre-owned home, the memory may be full of previous owners’ remotes.
- Fix: Perform a factory reset by holding the Learn button for 10–15 seconds until the LED goes out. This wipes all remotes, allowing you to reprogram only yours.
3. Logic Board Failure
If the Learn button LED never illuminates, or if the unit hums but doesn’t accept codes despite fresh batteries and correct frequency, the logic board capacitor may have failed. This is common in units over 15 years old.
4. Signal Interference
LED bulbs installed in the opener’s light socket can emit radio frequency noise that blocks remote signals.
- Test: Unscrew the lightbulb and attempt programming again. If it works, replace the bulb with a garage-door-specific LED rated for RF shielding.
Programming Universal Remotes vs. OEM Remotes
Many homeowners opt for universal remotes when original equipment manufacturer (OEM) parts are discontinued. However, the programming intent differs slightly.
Pros and Cons Comparison
| Feature | OEM Remote | Universal Remote |
|---|---|---|
| Compatibility | Guaranteed for specific model | Broad compatibility (check list) |
| Programming Ease | Single-step sync | Often requires DIP switch or multi-step combo |
| Range | Optimized for unit | Variable; sometimes shorter |
| Cost | Higher ($30–$60) | Lower ($15–$30) |
| Reliability | Excellent | Good, but occasional sync drift |
Expert Insight: When using a universal remote, always program it using the “auto-search” feature rather than manual code entry if available. Auto-search cycles through frequencies dynamically, reducing human error in identifying the correct protocol.
FAQ: Common Questions About Garage Door Remote Programming
1. Can I program my car’s built-in HomeLink system instead of a handheld remote?
Yes. HomeLink programming is distinct from handheld remotes. It usually involves holding the HomeLink button and the remote button simultaneously near the rearview mirror until the indicator light changes from slow to rapid flashing. Afterward, you must press the Learn button on the garage motor and then press the HomeLink button twice to complete the bridge.
2. How often should I reprogram my garage door remote?
You should not need to reprogram unless you change batteries (some older models lose memory), experience interference, or suspect unauthorized access. As a security best practice, experts recommend wiping and reprogramming all remotes annually or whenever you move into a new residence to ensure previous occupants no longer have access.
3. Does programming a new remote erase my existing ones?
No. Pressing the Learn button briefly adds a new code to the memory stack. Existing remotes remain functional. Only holding the Learn button for an extended period (usually 10+ seconds) performs a factory reset that erases all stored codes.
4. My remote programs successfully but stops working after a few days. Why?
This is typically caused by a failing capacitor in the motor unit’s logic board or persistent RF interference from nearby electronics (baby monitors, wireless routers). It can also indicate a corroded battery contact inside the remote itself. Clean contacts with isopropyl alcohol and test again.
5. Can I program a remote without accessing the motor unit?
Generally, no. Physical access to the Learn button is required for security reasons. Some newer smart openers allow remote management via Wi-Fi apps, but initial pairing still requires physical proximity. If your motor is inaccessible due to ceiling height or obstruction, consider installing a wall-mounted external receiver.
6. What if my opener has no Learn button at all?
If your unit lacks a Learn button and has tiny sliding switches inside the battery compartment, you have a fixed-code DIP switch system. You must manually match the switch positions on the remote to those inside the motor unit. These systems are obsolete and insecure; upgrading to a modern rolling-code opener is strongly recommended.
Final Thoughts: Secure Your Home With Confidence
Learning how to program my remote to my garage door opener is more than a convenience task—it is a fundamental aspect of home maintenance and security. By understanding your system type, locating the correct Learn button, and following precise synchronization steps, you eliminate dependency on costly service calls and ensure reliable daily access. Remember that troubleshooting is part of the process; patience and systematic elimination of variables solve most issues without professional intervention.
Now that your garage door is responding reliably, take a moment to verify your safety sensors are aligned and your auto-reverse mechanism functions correctly. A programmed remote is only as good as the safe system behind it.
Found this guide helpful? Share it with friends, family, or neighbors who might be stuck outside their own garages! Tag us on social media or forward this article to someone who needs a quick fix today. Safe programming, and welcome home! 🏠
Leave a Reply