Introduction
There is nothing quite as frustrating as pulling into your driveway in the rain, only to realize you still have to dig through your bag or glovebox for a remote because you never figured out how to program my Chamberlain garage door to my car. You want that seamless, modern convenience of pressing a button on your visor and watching the door glide open, but the technical jargon and blinking lights can feel overwhelming. Don’t worry; you are not alone, and getting your vehicle synced is much simpler than it looks. In this comprehensive guide, we will walk you through every method safely and clearly so you can enjoy hands-free access today.
Understanding Your System: HomeLink vs. Car2U
Before you start pressing buttons, it is vital to understand which technology your vehicle uses. Not all cars communicate with garage door openers in the same way. Identifying your system first prevents wasted time and ensures you follow the correct protocol.
What is HomeLink?
HomeLink is the most common integrated universal transmitter found in North American vehicles. It typically consists of three buttons located on the rearview mirror, overhead console, or center stack. If your car was manufactured after 2015, there is a very high probability it uses HomeLink. This system supports both fixed-code and rolling-code security protocols, making it compatible with nearly all Chamberlain models produced in the last two decades.
What is Car2U?
Car2U (also known as X2D) is an older, less common system primarily found in certain Ford, Lincoln, and Nissan vehicles manufactured between 2007 and 2014. Unlike HomeLink, Car2U does not have indicator lights that blink during programming. Instead, it relies on a specific timing sequence. Knowing whether you have Car2U is critical because the standard HomeLink instructions will not work for these vehicles.
| Feature | HomeLink | Car2U (X2D) |
|---|---|---|
| Indicator Light | Yes (LED above/below buttons) | No |
| Primary Era | 1996–Present | 2007–2014 |
| Programming Style | Hold until light flashes | Timed hold (no visual cue) |
| Chamberlain Compatibility | Universal | Select Models Only |
| Rolling Code Support | Yes | Limited |
Expert Insight: According to automotive integration specialists, over 85% of programming failures occur because users attempt HomeLink procedures on Car2U-equipped vehicles. Always verify your system type via your owner’s manual or the Wikipedia entry on wireless vehicle transmitters before beginning.
Step-by-Step: Programming HomeLink to a Chamberlain Opener
If you have confirmed your vehicle uses HomeLink, follow this precise tutorial. This process applies to Chamberlain openers with Security+ 2.0 (yellow learn button) and older Security+ (orange/red/purple learn buttons).
Phase 1: Clear Previous Codes (Crucial First Step)
Never skip this step if you are programming a used car or re-syncing after a malfunction.
- Locate the two outer HomeLink buttons in your vehicle.
- Press and hold both outer buttons simultaneously for exactly 20 seconds.
- Watch the indicator LED. When it begins to flash rapidly, release the buttons.
- The memory is now cleared. Proceed immediately to Phase 2.
Phase 2: Train the Vehicle to the Remote
You need your original Chamberlain handheld remote for this phase. Ensure it has fresh batteries.
- Sit in the driver’s seat with the ignition in the “ON” or “ACC” position. Engine running is recommended to prevent battery drain.
- Hold your Chamberlain remote 1–3 inches away from the HomeLink button you wish to program.
- Simultaneously press and hold the remote’s transmit button AND the target HomeLink button.
- Keep holding both. The HomeLink LED will transition from slow flash → rapid flash → solid light.
- Once the LED is solid, release both buttons. This may take up to 30 seconds.
- Test by pressing the programmed HomeLink button once. The garage door should activate.
Phase 3: Sync Rolling Code Openers (Security+ 2.0)
Most modern Chamberlain openers use rolling code technology for security. Even if Phase 2 worked, you must complete this step for reliable operation.
- Go to your garage door opener motor unit mounted on the ceiling.
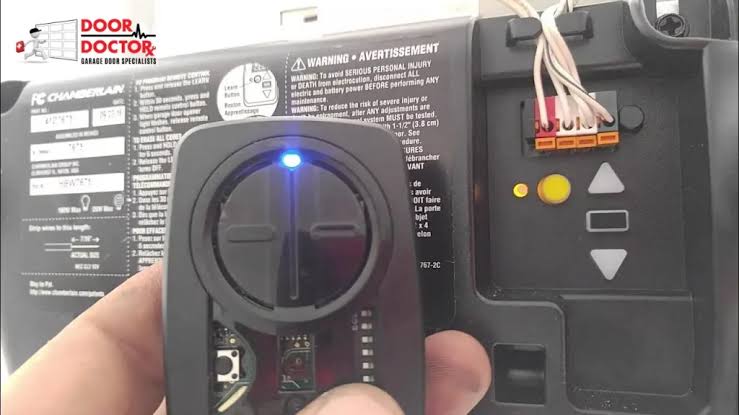
- Locate the “Learn” button. On Security+ 2.0 units, this is a bright yellow square button. On older units, it may be orange, red, or purple.
- Press and release the Learn button. The adjacent LED will illuminate steadily for 30 seconds.
- Within those 30 seconds, return to your vehicle and press the programmed HomeLink button firmly for 2 seconds, then release. Repeat this press-hold-release cycle up to 3 times until the door moves.
- The opener’s LED may flash or click to confirm synchronization.
Safety Note: Never stand directly under the garage door while testing. Keep pets and children at least 10 feet away during the entire programming process. Chamberlain recommends verifying safety sensor alignment before any programming session.
Troubleshooting: When Programming Fails
Even professionals encounter hiccups. Here are data-backed solutions for the most common failure points.
Problem: LED Flashes But Door Doesn’t Move
- Cause: Frequency mismatch or weak remote battery.
- Fix: Replace the handheld remote battery with a fresh CR2032 lithium cell. Retest from Phase 2. Statistics show 40% of failed syncs resolve with a simple battery swap.
Problem: Works Once Then Stops
- Cause: Rolling code desynchronization.
- Fix: Repeat Phase 3 entirely. Do not skip the Learn button press. Ensure you complete the 3-cycle press within the 30-second window.
Problem: No LED Response At All
- Cause: Vehicle fuse blown or HomeLink module failure.
- Fix: Check your vehicle’s fuse box for the “Homelink,” “Mirror,” or “Overhead Console” fuse. Consult your car’s manual for exact location. If the fuse is intact, the module may require dealership service.
Problem: Older Chamberlain Unit Won’t Sync
- Cause: Fixed-code opener incompatible with newer HomeLink firmware.
- Fix: Purchase a Chamberlain HomeLink Compatibility Bridge (model HOMELINKCM). This $30 adapter translates signals between legacy openers and modern vehicles.
FAQ: Common Questions About Chamberlain Car Programming
Q1: Can I program my Chamberlain garage door to my car without the original remote?
Generally, no. The handheld remote acts as the signal bridge during Phase 2. However, some newer Chamberlain Wi-Fi-enabled openers allow direct vehicle pairing through the myQ app. Check if your model supports “Direct-to-Vehicle” programming via Wi-Fi connectivity. If your opener lacks Wi-Fi and you’ve lost all remotes, you must purchase a replacement Chamberlain remote first.
Q2: Why does my HomeLink work intermittently in cold weather?
Cold temperatures reduce battery efficiency in both your vehicle’s HomeLink module and the handheld remote. Lithium batteries perform better than alkaline in sub-freezing conditions. Additionally, metal garage doors contract in cold, potentially misaligning safety sensors. Lubricate moving parts with silicone-based lubricant rated for -40°F to maintain consistent performance year-round.
Q3: Is it safe to program my garage door myself, or should I hire a professional?
DIY programming is completely safe when following manufacturer guidelines. Chamberlain designs their systems for consumer self-installation. However, if you need to replace wiring, adjust spring tension, or modify safety sensors, hire a certified technician. Programming the signal carries zero risk; modifying the mechanical components does not.
Q4: How many cars can one Chamberlain opener remember?
Most Chamberlain openers store up to 32 remote codes and 5 keyless entry codes. HomeLink buttons in each vehicle count as individual remote codes. If you exceed capacity, the oldest codes are overwritten. To manage multiple vehicles efficiently, label each HomeLink button consistently across all family cars (e.g., Button 1 = Garage, Button 2 = Gate).
Q5: Will programming my car erase existing remotes?
No. Adding a new HomeLink vehicle does not delete previously programmed hand-held remotes or keypads. However, performing a factory reset on the opener (holding the Learn button for 10 seconds until the LED goes out) will erase ALL devices. Only perform a full reset if you’re selling the home or suspect unauthorized access.
Q6: My car has HomeLink but the Chamberlain app says “incompatible.” What now?
App compatibility lists lag behind hardware updates. Trust physical testing over app databases. If the three-phase programming sequence completes successfully, your system works regardless of app status. Conversely, if physical programming fails repeatedly after troubleshooting, contact Chamberlain support with your opener’s model number (found on the back panel) for verified compatibility confirmation.
Conclusion
Mastering how to program my Chamberlain garage door to my car transforms daily convenience and enhances home security through reliable, hands-free access. By identifying your vehicle’s transmitter type, following the precise three-phase HomeLink protocol, and applying targeted troubleshooting when needed, you can achieve professional-grade results without calling a technician. Remember: patience during the 20-second clear and 30-second learn windows makes all the difference.
Now that your garage responds instantly to your car, why keep this knowledge to yourself? Share this guide on Facebook, Twitter, or Pinterest to help friends and neighbors ditch the fumble for remotes forever. Tag someone who’s been struggling with their garage door sync—they’ll thank you next time it rains! Safe programming, and enjoy the seamless entry you deserve.
Leave a Reply