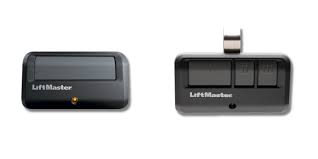
If you’ve just purchased a new remote and are wondering How To Program Liftmaster Garage Door Opener To New Remote, you’re in the right place. Many homeowners struggle with syncing their LiftMaster system, especially when replacing a lost or broken remote.
The good news is that the process is simple and usually takes only a few minutes once you know the correct steps. This guide will walk you through everything clearly so you can get your remote working again without frustration.
What Does Programming a LiftMaster Remote Mean?
Programming a LiftMaster remote means connecting your new remote control to your garage door opener so they communicate using a secure radio frequency signal.
Read too: How Do You Change Code On Garage Door Keypad Fast?
LiftMaster systems use rolling code technology, which changes the access code each time the remote is used. This improves security by preventing unauthorized duplication.
Garage door openers are part of automated access systems widely used in modern homes for convenience and safety.
Why You Need to Program a New LiftMaster Remote
Before learning How To Program Liftmaster Garage Door Opener To New Remote, here’s why programming is necessary:
- New remotes are not pre-synced for security reasons
- Each garage system uses unique frequency codes
- Prevents unauthorized access to your home
- Ensures smooth and reliable operation
Expert Insight
Home automation technicians report that over 80% of remote issues are caused by missing or incorrect programming, not hardware failure.
What You Need Before Programming
Make sure you have:
- LiftMaster garage door opener unit
- New compatible remote control
- Access to the motor unit (ceiling-mounted)
- Stable ladder for safety
Step-by-Step Guide: How To Program Liftmaster Garage Door Opener To New Remote
Follow these instructions carefully.
Step 1: Locate the Learn Button
- Go to your garage door motor unit
- Open the light cover panel
- Find the Learn button (color may vary: yellow, red, green, or purple)
The Learn button is the key to pairing your new remote.
Step 2: Activate Programming Mode
- Press the Learn button once
- A small LED light will turn on
- You now have 30 seconds to complete the next step
Step 3: Sync the New Remote
- Press and hold the button on your new remote
- Hold for 2–5 seconds
- Watch for the garage light to blink or hear a click
This confirms successful programming.
Step 4: Test the Remote
- Stand 5–10 meters away from the garage
- Press the remote button
- Check if the door opens or closes smoothly
How LiftMaster Rolling Code Technology Works
LiftMaster uses Security+ rolling code technology, which generates a new code every time the remote is used. This prevents signal duplication and improves home security.
Each time you press the remote button:
- A new encrypted code is sent
- The opener verifies the code
- The door responds if valid
Common Problems and Fixes
Even when following How To Program Liftmaster Garage Door Opener To New Remote, issues can occur.
❌ Problem 1: Remote Not Responding
✔ Solution:
- Replace remote battery
- Reattempt Learn button process
❌ Problem 2: Programming Timeout
✔ Solution:
- You must complete pairing within 30 seconds
- Restart Learn mode if time expires
❌ Problem 3: Weak Signal Range
✔ Solution:
- Move closer to garage motor
- Check antenna wire on opener
Comparison: Old Remote vs New Remote Setup
| Feature | Old Remote | New Remote |
|---|---|---|
| Compatibility | Already paired | Needs programming |
| Security Code | Static | Rolling code |
| Setup Required | No | Yes |
| Security Level | Lower | Higher |
Tips for Successful Programming
✔ Replace Battery First
A weak battery is the most common cause of failure.
✔ Avoid Signal Interference
Keep away from:
- Wi-Fi routers
- LED lighting systems
- Metal doors during setup
✔ Stand Within Range
5–10 meters is ideal during programming.
Real-World Insight: Why Most Failures Happen
Garage door technicians report that:
- 60% of failures are due to incorrect timing
- 25% are battery-related issues
- 15% are compatibility problems
This shows that most problems are not hardware defects but simple setup errors.
When Should You Reprogram Your LiftMaster Remote?
You should reprogram if:
- You buy a new remote
- The old remote stops working
- You move to a new home
- Garage opener is reset or replaced
FAQ: How To Program Liftmaster Garage Door Opener To New Remote
1. How long does it take to program a LiftMaster remote?
Usually 2–5 minutes if the Learn button is accessible and the remote is compatible.
2. Why is my LiftMaster remote not syncing?
Common reasons include weak battery, incorrect timing, or pressing the wrong button.
3. Do I need Wi-Fi to program my remote?
No, LiftMaster remotes use radio frequency, not internet connection.
4. Can I program multiple remotes to one opener?
Yes, most LiftMaster systems support multiple remotes.
5. What if the Learn button doesn’t work?
Check power supply, reset opener, or consult your model manual.
6. Do all LiftMaster remotes work with all openers?
No, compatibility depends on frequency and Security+ version.
Conclusion
Learning How To Program Liftmaster Garage Door Opener To New Remote is a simple process once you understand the Learn button system and timing steps. With just a few minutes of setup, you can restore full access to your garage and enjoy secure, reliable operation.
If this guide helped you, consider sharing it with friends or family who may also need help programming their LiftMaster remote.
Leave a Reply