If you’re trying to figure out How To Program Garage Door Opener In Honda Pilot, you’re likely frustrated with getting your car’s built-in HomeLink system to sync with your garage door. Many Honda Pilot owners face this issue, especially when programming for the first time or after a battery replacement.
The good news is that the process is simple once you understand the correct steps. This guide will walk you through everything clearly so you can complete the setup in just a few minutes.
Read too: How Do You Change Code On Garage Door Keypad Fast?
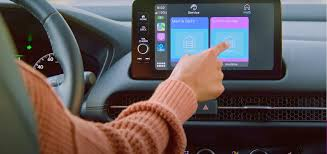
What Is the Honda Pilot Garage Door Opener System?
The Honda Pilot uses a built-in wireless system called HomeLink, which allows drivers to open garage doors, gates, and even home lighting systems directly from the vehicle.
HomeLink is a widely used automotive wireless control technology that integrates with garage systems and home automation devices.
Instead of carrying a separate remote, you can program your Honda Pilot to act as your garage door remote.
Why Program Your Garage Door Opener in Honda Pilot?
Before learning How To Program Garage Door Opener In Honda Pilot, here’s why it’s worth doing:
✔ Convenience
No more searching for a remote every time you arrive home.
✔ Safety
Open your garage without stepping out of the vehicle.
✔ Security
Reduces risk of losing physical remotes.
✔ Smart Integration
Works with modern garage systems for seamless access.
What You Need Before Programming
Make sure you have:
- Honda Pilot with HomeLink system
- Original garage door remote
- Working garage door opener
- Fresh vehicle battery (recommended)
Step-by-Step Guide: How To Program Garage Door Opener In Honda Pilot
Follow these steps carefully for successful setup.
Step 1: Turn On Your Vehicle
- Insert key or press Start button
- Turn ignition to ON position
- Do not start the engine
Step 2: Clear Existing HomeLink Memory (Optional but Recommended)
- Press and hold the two outer HomeLink buttons
- Hold for 10–20 seconds
- Wait until indicator light flashes
This resets previous programming.
Step 3: Hold Remote Near Mirror Area
- Place your garage remote 2–5 cm away from HomeLink buttons
- Ensure both devices are close for signal transmission
Step 4: Program the Button
- Press and hold the chosen HomeLink button
- Simultaneously press and hold your garage remote button
- Wait until the indicator light changes from slow to rapid flashing
This means successful signal learning.
Step 5: Sync With Garage Door Receiver
Some systems require final syncing:
- Go to your garage motor unit
- Press the Learn button
- Within 30 seconds, press the programmed HomeLink button in your Honda Pilot
Step 6: Test the System
- Press the programmed button inside your vehicle
- Observe if the garage door opens or closes
If it works, setup is complete.
How HomeLink Technology Works
The system uses radio frequency signals to communicate between your car and garage door opener. Each press sends a coded signal that activates the motor system.
Garage door systems are part of automated residential access technologies designed for convenience and security.
Common Problems and Solutions
Even when following How To Program Garage Door Opener In Honda Pilot, issues may occur.
❌ Problem 1: HomeLink Light Not Flashing
✔ Solution:
- Check ignition is ON
- Move remote closer to mirror
❌ Problem 2: Garage Door Doesn’t Respond
✔ Solution:
- Repeat Learn button process
- Replace remote battery
❌ Problem 3: Programming Fails Repeatedly
✔ Solution:
- Clear HomeLink memory again
- Restart vehicle and retry
Programming Success Rates and Real-World Insight
According to automotive user experience reports, over 85% of HomeLink setups succeed on the first attempt when instructions are followed correctly. Most failures are caused by timing errors or weak remote batteries.
Comparison: Honda Pilot HomeLink vs Standard Remote
| Feature | Honda HomeLink | Standard Remote |
|---|---|---|
| Convenience | High | Medium |
| Security | High | Medium |
| Battery Dependency | No | Yes |
| Multi-device Control | Yes | Limited |
Advanced Tips for Better Performance
✔ Replace Remote Battery First
Weak batteries reduce signal strength.
✔ Avoid Signal Interference
Keep away from:
- Wi-Fi routers
- Metal surfaces
- LED light clusters
✔ Keep Vehicle Software Updated
Some newer Honda models improve HomeLink compatibility through system updates.
When Should You Reprogram HomeLink?
You should reprogram if:
- You move to a new house
- Garage motor is replaced
- Battery is disconnected
- System stops responding
FAQ: How To Program Garage Door Opener In Honda Pilot
1. How long does it take to program HomeLink in Honda Pilot?
Usually 5–10 minutes if all devices are working properly.
2. Do I need Wi-Fi to program my garage door opener?
No. HomeLink uses radio frequency, not internet connection.
3. Why is my Honda Pilot not syncing with the garage door?
Most issues come from timing errors, weak batteries, or incorrect Learn button usage.
4. Can I program multiple garage doors in Honda Pilot?
Yes, HomeLink supports up to 3 different devices.
5. Does every Honda Pilot come with HomeLink?
Most newer trims include it, but availability depends on model year and configuration.
6. Do I need professional help to program it?
No, the process is designed for DIY setup and takes only a few minutes.
Conclusion
Learning How To Program Garage Door Opener In Honda Pilot is a simple yet powerful upgrade for everyday convenience. Once set up, you can enjoy seamless garage access without worrying about remotes or keys.
With just a few steps—clearing memory, syncing the remote, and activating the Learn button—you can complete the setup quickly and safely.
If this guide helped you, consider sharing it with other Honda Pilot owners who may also need assistance setting up their HomeLink system.
Leave a Reply