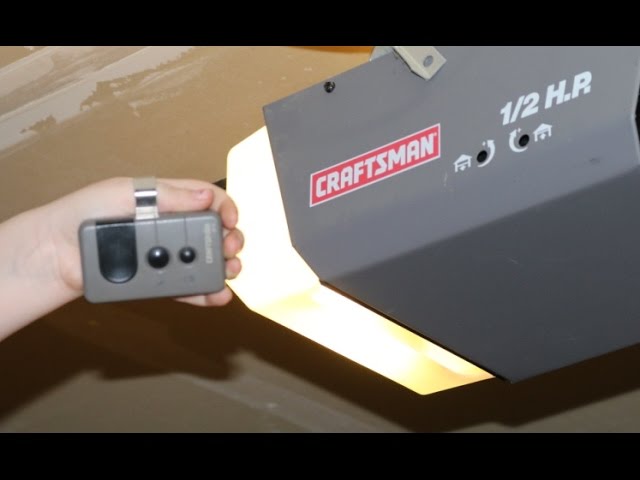
Introduction
There are few things more frustrating than standing in your driveway, pressing a remote button repeatedly, and watching your garage door remain stubbornly closed. If you have recently replaced a battery, lost a remote, or moved into a new home, understanding how to program garage door opener Craftsman 1/2 HP units is essential for restoring convenience and security. This comprehensive guide walks you through every step with empathy and precision, ensuring you get back inside your home safely and quickly without needing to call an expensive technician.
Programming these openers can feel intimidating due to varying model years and security protocols, but the process is actually quite standardized. Whether you are syncing a new visor remote, setting up an exterior keypad, or resetting the entire system after a power outage, this article provides the exact specifications and safety protocols you need. We have designed this tutorial specifically for US homeowners who want reliable, professional-grade results using simple tools and clear instructions.
Understanding Your Craftsman 1/2 HP Model Identification
Before attempting any programming sequence, accurate identification of your specific unit is critical. The “1/2 HP” designation refers to the motor’s lifting capacity, not the programming protocol. Craftsman has manufactured these openers for decades, often in partnership with Chamberlain Group, meaning many share internal logic but differ in external interfaces.
Locating the Learn Button Color
The most vital data point for programming is the color of the “Learn” or “Smart” button located on the rear or side panel of the motor head. This color dictates the frequency and security rolling code technology used.
| Learn Button Color | Technology Era | Remote Compatibility | Security Type |
|---|---|---|---|
| Purple | 2006–2014 | 390 MHz | Security+ Rolling Code |
| Orange/Amber | 1997–2005 | 390 MHz | Security+ Rolling Code |
| Red | Pre-1997 | 390 MHz | Fixed Code (DIP Switch) |
| Yellow | 2011–Present | 310/315/390 MHz | Security+ 2.0 |
| Green | Legacy Models | Varies | Early Rolling Code |
Expert Note: According to technical documentation referenced in Wikipedia, modern rolling code systems change the access code after every use to prevent code grabbing. Always match your remote’s frequency to your learn button color to ensure successful synchronization.
Step-by-Step: Programming a Standard Remote Control
This is the most common task when learning how to program garage door opener Craftsman 1/2 HP systems. Ensure your ladder is stable and the area around the motor is clear before beginning.
Preparation Checklist
- Fresh CR2032 or A23 battery installed in the remote.
- Ladder positioned safely beneath the motor unit.
- LED light on the motor housing is functional.
- No obstructions blocking the safety sensors at floor level.
The Programming Sequence
- Locate the Learn Button: Climb safely and find the colored button on the back panel. You may need to remove a plastic lens cover on older models.
- Initiate Learning Mode: Press and release the Learn button. An LED indicator will illuminate or begin blinking, signaling a 30-second programming window.
- Transmit Signal: Within those 30 seconds, press and hold the desired button on your remote. Hold it firmly until the motor unit lights flash or you hear two distinct clicks.
- Verify Synchronization: Release the remote button. Test the function immediately by pressing the button once from ground level. The door should respond instantly.
- Repeat for Additional Remotes: If you have multiple family members, repeat steps 2–4 for each device within the same session to avoid timeout errors.
If the light does not flash during step 3, replace the remote battery and restart the sequence. Weak batteries are the #1 cause of programming failure.
Syncing Wireless Keyless Entry Pads
Exterior keypads provide essential backup access when remotes fail or batteries die. The process differs slightly from remote programming because the keypad itself generates the initial handshake signal.
Detailed Keypad Setup Instructions
- Enter Factory Default: On the keypad, enter the current PIN (or factory default if new) followed by the Program button.
- Activate Motor Learn Mode: Press the Learn button on the overhead motor unit. Watch for the indicator light activation.
- Send New PIN: Return to the keypad within 30 seconds. Enter your new 4-digit PIN and press the Enter button.
- Confirm Handshake: Wait for the motor lights to flash or click. This confirms the new PIN has been accepted and stored in non-volatile memory.
- Test Thoroughly: Close the door completely, wait 10 seconds, then test the new PIN. Do not assume success without physical verification.
Pro Tip: Choose a PIN that avoids sequential numbers (1234) or birth years. Security experts recommend random combinations that are easy for you to recall but statistically improbable for intruders to guess.
Troubleshooting Common Programming Failures
Even professionals encounter hiccups. When standard procedures fail, systematic diagnosis saves time and prevents unnecessary part replacements.
Diagnostic Flowchart Text
- Remote LED blinks but door doesn’t move? → Check safety sensor alignment; clean lenses with microfiber cloth.
- Motor learns but forgets code after power cycle? → Failing logic board capacitor; consider professional repair.
- Range less than 5 feet? → Antenna wire damaged or RF interference from nearby LED bulbs.
- Keypad accepts code but reverses immediately? → Travel limit settings require recalibration via adjustment screws.
- All remotes stopped working simultaneously? → System lockout mode activated; perform full factory reset.
Addressing LED Bulb Interference
A frequently overlooked issue involves aftermarket LED lighting. Cheap LED drivers emit radio frequency noise that jams the 315/390 MHz receiver. If programming fails inexplicably, temporarily unscrew all garage LED bulbs and retry. If success returns, replace bulbs with FCC-compliant “garage door safe” variants specifically shielded against RF emission.
Safety Protocols and Maintenance Best Practices
Programming is only half the equation; maintaining safe operation protects your family and property. The Consumer Product Safety Commission mandates regular testing of auto-reverse mechanisms, which directly interact with your programmed settings.
Monthly Safety Verification Routine
- Photo-Eye Test: Wave an object under the beam while closing. Door must reverse instantly upon interruption.
- Force Setting Test: Place a 2×4 wood block flat on the floor where the door closes. Door must reverse upon contact, not crush the wood.
- Manual Release Check: Pull the emergency release cord to verify smooth disengagement for power outages.
- Hardware Inspection: Tighten all mounting brackets, roller bolts, and track fasteners to prevent vibration-induced misalignment.
Never bypass safety sensors to force programming completion. This violates federal regulations and creates severe entrapment hazards.
Frequently Asked Questions (FAQ)
Q1: Why won’t my Craftsman 1/2 HP opener accept new remotes after a power surge?
Power surges can corrupt the logic board’s volatile memory or damage the receiver module. First, perform a hard reset by unplugging the unit for 60 seconds. If reprogramming still fails, the circuit board likely requires replacement. Surge protectors rated for garage openers are recommended investments to prevent recurrence.
Q2: Can I program a universal remote to my Craftsman 1/2 HP unit?
Yes, provided the universal remote supports your specific Learn button color/frequency. Consult the universal remote’s compatibility chart before purchase. Programming typically involves entering a manufacturer-specific code sequence rather than the standard Learn button method. Success rates exceed 90% for post-1997 Security+ models.
Q3: How do I erase all previously programmed remotes and keypads?
Press and hold the Learn button on the motor unit for approximately 6–10 seconds until the indicator LED turns off completely. This wipes all paired devices from memory. You must then reprogram every remote and keypad individually. Perform this when selling your home or after losing a remote to maintain security integrity.
Q4: What causes intermittent operation where the door works sometimes but not others?
Intermittent failures usually indicate weak batteries, loose antenna connections, or environmental RF interference. Start by replacing all remote batteries with premium alkaline cells. Next, inspect the hanging antenna wire for breaks or corrosion. Finally, identify potential interference sources like Wi-Fi routers, baby monitors, or ham radios operating near the garage.
Q5: Is there a difference between programming Chain Drive vs Belt Drive 1/2 HP models?
No. The programming protocol is determined solely by the logic board and Learn button color, not the drive mechanism. Both chain and belt drive variants within the same production era use identical remote synchronization procedures. Focus exclusively on matching the Learn button color when selecting compatible accessories.
Q6: My Craftsman opener has no visible Learn button; what should I do?
Older pre-1997 models use DIP switches instead of Learn buttons. Open both the remote and motor housing to reveal tiny sliding switches. Match the switch positions exactly between devices. These fixed-code systems lack modern security features; upgrading to a newer Security+ receiver kit is strongly advised for enhanced protection.
Conclusion
Mastering how to program garage door opener Craftsman 1/2 HP systems empowers you to maintain household security and convenience independently. By correctly identifying your Learn button color, following precise timing sequences, and adhering to safety verification protocols, you eliminate dependency on costly service calls while ensuring reliable daily operation. Remember that proper maintenance and periodic safety testing are just as important as initial programming for long-term performance.
We hope this guide has resolved your garage door challenges and restored peace of mind. If you found these instructions helpful, please share this article on Facebook, Twitter, or Pinterest to assist fellow homeowners facing similar issues. Your social shares help us continue creating free, expert-level content that keeps American homes safe and functional. Have additional questions or unique model variations? Drop a comment below—our community of DIY enthusiasts and professionals is always ready to help!
Leave a Reply