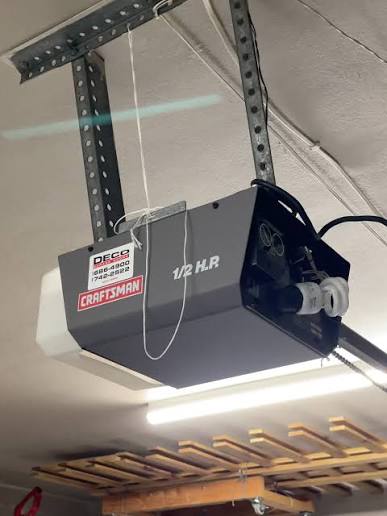
Introduction
There are few things more frustrating than standing in your driveway with groceries in hand, only to realize your garage door remote isn’t responding. If you have recently replaced a battery, moved into a new home, or reset your system, knowing how to program Craftsman 1/2 HP garage door opener units is an essential skill that saves both time and service fees. This guide provides clear, empathetic, and professional instructions to get your system running smoothly again, ensuring your home remains secure and accessible without unnecessary stress.
Understanding Your Craftsman 1/2 HP System
Before diving into the programming steps, it is vital to identify which generation of opener you own. The Craftsman 1/2 HP model has been a staple in American homes for decades, but the programming method differs significantly between older “dip switch” models and newer “Security+” rolling code systems.
According to industry standards documented on Wikipedia, modern openers utilize rolling code technology to prevent signal interception, a massive upgrade from the fixed-code systems of the past. Identifying your unit’s era ensures you do not waste time pressing buttons that serve no function on your specific model.
Quick Identification Table
| Feature | Older Models (Pre-1993) | Newer Models (1993–Present) |
|---|---|---|
| Code Type | Fixed DIP Switches | Rolling Code / Security+ |
| Learn Button Color | None / Toggle Switches | Orange, Purple, Yellow, or Red |
| Remote Style | Large, 8-12 switches inside | Compact, 1-3 buttons |
| Programming Method | Match physical switches | Press “Learn” button + Remote |
| Safety Sensors | Often absent | Mandatory infrared sensors |
How Do I Find the Learn Button on My Craftsman Opener?
The most common question users ask when figuring out how to program Craftsman 1/2 HP garage door opener systems is simply locating the interface. On most 1/2 HP chain-drive and belt-drive units, the “Learn” or “Smart” button is located on the back panel or the side of the motor head, near the antenna wire.
- Yellow Learn Button: Indicates Security+ 2.0 (2011–Present).
- Orange/Red Learn Button: Indicates Security+ (1997–2011).
- Purple Learn Button: Indicates older rolling code tech (2005–2014 variants).
- Green Learn Button: Early rolling code or proprietary frequency.
Note: Always use a sturdy ladder and ensure the area is well-lit when inspecting the motor head. Safety should never be compromised for convenience.
Step-by-Step: Programming a Standard Remote Control
This is the primary solution for 90% of users. Follow these concrete steps precisely. Deviating from the timing can cause the memory to fail.
- Clear the Area: Ensure nothing is obstructing the door’s path and the safety sensors are aligned.
- Locate the Learn Button: Climb safely to the motor unit and find the colored button identified in the previous section.
- Press the Learn Button: Press and release the button. An LED indicator will light up or begin blinking. You typically have 30 seconds to complete the next step before the system times out.
- Activate the Remote: Within that 30-second window, press and hold the button on your remote that you wish to program. Hold it until the motor unit’s lights flash or you hear two distinct clicks.
- Test Immediately: Step down safely and test the remote from at least 5 feet away. The door should respond instantly.
Pro Tip: If the light on the motor unit does not flash during step 4, replace the remote battery immediately. A weak signal is the #1 cause of programming failure, even if the battery seems new.
How To Program a Wireless Keypad Entry System
Many homeowners prefer keyless entry. Programming a keypad for a Craftsman 1/2 HP unit follows a similar logic but requires entering a PIN.
- Press and release the Learn Button on the motor unit.
- Within 30 seconds, enter your desired 4-digit PIN on the exterior keypad.
- Press and hold the ENTER button on the keypad.
- Release the ENTER button when the motor unit lights flash or click.
- Test by entering the PIN and pressing ENTER.
Crucial Detail: Avoid using obvious PINs like “1234” or your house number. Security experts recommend randomized codes to prevent unauthorized access via social engineering or observation.
Troubleshooting: Why Won’t My Craftsman Opener Program?
Even when you know how to program Craftsman 1/2 HP garage door opener devices correctly, issues arise. Here is a diagnostic checklist based on field experience:
1. The LED Flashes But Door Doesn’t Move
This usually indicates a safety sensor misalignment rather than a programming error. Check the small LED lights on the sensors at the floor level. Both should be solid (not blinking). If one is off or blinking, realign the bracket until both glow steadily.
2. Remote Works Only When Very Close
If you must stand directly under the opener for it to work, you likely have RF interference or a failing logic board capacitor. Try changing the remote battery first. If that fails, check for nearby LED bulbs; some cheap LED garage lights emit frequencies that jam opener signals.
3. Memory Wipes After Power Outage
Older 1/2 HP units may lose programming after surges. Installing a dedicated surge protector for your garage door opener is a cost-effective ($15–$25) investment that preserves memory and extends the logic board’s lifespan.
4. Limit Switch Issues
If the door programs but reverses immediately upon hitting the floor, the travel limits need adjustment, not reprogramming. Locate the white plastic dials on the side of the motor unit labeled “Up” and “Down.” Adjust the “Down” dial slightly clockwise to increase travel distance.
Frequently Asked Questions (FAQ)
Can I program multiple remotes to one Craftsman 1/2 HP opener?
Yes. Most Craftsman 1/2 HP models support up to 8 remotes and 1 keypad simultaneously. Simply repeat the standard programming steps for each additional device. You do not need to reprogram existing remotes when adding new ones unless you perform a full factory reset.
How do I erase all programmed devices from my opener?
To wipe the memory completely, press and hold the Learn button on the motor unit for approximately 6–10 seconds until the LED turns off. This is useful when moving out of a home or if you suspect unauthorized access. All remotes and keypads will need to be re-synced afterward.
Is there a difference between Craftsman and LiftMaster programming?
Functionally, no. Craftsman openers are manufactured by Chamberlain Group, the same company behind LiftMaster. The internal components, frequencies, and programming procedures for 1/2 HP models are virtually identical. Remotes branded as LiftMaster often work seamlessly with Craftsman units of the same era.
What if my Craftsman opener doesn’t have a Learn button?
If your unit lacks a colored Learn button and instead has a bank of tiny sliding switches inside the remote and motor unit, you have a pre-1993 fixed-code model. You must manually match the switch positions (up/down/center) on the remote to the motor unit exactly. These units lack modern security features, and upgrading to a new 1/2 HP system is strongly recommended for safety.
Why did my remote stop working after changing batteries?
Some older Craftsman remotes require a brief reset after battery replacement. Remove the new battery, hold the remote button for 10 seconds to discharge residual power, reinsert the battery, and reprogram. Also, verify you are using alkaline batteries; lithium batteries sometimes provide voltage spikes that confuse older receiver boards.
Can smart home devices interfere with programming?
Potentially, yes. Wi-Fi routers, baby monitors, and wireless doorbells operating on 315 MHz or 390 MHz can cause interference. If programming consistently fails, temporarily unplug nearby wireless devices to isolate the issue. Modern Security+ 2.0 openers use tri-band frequency hopping specifically to mitigate this problem.
Conclusion
Mastering how to program Craftsman 1/2 HP garage door opener systems empowers you to maintain your home’s security and convenience independently. Whether you are syncing a new remote, setting up a keypad, or troubleshooting intermittent failures, the key lies in identifying your model generation and following precise timing protocols. Remember, most issues stem from simple causes like dead batteries, sensor misalignment, or RF interference rather than catastrophic hardware failure.
By keeping this guide bookmarked, you transform a potentially stressful situation into a manageable five-minute task. Your garage door is your home’s largest moving appliance; treating it with informed care ensures reliable performance for years to come.
Found this guide helpful? Share it with friends, family, or neighbors who might be stuck in their driveways right now! Tag us on social media or leave a comment below with your specific model number if you need personalized assistance. Safe programming, and welcome home!
Leave a Reply