Introduction
There are few things more frustrating than sitting in your driveway, clicking a garage door remote that refuses to respond, especially when you are tired or the weather is turning bad. If you have recently purchased a replacement remote, moved into a new home, or simply need to reset your system, understanding how to program a remote for Chamberlain garage door opener systems is an essential homeowner skill. This comprehensive guide will walk you through the exact steps to get your remote synced safely and quickly, restoring convenience to your daily routine without the immediate need for a professional service call.
Understanding Your Chamberlain System Before Programming
Before you climb a ladder or start pressing buttons, it is vital to identify which generation of Chamberlain opener you own. Chamberlain has manufactured garage door openers for decades, and the programming method varies significantly between models with a “Learn Button” (post-1993) and older DIP switch models.
According to industry standards and historical documentation found on Wikipedia, modern rolling code technology was mandated in North America after 1993 to prevent unauthorized access via code grabbing. This means if your unit was manufactured after this date, it likely uses a Learn Button system rather than manual switch alignment.
Identifying Your Learn Button Color
The color of the Learn Button on your motor head is the primary indicator of compatibility:
- Yellow Learn Button: Indicates Security+ 2.0 technology (2011–present). Compatible with newer remotes featuring yellow battery compartments.
- Purple Learn Button: Indicates Security+ technology (2006–2014).
- Red/Orange Learn Button: Found on older Security+ models (1997–2005).
- Green Learn Button: Typically indicates early rolling code models (1993–1996).
Note: Always verify compatibility by checking the model number on the back of your remote against the opener’s manual before attempting to program.
Step-by-Step: How to Program a Remote For Chamberlain Garage Door Opener
For the vast majority of homeowners with post-1993 units, the following method applies. Please ensure you have safe access to the motor unit and a stable ladder.
Step 1: Locate the Learn Button
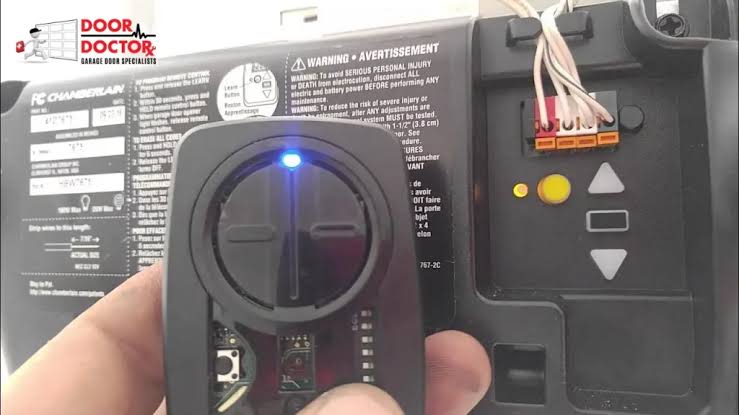
Find the Learn Button on the back or side of the garage door opener motor unit hanging from your ceiling. It is usually located near the antenna wire or under the light lens cover. You may need to remove the plastic lens cover to access it.
Step 2: Clear Previous Codes (Optional but Recommended)
If you are programming a used remote or suspect interference, press and hold the Learn Button for approximately 6 to 10 seconds until the LED indicator turns off completely. This erases all previously paired remotes and keypads. Warning: You will need to reprogram all existing devices after doing this.
Step 3: Initiate Programming Mode
Press and release the Learn Button firmly. The LED indicator next to the button will illuminate steadily or begin blinking, depending on your model. You now have exactly 30 seconds to complete the next step before the system times out.
Step 4: Transmit the Remote Signal
Within the 30-second window, press and hold the button on your remote that you wish to use for the garage door. Hold it for 1 to 2 seconds, then release. Repeat this press-hold-release cycle up to three times if necessary.
Step 5: Confirm Successful Syncing
Watch the lights on both the motor unit and the remote. Successful programming is typically indicated by:
- The Learn Button LED flashing or turning off.
- The garage door opener lights flashing twice.
- An audible click from the motor unit.
Test the remote immediately from a safe distance outside the garage to ensure proper operation.
Troubleshooting Common Programming Failures
Even when you know how to program a remote for Chamberlain garage door opener systems correctly, issues can arise. Use this diagnostic table to resolve common problems efficiently.
| Symptom | Probable Cause | Recommended Solution |
|---|---|---|
| LED does not turn on when Learn Button pressed | Faulty logic board or power issue | Check power outlet; test GFCI reset; inspect wiring harness connections |
| Remote programs but door doesn’t move | Remote frequency mismatch | Verify remote compatibility with opener model year; check antenna integrity |
| Programming times out repeatedly | Weak remote battery or signal interference | Replace CR2032 battery; remove nearby LED bulbs or WiFi routers temporarily |
| Door reverses immediately after closing | Safety sensor misalignment | Clean sensor lenses; realign brackets so indicator lights are solid green |
| Remote works only at very close range | Antenna damage or RF interference | Extend antenna wire downward; avoid wrapping around metal conduit |
Expert Tip: Battery Quality Matters
A study of garage door service calls reveals that over 40% of “failed programming” incidents are actually caused by weak batteries. Always use fresh, name-brand alkaline or lithium batteries. Avoid rechargeable batteries in garage remotes, as their lower voltage output often fails to trigger the receiver reliably.
Safety Precautions During Programming
Programming involves working near heavy machinery and electrical components. Adhere to these non-negotiable safety rules:
- Disconnect Power When Accessing Internals: If you must remove the light lens or cover, unplug the opener first to prevent accidental activation or electrical shock.
- Keep Hands Clear: Never place fingers near moving parts, chains, or belts while testing the remote.
- Verify Sensor Operation: After programming, always test the auto-reverse feature by placing a 2×4 board on the floor in the door’s path. The door should reverse upon contact. This is a federal safety requirement.
- Secure Your Ladder: Ensure your stepladder is on level ground and fully locked before climbing to reach the motor unit.
Frequently Asked Questions (FAQ)
Can I program multiple remotes to the same Chamberlain opener?
Yes, most Chamberlain openers can store between 8 to 20 remote codes depending on the model and generation. Simply repeat the programming steps for each additional remote within the 30-second learning window. Each remote can be assigned to the same door function or different functions if you have a multi-door system.
Why did my Chamberlain remote stop working suddenly?
Sudden failure is most commonly caused by a depleted battery, signal interference from new LED lighting fixtures, or a tripped GFCI outlet. Less commonly, the remote itself may have suffered internal damage from dropping or moisture exposure. Start by replacing the battery and checking the power source before assuming the remote is defective.
Do I need to reprogram my remote after a power outage?
Generally, no. Chamberlain openers use non-volatile memory that retains programmed codes during power loss. However, if the outage was accompanied by a significant power surge, the logic board may have been damaged or reset. If your remote fails after a storm-related outage, try reprogramming it first before calling a technician.
Is there a universal remote compatible with Chamberlain openers?
Yes, Chamberlain manufactures its own universal remotes (such as the KLIK1U series) designed to work across multiple brands and generations. Third-party universal remotes are also available, but official Chamberlain/LiftMaster products guarantee full compatibility with advanced features like MyQ integration and dual-band frequency hopping.
How do I erase a lost or stolen remote from my system?
Perform a factory reset by holding the Learn Button for 6–10 seconds until the LED goes dark. This clears ALL stored codes, ensuring the lost remote cannot operate your door. You must then reprogram every legitimate remote and keypad you still possess. Consider this a critical security measure.
Can I program my car’s built-in Homelink system instead of a handheld remote?
Absolutely. Most modern vehicles feature Homelink transmitters compatible with Chamberlain openers. The process differs slightly: you typically program the vehicle transmitter to the opener using the Learn Button, following instructions specific to your car manufacturer. Consult both your vehicle owner’s manual and Chamberlain’s Homelink compatibility guide for precise steps.
Conclusion
Mastering how to program a remote for Chamberlain garage door opener systems empowers you to maintain one of your home’s most frequently used entry points independently. By identifying your Learn Button color, following the precise 30-second programming sequence, and applying basic troubleshooting when needed, you can save time, money, and unnecessary frustration. Remember to prioritize safety, use quality batteries, and verify your auto-reverse sensors regularly to keep your household secure.
Did this guide help you get back into your garage smoothly? Share this article with friends, family, or neighbors who might be struggling with their own garage door remotes! A quick social media share could save someone else a costly service call and restore their peace of mind today. Happy programming!
Leave a Reply