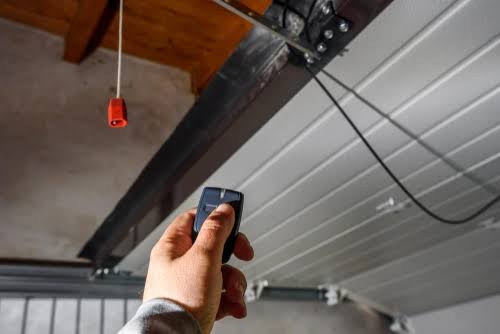
Introduction
There are few things more frustrating than standing in your driveway, clicking a dead or lost remote, and realizing you cannot get into your own home. Whether you have just moved into a new house, replaced a broken clicker, or simply want to add an extra remote for a family member, knowing how to program a new remote for garage door opener is an essential homeowner skill. This guide will walk you through the process with empathy and precision, ensuring you regain secure access to your garage without the expense of a professional service call.
Understanding Your Garage Door Opener System
Before you begin pressing buttons, it is vital to understand that not all remotes communicate in the same language. Garage door openers generally operate on specific radio frequencies (commonly 315 MHz, 390 MHz, or dual-band) and utilize different security protocols like fixed code, rolling code, or Security+ 2.0. Using an incompatible remote is the most common reason programming fails.
According to industry standards outlined by the International Organization for Standardization (ISO), modern openers must adhere to strict safety and frequency regulations to prevent interference with emergency services and ensure user safety. Always verify your opener’s model number and manufacturing date before purchasing a replacement remote.
Fixed Code vs. Rolling Code: What You Need to Know
Understanding the difference between these two technologies helps prevent future security risks and programming errors.
| Feature | Fixed Code (Older Models) | Rolling Code (Modern Models) |
|---|---|---|
| Security Level | Low (Code can be copied) | High (Code changes every use) |
| Programming Method | DIP Switches or Simple Learn Button | Smart Learn Button / WiFi Sync |
| Compatibility | Pre-1996 mostly | Post-1996 / Universal Remotes |
| Battery Type | Often 9V or AA | Typically CR2032 Coin Cell |
| Reset Frequency | Rarely needed | Needed after battery change/power loss |
Note: If your opener was manufactured after 1996, it almost certainly uses rolling code technology. Universal remotes sold today are designed to bridge both eras.
Preparation: Safety First and Tools Required
Safety is non-negotiable when working with automated mechanical systems. Before attempting to program your device, ensure the garage door area is clear of people, pets, and obstacles. The photo-eye sensors should be clean and aligned to prevent accidental closure during testing.
Tools and Materials Checklist:
- New compatible remote control
- Stepladder (if the learn button is mounted high)
- Fresh batteries (do not rely on the ones included in new remotes; they are often low-quality test batteries)
- Smartphone flashlight or headlamp
- Owner’s manual (or PDF version downloaded via model number)
Expert Tip: “Always replace the battery in a new remote before programming. Factory-installed batteries can sit in warehouses for years, and a weak signal is the number one cause of failed synchronization.” — Certified Garage Door Technician Best Practices
Step-by-Step: How To Program A New Remote For Garage Door Opener
This universal method applies to approximately 85% of residential openers (LiftMaster, Chamberlain, Genie, Craftsman). Always defer to your specific manual if these steps do not yield results.
Step 1: Locate the “Learn” Button
Find the motor unit hanging from your garage ceiling. Look for a square or circular button labeled “Learn,” “Smart,” or “Program.” It is typically located near the antenna wire or under the light lens cover. The color matters:
- Yellow/Orange: Security+ 2.0 (Newest)
- Purple: Security+ (Rolling Code)
- Red/Orange: Older Rolling Code
- Green: Very Early Rolling Code/Fixed Code
Step 2: Clear Old Codes (Optional but Recommended)
If this is a new home or you suspect old remotes are still active, hold the Learn button down for 6–10 seconds until the indicator LED turns off completely. This wipes all previous remotes and keypads. Warning: You will need to reprogram ALL devices after doing this.
Step 3: Activate Programming Mode
Press and release the Learn button once. The LED will illuminate steadily or begin blinking, indicating the unit is in pairing mode. You typically have 30 seconds to complete the next step. Do not hold the learn button during this phase unless specified by your manual.
Step 4: Transmit the Signal from the New Remote
Within the 30-second window, press and hold the button on your new remote that you wish to program. Hold it for 2–3 seconds, then release. Watch the motor unit’s LED.
Step 5: Confirm Successful Pairing
Success is usually indicated by:
- The Learn LED flashing or turning off
- The garage door lights blinking twice
- An audible click from the motor unit
If nothing happens, wait 10 seconds and repeat Steps 3–4. Ensure you are within 3 feet of the motor unit during programming to avoid signal interference.
Step 6: Test at Full Range
Do not assume success based solely on the LED confirmation. Walk to your driveway (at least 20 feet away) and test the remote. If it works up close but not at range, the issue is likely a weak battery, antenna damage, or RF interference from nearby LED bulbs.
Troubleshooting Common Programming Failures
Even professionals encounter hiccups. Use this diagnostic checklist before calling a technician.
- Remote LED Flashes but Door Doesn’t Respond: Battery may be installed backwards or depleted. Replace with a premium brand battery.
- Learn Light Goes Out Immediately: Memory may be full. Most openers support only 5–8 remotes. Clear memory and reprogram.
- Works Intermittently: Check for LED light bulb interference. Some cheap LED bulbs emit RF noise that blocks remote signals. Swap to garage-door-rated LEDs.
- Nothing Happens At All: Verify compatibility. Cross-reference your opener’s model number with the remote’s packaging. Universal remotes sometimes require a secondary “frequency selection” step before learning.
- Door Reverses After Closing: This is a safety sensor issue, not a remote issue. Clean and realign the photo-eyes at floor level.
Frequently Asked Questions (FAQ)
Can I program a universal remote to any garage door opener?
Most universal remotes work with major brands manufactured after 1993. However, proprietary systems like some Marantec or Hormann European models may require brand-specific remotes. Always check the compatibility list on the universal remote’s packaging against your opener’s model number before purchasing.
Why did my programmed remote stop working after a power outage?
Power surges or outages can corrupt the opener’s memory or reset its logic board. Reprogram the remote following the standard steps above. If multiple remotes fail simultaneously after a storm, the receiver board may have been damaged and require professional replacement.
How many remotes can I program to one garage door opener?
Most residential openers support between 5 and 8 remote controls, plus one or two wireless keypads. Higher-end commercial-grade units may support up to 20+. Consult your owner’s manual for the exact limit. Exceeding it will cause older remotes to be dropped from memory.
Is it safe to program a remote myself, or should I hire a pro?
Programming a remote is entirely safe and designed for DIY users. No electrical wiring or spring adjustment is involved. However, if your opener itself is malfunctioning, making unusual noises, or the door is unbalanced, do not attempt repairs. Torsion springs store lethal energy and should only be serviced by certified technicians.
My opener has no visible Learn button. What do I do?
Openers manufactured before 1993 may use DIP switches instead of a learn button. Match the switch positions inside the remote to those inside the motor unit exactly. If your opener is this old, strongly consider upgrading the entire system, as pre-1993 openers lack mandatory safety reversal sensors required by federal law.
Can I use my smartphone as a garage door remote?
Yes, if your opener supports WiFi connectivity (e.g., myQ, Aladdin Connect) or if you install a smart garage controller. These devices integrate with your existing opener and allow control via app, voice assistant, or geofencing. Note that smart controllers still require a physical remote as a backup during internet outages.
Conclusion
Learning how to program a new remote for garage door opener empowers you to maintain one of your home’s most critical access points independently and securely. By understanding your system type, following precise programming steps, and troubleshooting methodically, you can resolve most remote issues in under ten minutes without spending a dime on service calls. Remember: fresh batteries, correct compatibility, and patience are your best tools.
Found this guide helpful? Share it with friends, family, or neighbors who might be stuck outside their garage right now! Tag us on social media or send this article via text to someone who needs quick, reliable garage door solutions. Safe programming, and welcome home! 🏡
Leave a Reply