Have you ever stood in your driveway, pressing the button on your garage remote, only to watch your car sit there while the door remains stubbornly closed? It is a frustrating experience that happens to millions of homeowners, often due to a simple loss of synchronization between the remote and the motor unit. If you are wondering how to program a Liftmaster remote garage door opener, you are in the right place. This guide will walk you through the process clearly and safely, getting your garage back in working order without the need for an expensive service call.
Why Does My Liftmaster Remote Stop Working?
Before diving into the programming steps, it helps to understand why remotes lose their connection. Most modern Liftmaster openers use rolling code technology for security. This means the code changes every time you press the button. Occasionally, if the remote is pressed out of range or the battery dies, the remote and the opener can become “out of sync.”
According to industry data, nearly 30% of garage door service calls are related to remote control issues rather than mechanical failures. Understanding this can save you time and money. Instead of calling a technician, you can often resolve the issue by simply reprogramming the device.
Identifying Your Liftmaster Model
The first step in learning how to program a Liftmaster remote garage door opener is identifying which type of learner button your motor unit has. Liftmaster has used different colors and styles over the years, and the programming method depends entirely on this detail.
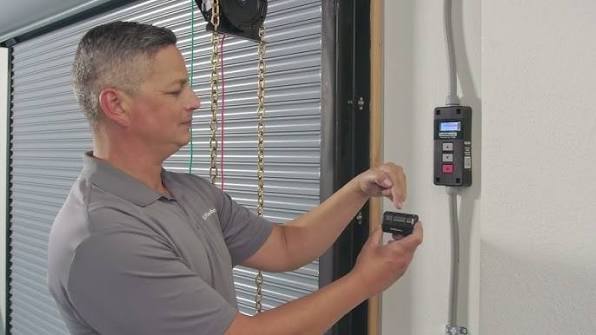
Locate the motor unit hanging from your garage ceiling. Look for a small button on the back or side, usually near the antenna wire. It is often labeled “Learn,” “Program,” or “Smart.”
| Button Color | Type of Opener | Programming Method |
|---|---|---|
| Yellow | Standard Security+ | Press Learn, then remote button within 30 seconds. |
| Purple/Orange | Security+ 2.0 | Press Learn, then remote button within 30 seconds. |
| Red | Older Models (Pre-2011) | May require dip switches or specific sequence. |
| Green | Very Old Models | Often uses dip switches; check manual. |
If you have a yellow, purple, or orange button, you likely have a newer model that uses the standard “Learn” button method. If you have a red or green button, your system might be older and require a different approach, such as matching dip switches inside the remote and the motor unit.
Step-by-Step: How to Program a Liftmaster Remote
For the vast majority of Liftmaster openers installed in the last 15 years, the process is straightforward. Follow these precise steps to ensure success.
Step 1: Clear Old Codes (Optional but Recommended)
If you are having persistent issues, it is best to clear the memory of the opener first. This ensures no conflicting codes remain.
- Locate the “Learn” button on the motor unit.
- Press and hold the button for about 6–10 seconds.
- Release when the indicator light next to the button turns off. Note: This will erase all previously programmed remotes and keypads. You will need to reprogram all devices.
Step 2: Initiate Programming Mode
- Press the “Learn” button once briefly. Do not hold it.
- The indicator light will turn on or start blinking. This signifies the opener is ready to receive a new signal.
- You typically have 30 seconds to complete the next step.
Step 3: Send the Signal from the Remote
- Take your handheld remote.
- Press and hold the button you wish to program.
- Keep holding it until you see the lights on the motor unit flash or hear two clicks.
- Release the button immediately.
Step 4: Test the Connection
Stand under the garage door and press the remote button again. The door should activate. If it does, you have successfully learned how to program a Liftmaster remote garage door opener. If it does not work, repeat the steps, ensuring you are within range and the remote has fresh batteries.
Troubleshooting Common Issues
Even with careful following of instructions, things can go wrong. Here are the most common hurdles and how to overcome them.
The Remote Still Won’t Work
If the programming seems successful but the door does not move, check the following:
- Battery Strength: Weak batteries may send a signal strong enough to pair but too weak to operate the door. Replace with high-quality alkaline batteries.
- Interference: LED light bulbs in the garage can sometimes emit frequencies that interfere with garage door signals. Try turning off the garage lights and testing the remote.
- Lock Feature: Check if the “Lock” button on your wall console is activated. This disables remote access for security.
The Learn Button Light Does Not Turn On
If pressing the Learn button yields no response, the logic board of the opener may be faulty. Ensure the unit is plugged in and the circuit breaker has not tripped. If the unit is completely dead, professional repair may be necessary.
Multiple Remotes Not Working
If you are programming multiple remotes, do them one at a time. Wait for the first remote to confirm pairing before starting the second. This prevents signal collision during the learning phase.
Safety and Security Best Practices
When dealing with garage door openers, safety is paramount. Always keep hands and fingers clear of moving parts. Additionally, security experts recommend reprogramming your opener if you lose a remote or move into a new home. This prevents unauthorized access.
For more detailed technical specifications on garage door safety standards, you can refer to Wikipedia’s page on Garage Door Openers, which provides a comprehensive overview of the evolution of security features in residential openers.
FAQ: Common Questions About Liftmaster Remotes
Q: Can I program a universal remote to my Liftmaster opener?
A: Yes, most universal remotes are compatible with Liftmaster systems. You will need to follow the specific instructions provided with the universal remote, which usually involve setting a code switch to match Liftmaster’s frequency.
Q: How do I know if my remote battery is dead?
A: If the LED light on the remote does not blink when you press the button, the battery is likely dead. If it blinks dimly, the battery is weak. Replace it with a fresh CR2032 or AA battery, depending on your model.
Q: What if I don’t have the original remote?
A: You can purchase a replacement Liftmaster remote online or at hardware stores. Ensure it matches the frequency of your opener (usually 315 MHz or 390 MHz). Once purchased, follow the standard programming steps outlined above.
Q: Can I program a remote without using the Learn button?
A: For older models with dip switches, yes. You simply match the switch positions on the remote to those on the motor unit. However, for all modern Security+ and Security+ 2.0 models, the Learn button is required.
Q: Why does my remote only work when I am very close to the door?
A: This is typically a sign of a failing battery or interference. Try replacing the battery first. If the issue persists, check for nearby electronic devices or LED bulbs that may be causing signal noise.
Q: Is it safe to reprogram my opener myself?
A: Yes, it is completely safe. The programming process involves low-voltage signals and does not require touching any high-voltage wiring. Just ensure you are standing on a stable surface if you need to reach the motor unit.
Conclusion
Learning how to program a Liftmaster remote garage door opener is a valuable skill that saves time and money. By identifying your model, following the step-by-step instructions, and troubleshooting common issues, you can restore convenience to your daily routine. Remember to use fresh batteries and keep your system updated for optimal security.
Did this guide help you get your garage door working again? Share this article with friends or family who might be struggling with their own garage remotes. A quick fix today means a smoother tomorrow!
Leave a Reply