If your garage keypad is not working or you just installed a new one, you’re likely searching for How To Program A Liftmaster Keypad Garage Door Opener in a simple, reliable way. Many homeowners struggle with syncing the keypad correctly, especially when replacing old systems or resetting security codes.
This guide will walk you through everything step-by-step so you can set up your LiftMaster keypad quickly—even if you’ve never done it before.
What Is a LiftMaster Keypad Garage Door Opener?
A LiftMaster keypad garage door opener is a wireless entry system that allows you to open your garage door using a PIN code instead of a remote.
Read too: Tc1 Tricode Garage Door Opener Remote W/ Clip Chamberlain: Complete Guide
It connects to your garage motor unit and sends a secure signal using rolling code technology.
According to general security system principles described by Wikipedia, rolling code encryption helps prevent unauthorized access by changing the signal each time the system is used.
Why Is My LiftMaster Keypad Not Working?
Before learning How To Program A Liftmaster Keypad Garage Door Opener, it helps to understand common issues:
- Weak or dead battery
- Incorrect PIN entry
- Out-of-sync programming
- Interference from nearby devices
- Old or erased memory settings
Most problems are not hardware failures but simple syncing issues.
How To Program A Liftmaster Keypad Garage Door Opener Step by Step
This is the main process. Follow carefully.
Step 1: Locate the Learn Button
Go to your garage door motor unit (ceiling-mounted).
Look for:
- A small button labeled Learn
- Usually near antenna wire or light cover
Step 2: Clear Old Codes (Optional but Recommended)
For better security:
- Press and hold the Learn button for 6–10 seconds
- Wait until the indicator light turns off
👉 This resets all previous keypad and remote connections.
Step 3: Activate Programming Mode
Now prepare the system:
- Press and release the Learn button once
- A light will turn on for 30 seconds
This is your programming window.
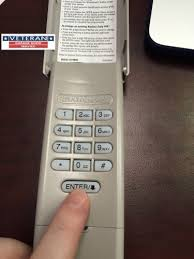
Step 4: Enter Your New PIN on the Keypad
On your LiftMaster keypad:
- Enter a 4-digit PIN (example: 4829)
- Press Enter or # (depending on model)
Step 5: Sync the Keypad
Within the 30-second window:
- Press Enter again
- Wait for garage light to blink or click
This confirms successful pairing.
Step 6: Test the Keypad
After setup:
- Close garage door
- Enter your PIN
- Press Enter
If the door opens, programming is complete.
How Long Does It Take To Program A LiftMaster Keypad?
On average:
- Initial setup: 3–7 minutes
- Full reset + setup: 5–10 minutes
Most homeowners complete the process quickly once they understand the steps.
Types of LiftMaster Keypads
1. Basic Wireless Keypad
- Manual PIN entry
- Battery-powered
- Easy installation
2. Smart Keypad System
- Connects to Wi-Fi hub
- Works with mobile apps
- Enhanced security features
3. Universal Keypad
- Compatible with multiple brands
- Useful for older systems
Comparison: Keypad Setup vs Remote Programming
| Feature | Keypad | Remote |
|---|---|---|
| Access Method | PIN code | Button press |
| Security | High | Medium |
| Convenience | Very high | High |
| Battery Need | Yes | Yes |
Expert Insight: Why Keypad Security Matters
Modern garage systems rely on encrypted rolling codes that reduce hacking risks significantly. Studies in wireless access systems show that dynamic code changes greatly reduce unauthorized entry attempts.
This makes keypad systems one of the safest residential access methods available today.
Common Mistakes When Programming LiftMaster Keypads
Avoid these errors when learning How To Program A Liftmaster Keypad Garage Door Opener:
- Waiting too long after pressing Learn button
- Entering wrong PIN format
- Not replacing weak batteries
- Skipping reset step when needed
- Pressing buttons too slowly
Small timing mistakes are the most common cause of failure.
How To Reset A LiftMaster Keypad
If programming fails:
Reset Steps:
- Press and hold Learn button (6–10 seconds)
- Wait for LED to turn off
- Release button
- Reprogram keypad from scratch
This clears all previous connections.
How To Change Your LiftMaster Keypad Code
To update your PIN:
- Enter existing code
- Press and hold Enter until light flashes
- Enter new 4-digit PIN
- Press Enter again
Your new code is now active.
Safety Tips Before Programming
- Keep garage door closed
- Stand clear of moving parts
- Avoid distractions during setup
- Ensure ladder stability if needed
Safety should always come first when working with motorized systems.
Maintenance Tips for Long-Term Performance
To keep your keypad working well:
- Replace batteries every 12–18 months
- Clean keypad surface regularly
- Avoid water exposure
- Test system monthly
FAQ: How To Program A Liftmaster Keypad Garage Door Opener
1. How do I program my LiftMaster keypad for the first time?
Press the Learn button, enter your PIN, and sync within 30 seconds to complete setup.
2. Why is my LiftMaster keypad not responding?
Most likely due to dead batteries, incorrect PIN entry, or missed programming timing.
3. How many keypads can I connect to one garage door opener?
Most systems support multiple keypads depending on model capacity.
4. Can I change my keypad code anytime?
Yes, you can easily update your PIN using the existing code and Enter button sequence.
5. Do LiftMaster keypads need Wi-Fi?
No, standard keypads work without Wi-Fi. Only smart models require internet connection.
6. How long does a LiftMaster keypad battery last?
Typically 1–2 years, depending on usage frequency.
Conclusion
Learning How To Program A Liftmaster Keypad Garage Door Opener is simple once you understand the timing and steps. With just a few button presses, you can secure your garage and enjoy keyless entry convenience.
This small upgrade improves home security, adds convenience, and gives you full control over garage access.
If this guide helped you, consider sharing it with friends or neighbors who may also need help setting up their keypad system.
Leave a Reply