Introduction
There is nothing quite as frustrating as standing in your driveway, pressing a button repeatedly, and watching your garage door remain stubbornly shut. If you own an older home or have inherited a vintage opener system, figuring out how to program a garage door remote with dip switches can feel like deciphering an ancient code without a manual. Unlike modern “smart” openers that use rolling codes and learn buttons, these legacy systems rely on physical mechanical switches that must match perfectly between the motor unit and the handheld remote.
We understand that dealing with outdated technology can be intimidating, especially when ladders and electricity are involved. However, mastering this process saves you the cost of a full system replacement and restores convenience to your daily routine. This comprehensive guide will walk you through the exact steps to sync your devices safely, ensuring you get back inside your warm garage without the headache.
What Are Dip Switches and How Do They Work?
Before grabbing a screwdriver, it is vital to understand the mechanism you are working with. Dip switches (Dual Inline Package switches) are small, sliding mechanical toggles found inside both your garage door opener motor unit and the corresponding remote control. Typically arranged in a row of 8 to 12 switches, each toggle represents a binary position: ON (up) or OFF (down).
According to technical documentation archived by Wikipedia, these switches were the industry standard for radio frequency identification before the advent of digital encryption in the mid-1990s. The system operates on a simple principle: the pattern of switches in the remote must be an exact mirror image of the pattern in the overhead motor unit. When you press the remote button, it transmits this specific binary code via radio frequency. If the receiver in the motor unit recognizes the matching sequence, it activates the relay to open or close the door.
Why Identifying Your System Matters
Not all older openers use dip switches. Before proceeding, verify your system type:
- Dip Switch Systems: Have visible rows of tiny sliding switches behind a cover panel. Usually manufactured before 1993.
- Learn Button Systems: Feature a colored square button (yellow, purple, orange, or red) on the back panel. These use rolling codes and require a different programming method.
- Smart Systems: Connect via Wi-Fi and are programmed through mobile apps.
If your unit has a “Learn” button instead of switches, stop here and search for rolling code programming instructions.
Safety First: Preparing Your Workspace
Working with garage door openers involves electricity, moving parts, and heights. Professional technicians always prioritize safety over speed. Before you attempt to program your device, adhere to these non-negotiable precautions:
- Disconnect Power (Optional but Recommended): While you can program with power on, unplugging the unit prevents accidental activation while your hands are near the motor housing.
- Secure Your Ladder: Use a fiberglass ladder (non-conductive) placed on stable, level ground. Never lean against the garage door tracks.
- Clear the Area: Ensure no children, pets, or obstacles are beneath the door path.
- Use Proper Lighting: Dip switches are tiny. Use a headlamp or work light to avoid eye strain and misalignment errors.
- Avoid Touching Capacitors: Even when unplugged, internal capacitors can hold a charge. Only touch the plastic switch toggles and designated covers.
Expert Tip: Take a high-resolution photo of the existing switch configuration in the motor unit before making any changes. This serves as your backup reference if you accidentally bump a switch during the process.
Step-by-Step: How To Program A Garage Door Remote With Dip Switches
Follow this precise tutorial to synchronize your remote. This process assumes you have a compatible replacement remote designed for your specific opener brand (e.g., Chamberlain, LiftMaster, Genie, or Stanley).
Step 1: Access the Motor Unit Switches
Locate the light lens cover or the rear access panel on your overhead garage door opener. You may need a flathead screwdriver to gently pry the cover off. Once removed, locate the row of dip switches. They are usually white or blue and numbered 1 through 8 (or 1 through 12).
Step 2: Set the Desired Code Pattern
Decide on a unique switch pattern. Do not leave all switches in the same position (all up or all down), as this is the most common factory default and poses a security risk. Create a random pattern using the following guidelines:
- Mix ON and OFF positions randomly.
- Ensure at least 3 switches are ON and 3 are OFF for signal integrity.
- Avoid obvious patterns like alternating up-down-up-down.
Example 8-Switch Pattern: UP – DOWN – UP – UP – DOWN – DOWN – UP – DOWN
Use a small tool like a pen tip, toothpick, or precision screwdriver to slide each switch firmly into place. You should feel a distinct tactile “click” confirming the switch is seated.
Step 3: Match the Remote Control Switches
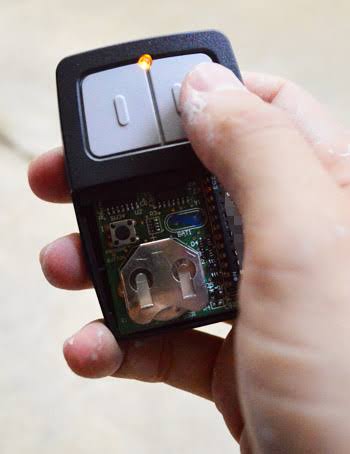
Open the battery compartment or rear casing of your handheld remote. You will find an identical row of dip switches inside. Replicate the exact pattern you set on the motor unit.
- If Motor Switch #1 is UP → Remote Switch #1 must be UP.
- If Motor Switch #3 is DOWN → Remote Switch #3 must be DOWN.
Double-check every single switch alignment. A single mismatched toggle will prevent operation. This is where most DIY failures occur; patience is essential.
Step 4: Test the Synchronization
Reassemble the remote casing and restore power to the motor unit (if disconnected). Stand at least 5 feet away from the door to avoid sensor interference. Press and hold the remote button for 2–3 seconds.
- Success: The door begins moving, or the motor unit light blinks/clicks.
- Partial Success: The light blinks but the door doesn’t move. Check safety sensors and obstruction clearance.
- Failure: No response. Return to Step 3 and re-verify every switch position.
Step 5: Secure and Finalize
Once confirmed working, replace all access panels securely. Loose covers can cause vibration noise or expose wiring. Test the remote from various distances (driveway, street) to ensure reliable range. Typical dip switch remotes operate effectively within 100–150 feet in clear conditions.
Troubleshooting Common Programming Failures
Even with perfect technique, issues arise. Use this diagnostic table to resolve problems efficiently:
| Symptom | Probable Cause | Solution |
|---|---|---|
| No response at all | Dead remote battery | Replace with fresh CR2032 or 9V battery |
| Intermittent operation | Weak battery or interference | New battery + check for LED bulbs causing RF noise |
| Works only up close | Antenna damage or misalignment | Extend hanging antenna wire; ensure it’s not coiled |
| Door reverses immediately | Safety sensor misalignment | Clean sensor lenses; realign brackets until solid light |
| Motor hums but no movement | Broken gear/sprocket | Mechanical repair needed; not a programming issue |
| Neighbor’s door opens too | Duplicate code pattern | Change BOTH motor and remote to new unique pattern |
Addressing Signal Interference
Modern LED light bulbs are notorious for emitting radio frequency noise that blocks dip switch signals. If your remote worked previously but suddenly stopped after changing bulbs, test by turning off the opener’s light fixture temporarily. If functionality returns, switch to RF-shielded LED bulbs specifically rated for garage door openers.
Critical Security Warning for Legacy Systems
We must address an uncomfortable truth: dip switch systems are inherently insecure. With only 256 possible combinations (8-switch) or 4,096 combinations (12-switch), these codes can be brute-forced or intercepted by inexpensive universal remotes. Security researchers have demonstrated that attackers can cycle through all possible codes in minutes using automated devices.
Risk Mitigation Strategies
- Never use factory defaults: Always customize your switch pattern.
- Change codes annually: Treat it like a password rotation.
- Install a smart controller overlay: Devices like myQ or Tailwind add modern rolling-code security to legacy motors without replacing the entire opener.
- Consider upgrade: If your opener is pre-1993, budget for a modern replacement with rolling code technology and battery backup.
Your safety matters more than nostalgia. While learning how to program a garage door remote with dip switches is valuable maintenance knowledge, long-term security requires acknowledging technological limitations.
Frequently Asked Questions (FAQ)
Can I use any universal remote with dip switches?
No. Universal remotes must explicitly state compatibility with dip switch systems and your specific brand/frequency (typically 300MHz, 310MHz, 315MHz, or 390MHz). Frequency mismatch renders even perfectly matched switches useless. Check your motor unit’s label for the exact MHz rating before purchasing.
How do I know if my dip switches are worn out?
If switches feel loose, don’t click distinctly, or require excessive pressure to stay in position, they are mechanically failing. Worn switches create intermittent connections causing unreliable operation. Replacement switch banks are available from electronics suppliers, but soldering skills are required. For most homeowners, replacing the entire logic board or opener is more cost-effective.
Why does my remote work sometimes but not others?
Intermittent failure typically indicates three causes: dying batteries (voltage drops under load), RF interference from nearby electronics, or oxidized switch contacts. Start with fresh batteries. If unresolved, clean switch contacts with electronic contact spray (never oil-based lubricants). Persistent issues suggest component aging requiring professional diagnosis.
Is it legal to own a dip switch garage door opener?
Yes, ownership is legal. However, manufacturing and selling new dip switch openers was banned in the United States after January 1, 1993, due to safety standards mandating photoelectric reversal sensors. Existing units may remain in service, but insurers may flag them during home inspections. Document regular maintenance and consider supplemental safety sensors if none exist.
Can I convert my dip switch opener to rolling code without replacement?
Technically yes, through aftermarket receiver kits that install alongside your existing motor. These kits include a new rolling-code receiver wired to your opener’s trigger terminals plus new secure remotes. Installation requires electrical competency. Cost typically ranges $80–$150 for kit components, offering modern security at fraction of full replacement expense.
What tools do I need for dip switch programming?
Minimal tools required: small flathead screwdriver (for switch adjustment), Phillips screwdriver (panel removal), fresh batteries, stepladder, and flashlight/headlamp. Optional but helpful: digital camera for reference photos, electronic contact cleaner for maintenance, and multimeter for battery voltage verification. No specialized programming equipment is necessary.
Conclusion
Mastering how to program a garage door remote with dip switches empowers you to maintain legacy equipment confidently and avoid unnecessary service calls. By following systematic matching procedures, prioritizing safety protocols, and understanding inherent security limitations, you transform a potentially frustrating task into manageable home maintenance. Remember: precision beats speed, documentation prevents repeat errors, and acknowledging when technology has reached its end-of-life is itself a form of expertise.
Your restored garage access isn’t just about convenience—it’s about reclaiming control over your home’s functionality. If this guide helped you solve your dip switch dilemma, we’d genuinely appreciate you sharing it with fellow homeowners navigating similar vintage system challenges. Post your success story or remaining questions on social media and tag us; community knowledge makes everyone safer and more capable. Happy programming, and may your garage door always respond on the first press!
Leave a Reply