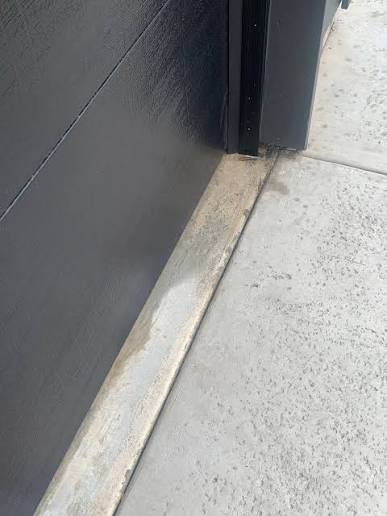
Water pooling in your garage is more than just a nuisance; it is a threat to your home’s structural integrity and your stored belongings. If you are tired of mopping up rainwater every time a storm hits, you are not alone. Learning how to prevent water from coming under garage door is the first step toward a dry, safe, and functional space.
Many homeowners assume that a small gap under the door is normal. While some clearance is necessary for movement, excessive gaps allow rain, snowmelt, and debris to invade your sanctuary. This guide will walk you through practical, cost-effective solutions to seal your garage against the elements, ensuring your peace of mind during heavy downpours.
Why Does Water Enter Under My Garage Door?
Before applying a fix, it is crucial to understand the root cause. Water intrusion usually stems from three primary issues: poor drainage, worn-out seals, or an uneven floor.
According to general building principles, water always seeks the path of least resistance. If your driveway slopes toward the garage rather than away from it, gravity will push water directly against the door seal. Additionally, standard rubber bottom seals degrade over time due to UV exposure and temperature fluctuations, creating cracks where water can seep through.
| Common Cause | Symptom | Severity |
|---|---|---|
| Worn Bottom Seal | Visible cracks or gaps in the rubber strip | Moderate |
| Poor Driveway Slope | Water pools directly in front of the door | High |
| Uneven Concrete Floor | Gaps between the seal and the floor surface | Moderate |
| Clogged Gutters | Overflowing water runs down the wall to the door | High |
Addressing these issues requires a combination of maintenance and strategic upgrades. For more detailed information on residential drainage standards, you can refer to resources like Wikipedia’s entry on Surface Runoff to understand how water moves around your property.
How to Install a Heavy-Duty Threshold Seal
The most effective immediate solution for stopping water is installing a garage door threshold seal. Unlike standard bottom seals that attach to the door itself, a threshold seal attaches to the floor, creating a raised barrier that water must climb over to enter.
Step-by-Step Installation Guide
- Clean the Area Thoroughly: Use a degreaser and a stiff brush to clean the concrete floor where the door closes. Ensure the area is completely dry before proceeding. Any moisture or dirt will prevent the adhesive from bonding properly.
- Measure the Width: Measure the exact width of your garage door opening. Add 2–3 inches to this measurement to allow for trimming.
- Cut the Seal: Using a utility knife, cut the threshold seal to your measured length. Most thresholds are made of durable vinyl or aluminum-backed rubber.
- Apply Adhesive: Apply a high-quality construction adhesive (such as polyurethane-based glue) to the bottom of the threshold. Do not rely solely on the pre-applied tape if the product includes it, as extra adhesive ensures longevity.
- Position and Press: Place the threshold so that the garage door will close directly onto the raised center ridge. Press firmly along the entire length. Use weights or bricks to hold it in place for at least 24 hours while the adhesive cures.
This method creates a physical dam that is highly effective against wind-driven rain. It is particularly useful for older homes where the concrete floor may have settled unevenly.
Can Adjusting the Door Limit Switches Help?
Sometimes, the issue is not the seal but the door’s position. If your garage door does not close all the way to the floor, water will easily flow underneath. Adjusting the limit switches on your garage door opener can ensure a tighter closure.
Caution: Be careful not to adjust the door so tight that it crushes the bottom seal or strains the opener motor. The door should rest gently on the seal, compressing it slightly to create a watertight barrier.
- Locate the limit adjustment screws on your opener unit. They are usually labeled “Up” and “Down.”
- Turn the “Down” limit screw in small increments (quarter-turns).
- Test the door after each adjustment. If the door reverses immediately upon hitting the floor, you have gone too far. Back it off slightly until it stays closed without reversing.
What Are the Best Weatherstripping Options?
Not all weatherstripping is created equal. Choosing the right material can significantly impact how well you prevent water from coming under garage door.
- Vinyl Seals: These are affordable and easy to install but tend to become brittle in cold climates. They are best for mild weather regions.
- Rubber Seals: More durable and flexible than vinyl, rubber seals maintain their shape in extreme temperatures. They provide a better seal against uneven floors.
- Brush Seals: These consist of dense bristles and are excellent for keeping out debris and insects. However, they are less effective against standing water compared to solid rubber or vinyl.
Expert Tip: For maximum protection, consider a dual-seal system. Install a robust rubber bottom seal on the door and pair it with a threshold seal on the floor. This double layer of defense ensures that even if one seal fails, the other remains intact.
How to Improve Driveway Drainage
If water is pooling in front of your garage, no amount of sealing will solve the problem permanently. You must redirect the water away from the structure.
Create a Positive Slope
Your driveway should slope away from the garage at a minimum gradient of 1/8 inch per foot. If your current driveway slopes toward the garage, you may need to:
- Resurface the concrete with a sloped overlay.
- Install a trench drain across the width of the driveway entrance. This captures water before it reaches the door and channels it to a side drainage area.
Maintain Your Gutters
Clogged gutters are a silent culprit. When gutters overflow, water cascades down the side of your house and accumulates near the garage foundation. Clean your gutters at least twice a year, and ensure downspouts extend at least 6 feet away from your home’s foundation.
FAQ Section
1. How often should I replace my garage door bottom seal?
You should inspect your seal annually. Typically, rubber seals last between 3 to 5 years, depending on climate and usage. If you notice visible cracks, tears, or hardening of the material, it is time for a replacement.
2. Can I use silicone caulk to seal the gap?
Silicone caulk is a temporary fix at best. It lacks the durability to withstand the friction of a moving garage door and will peel away quickly. It is better suited for stationary gaps around window frames, not dynamic garage door bottoms.
3. Will a threshold seal trip my car?
Most modern threshold seals are designed with a low profile, typically rising only 1/2 to 1 inch off the ground. This height is generally safe for standard passenger vehicles. However, if you drive a low-clearance sports car, look for “low-profile” specific models.
4. Is it normal to see light under the garage door?
A tiny sliver of light might be visible, but if you can see a distinct beam of light or feel a draft, the seal is insufficient. A proper seal should block both light and air effectively.
5. Can ice cause water to come under the door?
Yes. In winter, snow can melt and refreeze under the door, lifting the seal slightly or creating a bridge for water to enter. Using a heated cable kit along the bottom edge of the door can prevent ice buildup.
Conclusion
Learning how to prevent water from coming under garage door is an essential skill for any homeowner. By combining a high-quality threshold seal, proper door adjustment, and effective drainage management, you can keep your garage dry year-round.
Don’t wait for the next storm to test your defenses. Take action today to protect your tools, cars, and storage items from water damage. If you found this guide helpful, please share it with your neighbors on social media—they might be dealing with the same soggy garage issues!
Leave a Reply