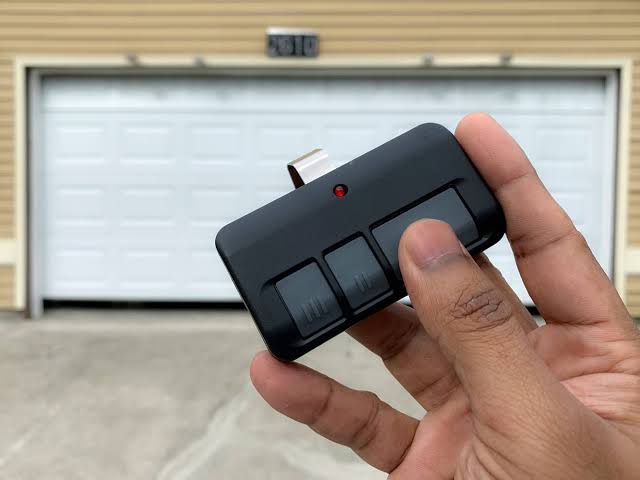
Have you ever stood in your driveway, pressing the button on your Liftmaster remote, only to watch your garage door stay stubbornly closed? It is a frustrating experience that disrupts your daily routine and leaves you feeling helpless. If you are wondering how to open a Liftmaster garage door opener remote to fix or replace its components, you are in the right place. This guide will walk you through the process safely and efficiently.
Why You Might Need to Open Your Liftmaster Remote
Before diving into the steps, it is essential to understand why you might need to access the internal components of your remote. Most often, homeowners need to open their remotes for two primary reasons: replacing a dead battery or cleaning corroded contacts. According to industry data, battery failure accounts for over 80% of garage door remote malfunctions.
Sometimes, the issue is not the battery itself but the connection points. Dust, moisture, or minor corrosion can prevent the remote from sending a signal to the opener. By opening the device, you can inspect these areas and restore functionality without buying a new unit. This simple maintenance task can save you time and money while extending the life of your device.
Tools You Will Need
Opening a Liftmaster remote does not require specialized equipment. However, having the right tools on hand ensures you do not damage the plastic casing or internal components. Here is what you should gather before starting:
- Small Phillips-head screwdriver: Most Liftmaster remotes use tiny screws to hold the case together.
- Flathead screwdriver or plastic pry tool: Useful for gently separating the casing if no screws are visible.
- Clean cloth: To wipe away dust or debris inside the remote.
- Replacement battery: Check your owner’s manual for the correct type, usually a CR2032 or similar coin-cell battery.
Having these items ready will make the process smoother and reduce the risk of losing small parts.
Step-by-Step Guide: How To Open A Liftmaster Garage Door Opener Remote
Follow these detailed steps to safely open your remote. Note that designs may vary slightly depending on your specific model, but the general process remains consistent across most Liftmaster units.
Step 1: Locate the Seam or Screws
Examine your remote closely. Some models have visible screws on the back, while others feature a seamless design that requires prying. If you see screws, proceed to Step 2. If not, look for a thin seam running along the edge of the remote. This seam is where the two halves of the casing meet.
Step 2: Remove the Screws (If Applicable)
Using your small Phillips-head screwdriver, carefully unscrew each screw. Place them in a small bowl or container to avoid losing them. Do not force the screws if they feel stuck; apply gentle pressure and turn counterclockwise. Once all screws are removed, set them aside safely.
Step 3: Separate the Casing
If your remote has no screws, insert a flathead screwdriver or plastic pry tool into the seam. Gently twist or lever the tool to create a small gap. Work your way around the edge, slowly separating the two halves. Avoid using excessive force, as this can crack the plastic. For screwed models, simply pull the halves apart after removing the screws.
Step 4: Access the Battery Compartment
Once the casing is open, you will see the internal circuit board and the battery compartment. The battery is usually held in place by a small metal clip or plastic holder. Carefully note the orientation of the battery (positive side up or down) before removing it. This detail is crucial for installing the new battery correctly.
Step 5: Inspect and Clean
With the battery removed, take a moment to inspect the interior. Look for signs of corrosion, dirt, or damaged wires. Use a clean cloth to gently wipe away any debris. If you notice corrosion on the battery contacts, you can clean them with a cotton swab dipped in rubbing alcohol. Allow the area to dry completely before proceeding.
Step 6: Replace the Battery and Reassemble
Insert the new battery, ensuring it matches the original orientation. Press it firmly into place. Align the two halves of the casing and snap them together. If your model uses screws, reinsert and tighten them securely. Avoid overtightening, as this can strip the threads or crack the plastic.
Common Issues After Opening the Remote
Even after following the steps above, you might encounter issues. Here are some common problems and their solutions:
| Issue | Possible Cause | Solution |
|---|---|---|
| Remote still does not work | Dead battery or incorrect installation | Double-check battery orientation and try a fresh battery |
| Buttons feel unresponsive | Dirty contacts or misaligned casing | Clean contacts and ensure casing is properly aligned |
| Case will not close | Broken clips or misplaced screws | Inspect clips for damage and verify screw placement |
If these solutions do not resolve the issue, the problem may lie with the garage door opener itself rather than the remote. In such cases, consulting a professional technician is advisable.
Understanding Liftmaster Remote Technology
Liftmaster remotes use radio frequency (RF) signals to communicate with the garage door opener. Most modern units operate on a rolling code system, which enhances security by changing the code with each use. This technology prevents unauthorized access but also means that reprogramming may be necessary after battery replacement.
For more information on RF technology and its applications, you can refer to Wikipedia’s article on Radio Frequency. Understanding this background helps you appreciate why proper maintenance is critical for reliable performance.
FAQ Section
Q1: What type of battery does a Liftmaster remote use?
Most Liftmaster remotes use a CR2032 3V lithium coin-cell battery. However, some older models may require different types. Always check your owner’s manual or the label inside the battery compartment for specifics.
Q2: Can I open my Liftmaster remote without damaging it?
Yes, if you follow the steps carefully. Use gentle pressure and the appropriate tools to avoid cracking the casing or damaging internal components. If you feel resistant, stop and reassess your approach.
Q3: Do I need to reprogram my remote after opening it?
In most cases, no. Simply replacing the battery should restore functionality. However, if the remote fails to work after battery replacement, you may need to reprogram it following the instructions in your owner’s manual.
Q4: How often should I replace the battery in my Liftmaster remote?
Battery life varies based on usage, but most homeowners replace their remote batteries every 1–2 years. If you notice reduced range or intermittent operation, it is time to check the battery.
Q5: What should I do if my remote stops working after opening it?
First, double-check the battery orientation and ensure the contacts are clean. If the issue persists, try reprogramming the remote. If none of these steps work, consider contacting Liftmaster support or a professional technician.
Q6: Is it safe to open my Liftmaster remote myself?
Yes, it is generally safe as long as you handle the components carefully. Avoid touching the circuit board with bare hands to prevent static damage, and ensure the remote is not connected to any power source during the process.
Conclusion
Learning how to open a Liftmaster garage door opener remote is a valuable skill that can save you time and money. By following the steps outlined in this guide, you can replace batteries, clean contacts, and troubleshoot common issues with confidence. Remember to handle your remote with care and use the right tools to avoid damage.
If you found this guide helpful, please share it with friends or family who might benefit from it. Keeping your garage door remote in good condition ensures smooth access to your home and peace of mind. Stay proactive with maintenance, and enjoy the convenience of a reliably functioning garage door system.
Leave a Reply