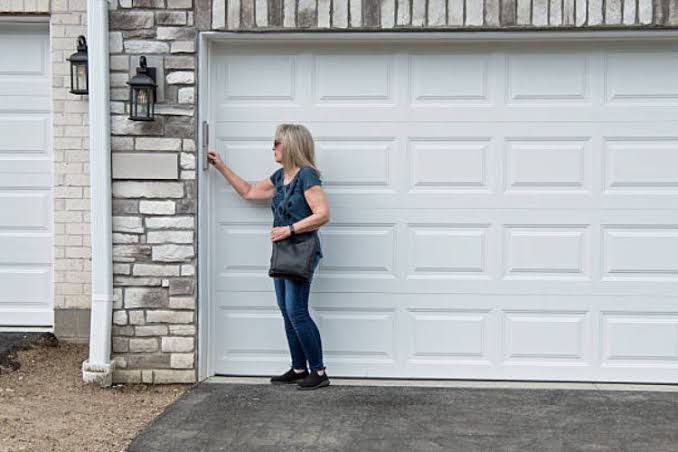
There are few things more frustrating than arriving home or trying to leave for work only to discover your garage door refuses to budge. Being locked out of your own garage creates an immediate security vulnerability and disrupts your entire schedule. If you are currently searching for how to open a jammed garage door from the outside, this comprehensive guide provides safe, expert-approved methods to regain access without causing costly damage to your property.
Why Is My Garage Door Jammed Shut?
Before attempting to force entry, it is vital to diagnose the root cause. Applying brute force to a mechanical failure can turn a minor repair into a complete system replacement. According to industry data, over 70% of garage door failures stem from lack of maintenance rather than catastrophic component breakage. Understanding the specific type of jam dictates which solution will work.
Common Causes of Exterior Jams
| Cause | Symptom | Risk Level | DIY Fixable? |
|---|---|---|---|
| Frozen Weather Seal | Door sticks at bottom after rain/snow | Low | Yes |
| Obstructed Track | Grinding noise, stops halfway | Medium | Yes |
| Broken Torsion Spring | Loud bang, door feels extremely heavy | High | No |
| Malfunctioning Opener | Motor hums but door doesn’t move | Medium | Yes |
| Bent Track/Roller | Visible gap between roller and track | High | Maybe |
| Lock Engagement | Key turns but latch won’t retract | Low | Yes |
Note: If you suspect a broken spring, do not attempt to lift the door manually. Torsion springs store immense kinetic energy and can cause severe injury. Consult a certified technician immediately.
Safety First: Critical Precautions Before Entry
When learning how to open a jammed garage door from the outside, safety must supersede speed. Garage doors weigh between 150 and 400 pounds; uncontrolled movement can result in crushed fingers, foot injuries, or structural damage.
- Disconnect Power: If you gain partial access or can reach an exterior outlet, ensure the automatic opener is unplugged to prevent accidental activation while you are working.
- Wear Protection: Always use leather work gloves and safety glasses. Rusty metal edges and snapping cables are unpredictable hazards.
- Secure the Area: Keep children and pets at least 20 feet away from the door zone during troubleshooting.
- Check Structural Integrity: Inspect the header above the door for sagging or rot before applying upward pressure.
For foundational knowledge on garage door mechanics and safety standards, refer to the Garage Door Wikipedia page, which outlines standard counterbalance systems and historical safety regulations that govern modern installations.
Step-by-Step: How to Open a Jammed Garage Door From The Outside
Follow these sequential steps designed for US residential garage doors. Each method addresses a specific failure point identified in the diagnostic phase above.
Method 1: Releasing the Emergency Lock Mechanism
Many older homes and some newer models feature exterior slide locks or T-handle locks that may have engaged accidentally or frozen.
- Locate the Lock Assembly: Identify the key cylinder or slide bolt near the handle. On T-handles, the locking bar extends horizontally into the track.
- Apply Penetrating Lubricant: Spray a silicone-based lubricant (not WD-40, which attracts dust) directly into the keyway and around the bolt housing. Wait exactly 3–5 minutes for capillary action to penetrate corrosion.
- Gentle Manipulation: Insert the key and apply light rotational pressure while simultaneously pushing inward on the door panel. This relieves lateral tension on the bolt.
- Vibration Technique: If stuck, tap the lock housing firmly with a rubber mallet (never steel) while turning the key. Vibration often frees seized tumblers.
- Retract and Lift: Once unlocked, pull the handle outward and lift smoothly using your legs, not your back.
Method 2: Clearing Frozen Bottom Seals (Winter Specific)
In northern US states, ice bonding between the rubber gasket and concrete is the #1 cause of winter jams.
- Assess Ice Thickness: Visually inspect the bottom seal gap. If ice exceeds 0.25 inches, proceed cautiously.
- Apply Controlled Heat: Use a hair dryer or heat gun on low setting (max 140°F / 60°C). Maintain a 6-inch distance from rubber to prevent melting. Move continuously across the seal width.
- Use De-Icing Solution: Apply calcium chloride-based de-icer along the seam. Avoid rock salt, which damages concrete and corrodes aluminum thresholds.
- Test Incrementally: After 2–3 minutes of heating, attempt to lift the door 1–2 inches. If resistance persists, reapply heat. Never yank forcefully—this tears the gasket.
- Prevent Recurrence: Once open, clean the threshold and apply silicone spray to the seal. Consider installing a heated threshold kit for long-term prevention.
Method 3: Addressing Track Obstructions Externally
Debris, bent sections, or displaced rollers can bind the door within the vertical track visible from outside.
- Visual Inspection: Shine a flashlight along both vertical tracks. Look for leaves, tools, ice chunks, or dented metal.
- Remove Surface Debris: Use needle-nose pliers or a hook tool to extract foreign objects. Never insert fingers into the track channel.
- Realign Minor Dents: For small inward dents (<1 inch), place a wood block against the dent and tap gently with a hammer. This restores roller clearance without removing the track.
- Lubricate Rollers: Apply white lithium grease to exposed roller stems. Avoid aerosol sprays near plastic components.
- Test Movement: Attempt to lift 6–8 inches. Smooth operation indicates success; grinding means professional realignment is needed.
Method 4: Bypassing a Failed Automatic Opener
If the motor runs but the door won’t move, the carriage may be disengaged or the drive gear stripped.
- Locate Exterior Release Cord: Some openers have an external emergency release cable (red cord) accessible through a small hole near the top corner. Pull firmly downward to disengage the trolley.
- Manual Lift Protocol: With the opener disconnected, grip the bottom handle or edge. Lift steadily at 1–2 feet per second. The door should balance at any height when properly counterweighted.
- Identify Imbalance: If the door falls when released mid-travel, springs are under-tensioned. Secure the door in the open position with C-clamps on the track below the bottom roller before investigating further.
- Reset Procedure: After resolving the underlying issue, re-engage the opener by pulling the release cord toward the motor unit until it clicks. Test auto-reverse safety sensors before regular use.
When to Call a Professional vs. DIY Assessment
Knowing your limits prevents injury and expense. Use this decision matrix:
| Scenario | Action Required | Estimated Cost Range (US) |
|---|---|---|
| Frozen seal / debris | DIY | $0–$20 |
| Lubrication / minor adjustment | DIY | $10–$30 |
| Broken cable / off-track roller | Professional | $150–$300 |
| Spring replacement | Professional Only | $250–$500 |
| Opener gear/motor failure | Professional | $200–$600 |
| Bent track section | Professional | $300–$700 |
Statistics Note: The International Door Association reports that improper DIY spring repairs account for approximately 30,000 emergency room visits annually in the United States. When in doubt, invest in professional service.
Frequently Asked Questions (FAQ)
Q1: Can I use a pry bar to force open a jammed garage door?
A: Absolutely not. Pry bars concentrate force on thin steel panels, causing permanent deformation that compromises insulation, security, and structural integrity. Repair costs for prying damage typically exceed $500, whereas proper diagnosis and targeted fixes cost significantly less. Always address the cause of the jam, not the symptom.
Q2: How do I know if my torsion spring is broken versus just unbalanced?
A: A broken torsion spring produces a loud gunshot-like noise and leaves a visible 2-inch gap in the coil above the door. An unbalanced door lifts partially then stalls or feels excessively heavy but shows no physical spring separation. Broken springs require immediate professional replacement; unbalanced doors may need adjustment or cable inspection.
Q3: Is it safe to leave a manually opened garage door unsecured overnight?
A: No. Manually lifted doors lack automatic locking mechanisms and are vulnerable to wind displacement or unauthorized entry. If you must leave it open temporarily, secure it with two C-clamps on each track below the bottom roller and engage any manual slide locks. Install a temporary padlock through the track holes as additional deterrent. Plan professional repair within 24 hours.
Q4: Why does my garage door jam only during humid summer months?
A: Humidity causes wooden door panels to swell and metal tracks to expand thermally. Wooden doors can increase in width by up to 0.5% in high humidity, binding against side jambs. Solutions include sanding swollen edges, adjusting track brackets outward by 1/8 inch, or upgrading to moisture-resistant composite panels. Ensure weatherstripping allows adequate ventilation to reduce interior humidity buildup.
Q5: What maintenance prevents future exterior jams?
A: Implement this quarterly checklist: (1) Clean tracks with degreaser and dry cloth; (2) Lubricate rollers, hinges, and springs with silicone or lithium grease; (3) Test auto-reverse sensors monthly; (4) Inspect weather seals for cracks or compression set; (5) Tighten all hardware (vibration loosens bolts over time); (6) Balance-test by disconnecting opener and lifting manually—the door should stay put at mid-height. Annual professional tune-ups extend lifespan by 5–10 years.
Q6: Can smart garage openers help prevent jams?
A: Yes. Modern smart openers with current-sensing technology detect abnormal resistance before full jamming occurs, automatically reversing and sending smartphone alerts. Models like Chamberlain MyQ or LiftMaster Secure View provide diagnostic data showing motor amperage trends, enabling proactive maintenance. While they don’t eliminate mechanical failures, they reduce emergency lockouts by an estimated 40% according to manufacturer field studies.
Conclusion: Regain Access Safely and Confidently
Learning how to open a jammed garage door from the outside empowers you to handle common emergencies while recognizing when professional intervention is necessary. By following systematic diagnostics, prioritizing safety protocols, and performing regular preventive maintenance, you transform reactive frustration into proactive home stewardship. Remember: patience and precision always outweigh force when dealing with counterbalanced mechanical systems.
Found this guide helpful? Share it with neighbors, friends, or family members who might face similar garage door challenges. Tag us on social media with your successful repair stories or questions—we’re here to support your home maintenance journey. Don’t let a jammed door compromise your security or peace of mind; bookmark this resource for your next emergency! 🏠🔧
Leave a Reply