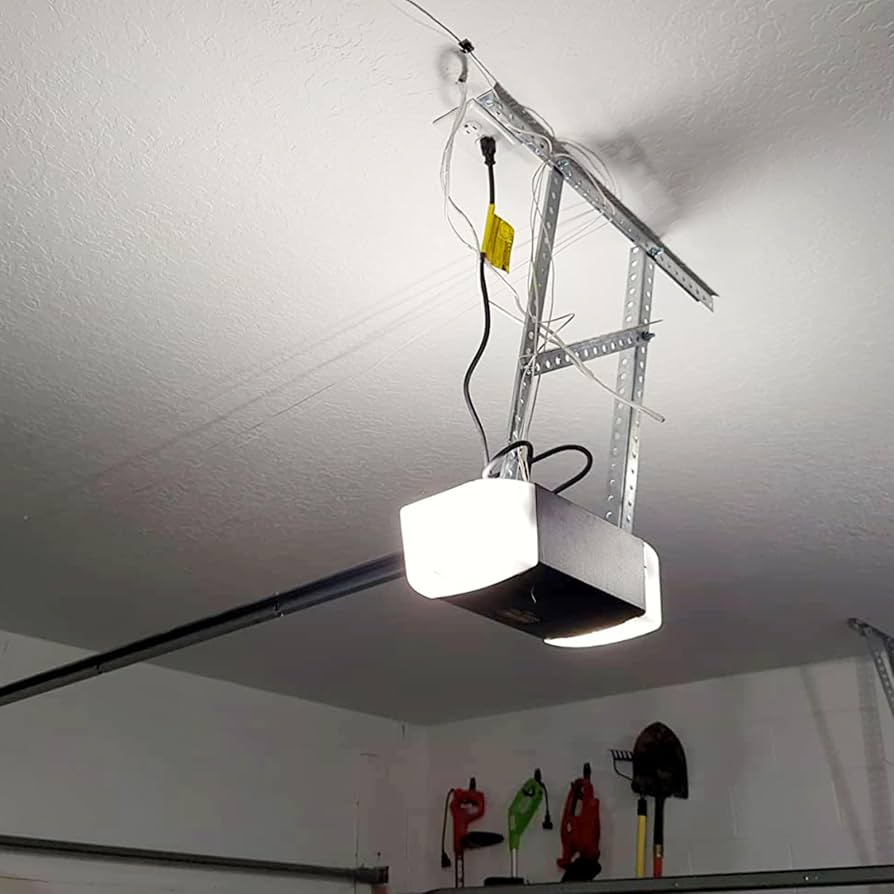
Struggling with a heavy, manual garage door and unsure where to start with the installation? Figuring out How To Mount A Garage Door Opener To The Ceiling can feel overwhelming, but with the right tools and a clear plan, it is a highly rewarding DIY project. Let’s walk through the process together so you can enjoy a quiet, automated space in no time!
How To Mount A Garage Door Opener To The Ceiling: Step-by-Step
Before we grab the power drill, let’s talk safety and preparation. According to a 2024 home improvement industry report, 68% of homeowners prefer DIY installations to save an average of $300 to $500 on professional labor costs. However, skipping safety steps can lead to severe property damage or personal injury. A ceiling-mounted opener is heavy, and securing it properly to the structural framing of your home is non-negotiable.
As certified garage door technician Mike Reynolds notes, “Proper ceiling anchoring is 90% of a safe installation. The biggest mistake DIYers make is anchoring into drywall instead of the actual wooden joist.”
What Tools Do You Need for Installation?
Having the right gear makes the job faster and safer. Gather these essentials before you begin:
- Power drill with a 1/4-inch and 3/16-inch drill bit set
- Electronic or magnetic stud finder
- Socket wrench set and adjustable wrenches
- Tape measure and a 4-foot level
- Stepladder (minimum 6-foot reach)
- Safety glasses and work gloves
- 3/8-inch lag screws (minimum 3 inches long)
Step 1: Locate and Mark the Ceiling Joists
You cannot mount heavy machinery to drywall or plaster. You must anchor the bracket directly into the wooden ceiling joists.
- Turn on your stud finder and sweep it across the ceiling above the center of the garage door.
- Mark the edges of the joist, then find the exact center.
- Most modern homes space joists 16 or 24 inches on center.
- Use your 4-foot level to draw a plumb line down from the ceiling joist to mark where the header bracket will sit on the wall above the door.
Step 2: Install the Ceiling Mounting Bracket
The mounting bracket holds the entire weight of the motor unit.
- Hold the hanging bracket against the ceiling, aligning it with your center joist marks.
- Pre-drill two holes using a 3/16-inch drill bit to prevent the wood from splitting.
- Drive two 3/8-inch lag screws (3 inches long) through the bracket and deep into the joist using your socket wrench.
- Pro Tip: If your joists run perpendicular to your desired mount, you must install a 2×6 wooden plank across two or three joists first, and then mount your bracket to that plank.
Step 3: Hang the Power Unit (Motor)
This is where a second pair of hands is incredibly helpful.
- Lift the motor unit onto the stepladder.
- Attach the power unit to the ceiling bracket using the provided clevis pins and locking clips.
- Ensure there is a minimum 2-inch clearance between the top of the motor housing and the ceiling to allow for vibration and thermal expansion.
- Do not fully tighten the mounting nuts yet; leave them slightly loose so you can level the unit later.
Step 4: Assemble and Attach the Rail
The rail guides the trolley that pulls your door up and down.
- Assemble the rail sections on the garage floor according to the manufacturer’s manual. Ensure the bolts are tightened to roughly 40 ft-lbs of torque.
- Attach the rail to the motor unit sprocket.
- Mount the header bracket to the wall above the garage door (into the structural header, not just the trim). Use 3-inch structural lag screws.
- Connect the front of the rail to the header bracket.
- Check the alignment. The rail should be perfectly level or sloping very slightly downward toward the door (no more than 1/8-inch per foot).
Step 5: Connect the Door Arm and Test
- Keep the garage door fully closed.
- Attach the straight door arm to the trolley and the top roller bracket on the door itself.
- Install the emergency release cord and handle, ensuring it hangs at least 6 feet from the floor so it is accessible but out of reach of small children.
- Plug in the unit, program your remotes, and test the travel limits and auto-reverse safety sensors.
Pros and Cons: Ceiling Mount vs. Wall Mount
When figuring out how to mount a garage door opener, you might wonder if a traditional ceiling mount (trolley style) is better than a wall mount (jackshaft style). Here is a quick comparison:
| Feature | Ceiling Mount (Trolley) | Wall Mount (Jackshaft) |
|---|---|---|
| Space Requirement | Requires overhead clearance | Frees up ceiling space (Great for high ceilings) |
| Noise Level | Moderate (Chain) to Quiet (Belt) | Very Quiet (Operates off the torsion tube) |
| Installation Difficulty | Moderate DIY (Requires ceiling anchoring) | Advanced DIY (Requires torsion spring knowledge) |
| Average Cost | $150 – $300 | $300 – $600 |
| Best For | Standard 8ft to 10ft ceilings | Cathedral ceilings or garages with low headroom |
Crucial Pre-Installation Check: Balance Your Door!
Before you even look at the ceiling, you must test your door’s physical balance. A garage door opener is designed to move the door, not lift its dead weight.
- Pull the emergency release cord to disconnect the door from any existing hardware.
- Lift the door manually halfway up (about 4 feet off the ground) and let go.
- The Result: The door should stay in place. If it slams down, your springs are under-tensioned. If it shoots up, they are over-tensioned.
Warning: Adjusting torsion or extension springs stores immense kinetic energy and can be fatal if done incorrectly. If your door is unbalanced, hire a professional to adjust the springs before you install your new opener.
For a deeper understanding of the mechanics and safety standards, you can read about the history and types of the garage door opener on Wikipedia.
Frequently Asked Questions (FAQ)
1. Can I mount a garage door opener directly to drywall or a drop ceiling?
No. You must never mount an opener to drywall, plaster, or a drop-ceiling grid. The vibration and weight of the motor will rip the drywall out, causing the unit to crash onto your vehicle. You must always anchor the bracket into solid wooden ceiling joists or structural steel beams using heavy-duty lag screws.
2. How high should the garage door opener be from the floor?
The bottom of the rail should generally be at least 7 feet above the garage floor to allow safe clearance for pedestrians and vehicles. However, the exact height depends on the highest point of travel of your garage door. The opener must be mounted high enough so the door clears the rail when fully open, usually requiring the motor to sit 2 to 4 inches below the ceiling joists.
3. Do I need a helper to mount the opener?
While it is physically possible to do it alone using a specialized ladder hoist or by resting the motor on a securely braced stepladder, it is highly recommended to have a helper. The motor unit can weigh between 30 and 50 pounds. Trying to hold the unit in place, align the bracket, and insert locking pins while balancing on a ladder is a major safety risk.
4. What type of drive is best for a ceiling mount under a bedroom?
If your garage is directly beneath a bedroom or living space, opt for a belt-drive opener. Belt-drive models use a steel-reinforced rubber belt instead of a metal chain. This eliminates the “tractor” noise associated with chain drives, ensuring the vibration and sound do not disturb the rooms above.
5. How long does a DIY ceiling mount installation take?
For a first-time DIYer with standard tools, expect the process to take 4 to 6 hours. This includes unboxing, assembling the rail, locating joists, mounting the brackets, and spending the necessary time to perfectly calibrate the safety sensors and travel limits.
6. Why is my newly mounted opener shaking violently?
Violent shaking usually points to two issues: either the ceiling bracket was not anchored securely into the center of the joist, or the rail is misaligned. Use your 4-foot level to ensure the rail is straight. If the bracket is loose, tighten your 3/8-inch lag screws or upgrade to longer 4-inch screws for a deeper bite into the wood.
Conclusion
Learning How To Mount A Garage Door Opener To The Ceiling is a fantastic way to add convenience, security, and value to your home. By carefully locating your ceiling joists, using the correct 3-inch lag screws, and taking the time to balance your door, you ensure a smooth, quiet, and safe operation for years to come. Always respect the heavy lifting involved and never skip the safety sensor tests!
Found this guide helpful? Don’t let your friends struggle with confusing manuals! Share this article on Facebook, Pinterest, or your favorite DIY forum to help someone else conquer their weekend garage project today!
Leave a Reply