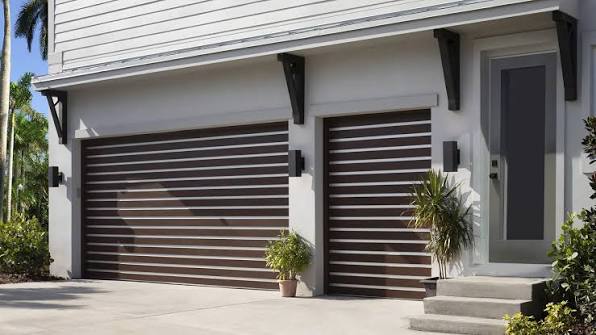
Introduction
Does your home’s exterior feel dated because of a faded, dented, or rusty garage door? You are not alone; the garage door often accounts for up to 30% of a home’s front facade, making its condition critical for first impressions. If you are wondering how to make an old garage door look new without breaking the bank on a full replacement, this guide provides practical, cost-effective solutions to restore its beauty and functionality.
Why Restoring Beats Replacing
Before diving into the tools and techniques, it is essential to understand why restoration is often the smarter choice. According to industry experts, replacing a standard single-car garage door can cost between $1,500 and $2,500, while a double-car door can exceed $4,000. In contrast, a DIY makeover typically costs under $200.
Beyond cost savings, restoring your existing door reduces waste. By extending the life of your current unit, you contribute to sustainability efforts while achieving a fresh aesthetic. However, success depends on proper preparation and execution. Let’s break down the process step-by-step.
Step 1: Deep Cleaning and Surface Preparation
You cannot paint over dirt, grease, or oxidation. The foundation of a professional-looking result is thorough cleaning.
The Cleaning Process:
- Remove Loose Debris: Use a soft-bristle brush to sweep away cobwebs, dust, and loose dirt from the panels and tracks.
- Wash with Degreaser: Mix a solution of warm water and a mild detergent or a dedicated automotive degreaser. Garage doors accumulate road grime and oil splashes that regular soap won’t remove.
- Scrub Gently: Using a non-abrasive sponge, scrub the surface in circular motions. Pay special attention to the bottom panel, which usually holds the most grime.
- Rinse Thoroughly: Use a garden hose with a gentle spray setting. Avoid high-pressure washers, as they can force water behind seals and damage insulation or electronic components.
Pro Tip: Allow the door to dry completely for at least 24 hours before proceeding. Painting over damp surfaces leads to peeling and blistering.
Step 2: Repairing Dents and Rust Spots
Even the best paint job will fail if the surface underneath is compromised. Addressing structural imperfections is crucial for that “brand new” look.
Fixing Minor Dents:
- For steel doors, you can use a plunger or a dent removal kit similar to those used for cars.
- Apply auto body filler for deeper dents. Sand it smooth once it cures using 220-grit sandpaper.
Treating Rust:
- Use a wire brush to scrape away flaky rust until you reach bare metal.
- Apply a rust-inhibiting primer specifically designed for metal surfaces. This step prevents the rust from spreading under the new paint layer.
If your door is wooden, check for rot. Replace any severely rotted sections with matching wood filler or new planks, then sand the area flush with the surrounding surface.
Step 3: Choosing the Right Paint and Finish
Selecting the correct materials is half the battle. Not all paints adhere well to garage door materials, which can be steel, aluminum, wood, or vinyl.
| Material Type | Recommended Paint Type | Primer Needed? |
|---|---|---|
| Steel/Aluminum | Acrylic Latex Exterior | Yes (Bonding Primer) |
| Wood | Exterior Acrylic or Oil-Based | Yes (Wood Primer) |
| Vinyl | Vinyl-Safe Acrylic Latex | No (Usually) |
Color Selection Strategy:
- Match the Trim: Painting the door the same color as your window trim creates a cohesive, high-end look.
- Contrast for Character: A dark charcoal or navy blue door against a light-colored house adds modern sophistication.
- Neutral Safety: Whites, creams, and greiges remain timeless and appeal to future buyers if you plan to sell.
For more detailed information on paint chemistry and durability standards, you can refer to resources like Wikipedia’s page on Paint to understand the composition of exterior-grade coatings.
Step 4: The Painting Technique
Application method matters. Brushing often leaves streaks, while spraying requires extensive masking. Rolling is generally the best balance for DIYers.
Step-by-Step Application:
- Mask Off: Use painter’s tape to protect windows, handles, and weather stripping. Lay drop cloths to catch drips.
- Prime First: Apply a thin, even coat of primer. This ensures better adhesion and true color representation. Let it dry according to the manufacturer’s instructions (usually 2–4 hours).
- Paint in Sections: Work on one panel at a time. Use a high-quality microfiber roller (4mm nap) for smooth surfaces.
- Back-Brushing: After rolling, lightly drag a dry brush over the wet paint to eliminate roller marks and ensure even coverage.
- Two Coats Minimum: One coat rarely provides sufficient durability or depth. Wait for the first coat to dry completely before applying the second.
Note: Avoid painting in direct sunlight or extreme temperatures. Ideal conditions are between 50°F and 85°F (10°C–29°C) with low humidity.
Step 5: Upgrading Hardware and Accessories
Paint refreshes the surface, but hardware updates modernize the style. This is where you can truly customize the look.
Essential Hardware Upgrades:
- Handles and Hinges: Replace rusty iron hinges with decorative black or bronze faux-hinges. Even if they are non-functional, they add a carriage-house aesthetic.
- Window Inserts: If your door has plain panels, consider adding window inserts. They break up the visual mass and add architectural interest.
- Lighting: Install sconces on either side of the garage door. Proper lighting highlights the new paint job and improves safety.
Cost vs. Impact Analysis:
- New Handles: ~$30–$50 | High Visual Impact
- Decorative Hinges: ~$40–$80 | Medium Visual Impact
- Window Inserts: ~$100–$200 | High Visual Impact
These small investments yield a disproportionate return in terms of perceived value and curb appeal.
Step 6: Maintenance for Longevity
A newly restored door needs care to stay looking new. Regular maintenance prevents premature wear and tear.
Monthly Checklist:
- Wipe down the surface with a damp cloth to remove pollen and dust.
- Inspect weather stripping for cracks and replace if necessary.
- Lubricate moving parts (rollers, hinges, springs) with a silicone-based lubricant. Avoid WD-40 as it attracts dirt.
By dedicating just 15 minutes a month to maintenance, you can extend the life of your makeover by several years.
FAQ Section
Q1: Can I paint my garage door without removing it? Yes, you can paint the door while it is still attached to the tracks. However, ensure the door is fully closed and locked in place to prevent movement during painting. Some professionals recommend painting panels individually if the door can be safely disconnected, but for most DIYers, painting in situ is safer and easier.
Q2: How long does a garage door paint job last? With proper preparation and high-quality exterior paint, a garage door paint job can last 5–10 years. Factors such as climate exposure, sun intensity, and maintenance frequency will affect longevity.
Q3: Is it safe to paint vinyl garage doors? Yes, but you must use paint specifically formulated for vinyl. Standard paints may not bond correctly and can peel or crack due to vinyl’s expansion and contraction with temperature changes. Always check the label for “vinyl-safe” certification.
Q4: Should I hire a professional or do it myself? If your door is in good structural condition and you are comfortable with basic DIY tasks, doing it yourself is cost-effective. However, if there is significant rust, structural damage, or if you are uncomfortable working with ladders and chemicals, hiring a professional ensures a flawless finish and safety.
Q5: What is the best time of year to paint a garage door? Spring and early fall are ideal. Temperatures are moderate, and humidity levels are generally lower. Avoid painting in winter due to cold temperatures affecting paint curing, or in peak summer heat which can cause paint to dry too quickly and leave brush marks.
Conclusion
Learning how to make an old garage door look new is a rewarding project that enhances your home’s value and aesthetic appeal. By following these steps—deep cleaning, repairing imperfections, choosing the right paint, upgrading hardware, and maintaining the finish—you can achieve a professional result without the hefty price tag of replacement.
Remember, patience during preparation is key. Rushing the cleaning or priming stages will compromise the final look. Take your time, enjoy the process, and take pride in transforming a neglected feature into a standout element of your home.
Did you find this guide helpful? Share it with your friends on Facebook or Pinterest who might be planning their own home improvement projects!
Leave a Reply