Introduction
Is your garage door stuck halfway, or did you hear a loud “bang” that signaled a broken spring? You are not alone; torsion springs are the hardest-working components of your garage door system, typically lasting only 10,000 cycles before failing. Knowing how to install a torsion spring on a garage door can save you hundreds of dollars in service fees, but it requires precision, the right tools, and an unwavering commitment to safety. This guide will walk you through the process with professional clarity, ensuring you understand every tensioned moment of the repair.
⚠️ CRITICAL SAFETY WARNING
Before we begin, please read this carefully. Torsion springs are under extreme tension. A slipping winding bar or a broken tool can cause severe injury, including broken bones or worse. If you are uncomfortable with heavy mechanical work or do not have the proper tools, hire a professional. This guide is for educational purposes and for those who are confident in their DIY abilities. Always wear safety glasses and heavy-duty gloves.
Understanding the Mechanics: Why Torsion Springs Matter
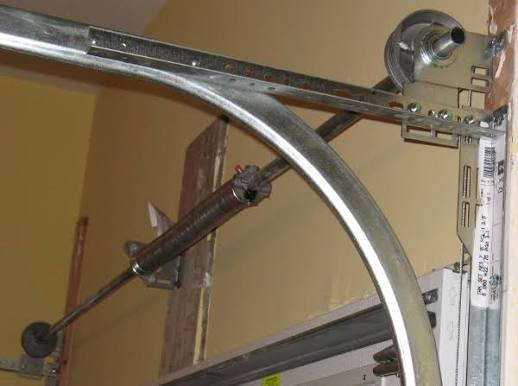
To successfully install a spring, you must understand what it does. Unlike extension springs that stretch along the tracks, torsion springs sit horizontally above the closed garage door. They store mechanical energy by twisting (torque) when the door is lowered and release that energy to lift the door.
According to industry standards, a standard residential garage door weighs between 130 and 400 pounds. The spring system counterbalances this weight, allowing the opener to lift the door with minimal effort. When a spring breaks, the opener cannot lift the dead weight, rendering the door useless.
For a deeper technical understanding of spring mechanics and torque calculations, you can refer to the general principles of Hooke’s Law on Wikipedia, which governs the elasticity of these steel components.
Tools and Materials You Will Need
You cannot improvise this repair. Using incorrect tools is the primary cause of accidents. Gather these items before starting:
- Two Steel Winding Bars: These must be solid steel, at least 18 inches long, and fit snugly into the winding cones. Do not use screwdrivers.
- Socket Set and Ratchet: Typically 7/16″ or 9/16″ sockets for set screws.
- Vise Grips or Locking Pliers: To secure the shaft during removal.
- Stepladder: Sturdy and tall enough to reach the header bracket comfortably.
- C-Clamps: To secure the track to the roller, preventing the door from moving.
- New Torsion Spring(s): Ensure you buy the exact wire size, inside diameter, and length as your old spring. Check the paint code on the end of the old spring (e.g., red, blue, yellow) to verify the weight rating.
Step 1: Secure the Garage Door and Release Tension
The first rule of how to install a torsion spring on a garage door is ensuring the door cannot move unexpectedly.
- Close the garage door completely.
- Disconnect the garage door opener by pulling the emergency release cord.
- Place C-clamps on the vertical tracks just below the bottom rollers. This locks the door in place so it doesn’t shoot up if the spring releases prematurely.
- If you are replacing a broken spring, there may be no tension left. However, if you are replacing both springs or one still has tension, you must unwind it carefully.
Step 2: Unwind the Old Spring (If Applicable)
If the old spring is intact or partially intact, you must release the stored energy.
- Insert a winding bar into one of the holes on the winding cone.
- Hold the bar firmly with both hands. Keep your body and face away from the plane of the spring.
- Loosen the set screws on the winding cone slightly using your socket wrench. Do not remove them yet; just break the seal.
- Pull the winding bar down to unwind the spring. Move the bar to the next hole and repeat.
- Continue until all tension is released and the spring is loose.
- Repeat for the second spring if applicable.
Step 3: Remove the Old Spring and Hardware
Once the tension is gone, the physical removal begins.
- Remove the set screws from the winding cones completely.
- Slide the winding cones off the torsion tube.
- Unbolt the center bearing plate from the header bracket above the door.
- Carefully slide the old spring(s) off the torsion tube. Note the orientation of the cones (left-wind vs. right-wind). One spring will be wound clockwise, and the other counter-clockwise. Mark them if necessary.
Step 4: Install the New Torsion Spring
This is the core of learning how to install a torsion spring on a garage door. Precision is key here.
- Check the Fit: Slide the new spring onto the torsion tube. Ensure the inside diameter matches the tube perfectly.
- Install the Winding Cones: Slide the stationary cone and the winding cone onto the ends of the spring. The stationary cone goes against the center bearing plate, and the winding cone faces outward.
- Align the Holes: Ensure the holes in the winding cone align with the holes in the spring end.
- Secure the Center Bearing: Reattach the center bearing plate to the header bracket. Tighten the bolts securely.
- Lock the Stationary Cone: Tighten the set screws on the stationary cone (the one near the center) to lock it to the torsion tube. This prevents the spring from spinning freely on the shaft.
Step 5: Wind the New Spring (Adding Tension)
This is the most dangerous part. Proceed with extreme caution.
- Insert your two winding bars into the holes of the winding cone. Use two bars for stability—one acts as a brake while you pull the other.
- Determine the number of turns required. A standard 7-foot door usually requires 30 to 35 quarter-turns (or 7.5 to 8.5 full turns). Check your spring manufacturer’s specifications.
- Wind the Spring: Pull the top winding bar down toward the floor. Once it reaches the bottom, insert the second bar into the next available hole.
- Transfer the Load: Slowly release the tension from the first bar while holding the second bar firm. Move the first bar to the next hole.
- Repeat: Continue this “pull, insert, transfer” motion until you reach the required number of turns.
- Final Locking: Once the correct tension is reached, tighten the set screws on the winding cone firmly. These screws bite into the torsion tube to hold the tension.
Step 6: Test and Balance the Door
Installation is not complete until the door is balanced.
- Remove the C-clamps from the tracks.
- Lift the door manually to about waist height (3–4 feet) and let go.
- If it stays in place: The door is balanced. Success!
- If it falls: The spring is under-wound. Add more tension.
- If it shoots up: The spring is over-wound. Release some tension carefully.
- Reconnect the garage door opener and test the automatic cycle. Listen for smooth operation without grinding noises.
Common Mistakes to Avoid
| Mistake | Consequence | Solution |
|---|---|---|
| Using Screwdrivers as Winding Bars | Bar slips, causing injury | Use only solid steel winding bars |
| Incorrect Spring Size | Door won’t balance or opens too fast | Match wire size, ID, and length exactly |
| Loose Set Screws | Spring unwinds unexpectedly | Tighten set screws firmly after winding |
| Ignoring Cable Condition | Cable snaps under new tension | Inspect and replace frayed cables simultaneously |
FAQ Section
Q1: How many turns should I put on my torsion spring? A: The number of turns depends on the height of your door. A general rule of thumb is 1/4 turn for every inch of door height. For a standard 7-foot (84-inch) door, you typically need around 30 to 35 quarter-turns (7.5 to 8.5 full rotations). Always consult the manufacturer’s chart included with your new spring.
Q2: Can I replace just one torsion spring? A: It is highly recommended to replace both springs at the same time. Since both springs were installed at the same time and have undergone the same number of cycles, the second spring is likely near failure as well. Replacing both ensures balanced lifting and prevents another repair call in the near future.
Q3: What is the difference between left-wind and right-wind springs? A: Torsion springs are directional. A left-wind spring coils counter-clockwise, and a right-wind spring coils clockwise. They are not interchangeable. You must install the correct spring on the correct side of the center bearing plate, or the winding cones will not function properly.
Q4: How long do torsion springs last? A: Standard residential torsion springs are rated for approximately 10,000 cycles. One cycle is one open and one close. For an average family using the door twice a day, this translates to roughly 7–10 years. High-cycle springs can last up to 25,000 cycles but are more expensive.
Q5: Why is my garage door making a loud noise after installation? A: Noise usually indicates friction or imbalance. Check that the rollers are lubricated and that the tracks are aligned. If the noise is coming from the spring itself, ensure the winding cones are tight and that the spring is not rubbing against the center bearing plate.
Conclusion
Learning how to install a torsion spring on a garage door is a significant DIY achievement that restores convenience and security to your home. By following these steps, using the correct tools, and respecting the high tension involved, you can perform this repair safely and effectively. Remember, a balanced door not only works better but also extends the life of your garage door opener.
If you found this guide helpful, please share it with your friends or on social media to help others tackle their home maintenance projects with confidence. Stay safe, and enjoy your smoothly operating garage door!
Leave a Reply