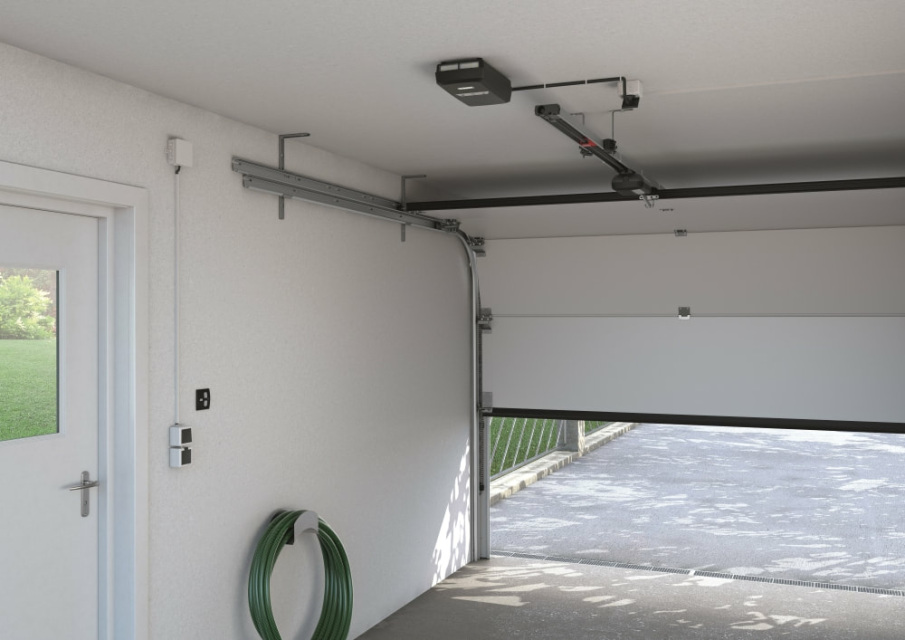
Introduction
Dealing with limited headroom in your garage can feel like an impossible puzzle when you want to automate your door. If standard openers simply won’t fit between the ceiling and the top of your door, you are likely searching for how to install a garage door opener with low clearance without compromising safety or functionality. This guide is designed specifically for homeowners facing this exact spatial challenge, offering empathetic, practical solutions that respect both your budget and your garage’s unique architecture.
What Is Considered Low Clearance for Garage Door Openers?
Before purchasing equipment, it is vital to understand the specific measurements that define “low clearance.” In the garage door industry, standard torsion spring systems typically require at least 12 inches of headroom above the door opening for a traditional trolley-style opener. However, many older homes, converted workshops, or garages with exposed beams may only offer 6 to 8 inches of space.
According to general architectural standards referenced on Wikipedia, residential garage doors have evolved significantly, but retrofitting automation into pre-1980s structures often presents spatial conflicts. When headroom drops below 10 inches, you enter the “low clearance” category. Attempting to force a standard chain-drive or belt-drive unit into this space can lead to motor burnout, track misalignment, and severe safety hazards. Recognizing this threshold early saves time and prevents costly returns.
Can You Install a Standard Opener in Low Headroom Spaces?
The short answer is usually no, but there are nuanced exceptions. Standard center-mount trolley openers hang from the ceiling via a rail system that requires vertical clearance for the motor housing and the carriage assembly. If your ceiling joists sit directly above the door header with less than 10 inches of gap, a standard unit will physically collide with the structural framing.
However, some manufacturers offer “low-profile” trolley models designed specifically for 6–8 inches of headroom. These units feature compact motors and specialized bracketry. Before committing to this option, measure twice:
- Vertical Space: Measure from the top of the closed door (including tracks) to the lowest ceiling obstruction.
- Horizontal Space: Ensure at least 3 inches of lateral clearance on each side of the centerline for mounting brackets.
- Spring Configuration: Verify if you have torsion springs (above door) or extension springs (along tracks). Torsion springs consume more headroom.
If your measurements fall below the manufacturer’s minimum specification for even low-profile trolley units, you must pivot to an alternative drive system.
Jackshaft vs. Low-Profile Trolley: Which Is Better?
When learning how to install a garage door opener with low clearance, choosing the right type is 80% of the battle. The two primary contenders are low-profile trolley openers and jackshaft (wall-mount) openers. Understanding their differences ensures long-term satisfaction.
| Feature | Low-Profile Trolley Opener | Jackshaft (Wall-Mount) Opener |
|---|---|---|
| Min. Headroom Required | 6–8 inches | As little as 3 inches |
| Mounting Location | Ceiling center | Wall beside door |
| Noise Level | Moderate (belt quieter than chain) | Very Quiet |
| Ceiling Obstruction | Still occupies center space | Frees up entire ceiling |
| Cost Range | $250 – $400 | $350 – $600 |
| Best For | Slightly tight spaces, budget-conscious | Extremely low ceilings, storage overhead |
| Safety Sensor Req. | Standard photo-eye sensors | Photo-eye + cable tension monitor |
Expert Insight: Professional installers increasingly recommend jackshaft openers for any garage with less than 8 inches of headroom. Because they mount on the wall next to the torsion spring shaft rather than hanging from the ceiling, they completely eliminate headroom concerns. They also free up overhead space for storage racks or car lifts, adding functional value beyond mere automation.
Step-by-Step: How To Install A Garage Door Opener With Low Clearance (Jackshaft Method)
For garages with critically low headroom, the jackshaft method is the gold standard. Below is a detailed installation walkthrough. Always disconnect power and release spring tension before beginning. Torsion springs store lethal energy; if inexperienced, hire a certified technician.
Step 1: Verify Door Balance and Spring Condition
A jackshaft opener relies entirely on your existing torsion spring system. Manually lift the door halfway and release. It should stay in place. If it slams down or shoots up, your springs are unbalanced. Do not proceed until a professional rebalances the door. An unbalanced door will destroy a jackshaft motor within weeks.
Step 2: Determine Mounting Side and Clearances
Choose the side of the door where the torsion spring winding cone is accessible. You need:
- Minimum 7 inches of lateral wall space beside the door frame.
- At least 3 inches of headroom above the torsion shaft for the motor housing.
- A standard 120V outlet within 6 feet (or plan electrical work).
Step 3: Install the Motor Unit Bracket
Mark the mounting holes using the template provided by the manufacturer. Use a stud finder to locate the wall stud or door jamb header. Critical: Anchor the bracket into solid wood or steel framing, never just drywall. Use 3/8-inch lag screws (minimum 3 inches long). Torque to manufacturer specs, typically 25–30 ft-lbs.
Step 4: Attach the Drive Coupling
Slide the drive coupling onto the torsion shaft. Align the set screws with the flat spots machined into the shaft. Tighten set screws to exactly 15 ft-lbs using a calibrated torque wrench. Over-tightening can crack the shaft; under-tightening causes slippage. Mark the shaft and coupling with paint pen to create a visual slip indicator for future inspections.
Step 5: Wire Safety Sensors and Controls
Jackshaft openers require dual safety systems:
- Photo-Eye Sensors: Mount 6 inches above floor on both sides, aligned perfectly.
- Cable Tension Monitor: Install on the bottom roller bracket. This detects if cables go slack (indicating obstruction or broken cable) and reverses the door instantly.
Wire both to the motor head per the color-coded diagram. Test sensor alignment before powering on—the LED indicators should show steady green (not blinking).
Step 6: Program Travel Limits and Force Settings
Power on the unit. Enter programming mode (usually holding SET button for 6 seconds). Run the door through one complete cycle to establish baseline limits. Fine-tune open/close limits in 1-inch increments. Set force sensitivity so the door reverses upon encountering 5 lbs of resistance. Test monthly by placing a 2×4 board under the door; it must reverse immediately upon contact.
Essential Safety Precautions for Tight-Space Installations
Working in confined areas increases risk. Keep these protocols front-of-mind:
- Lock Out Tag Out: Unplug the opener AND turn off the circuit breaker during installation.
- Spring Awareness: Never loosen torsion spring bolts unless you are trained. The jackshaft installs without adjusting springs.
- Ladder Safety: Use fiberglass ladders near electrical components. Have a spotter when working overhead in cramped spaces.
- Post-Install Testing: Perform 10 consecutive cycles after installation. Listen for grinding, binding, or unusual vibration. Address issues immediately.
Frequently Asked Questions (FAQ)
Q1: How much headroom do I need for a jackshaft garage door opener?
Most modern jackshaft openers require only 3 inches of vertical space above the torsion shaft and 7 inches of lateral wall space. Always check your specific model’s manual, as dimensions vary between brands like LiftMaster, Genie, and Chamberlain.
Q2: Can I convert my extension spring system to work with a low-clearance opener?
Jackshaft openers require torsion springs. If you have extension springs, you’ll need a professional conversion first (typically $200–$400). Low-profile trolley openers can sometimes work with extension springs, but headroom requirements remain higher than jackshaft options.
Q3: Are low-clearance openers louder than standard models?
Actually, jackshaft openers are often quieter. Since the motor mounts on the wall rather than vibrating against ceiling joists, noise transmission into living spaces above the garage is significantly reduced. Belt-drive low-profile trolleys are also quieter than chain drives.
Q4: Do I need special permits for low-clearance opener installation?
Most jurisdictions don’t require permits for opener replacement. However, if you’re converting spring systems or adding new electrical circuits, permits may apply. Check local building codes and HOA rules before starting.
Q5: What maintenance does a low-clearance opener require?
Monthly: test auto-reverse safety features. Quarterly: inspect cable tension monitor and lubricate torsion bearings (not the shaft itself). Annually: have a professional inspect spring balance and hardware wear. Jackshaft units generally require less maintenance than trolley systems due to fewer moving parts.
Q6: Can smart home features work with low-clearance openers?
Absolutely. Most modern jackshaft and low-profile trolley openers include Wi-Fi connectivity, battery backup compatibility, and integration with platforms like MyQ, Alexa, and Google Home. Smart features function identically regardless of opener type.
Conclusion
Mastering how to install a garage door opener with low clearance transforms a frustrating spatial limitation into an opportunity for smarter garage design. Whether you choose a low-profile trolley for moderate constraints or a jackshaft system for extremely tight spaces, the key lies in accurate measurement, proper equipment selection, and unwavering attention to safety. Remember: when in doubt about spring systems or electrical work, investing in professional installation protects both your property and your wellbeing.
Found this guide helpful? Share it with fellow DIYers on Facebook, Pinterest, or Reddit who might be battling the same headroom headaches! Your share could save someone from a dangerous installation mistake. Happy automating! 🏠🔧
Leave a Reply