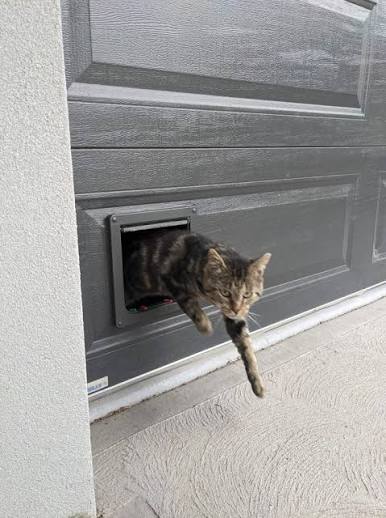
Introduction
Giving your feline friend independent access to the outdoors is a wonderful way to enrich their life, but cutting into a heavy, mechanical garage door can feel intimidating for any homeowner. If you are searching for how to install a cat door in a garage door without compromising the door’s structural integrity or your family’s safety, you have come to the right place. This guide provides a safe, methodical approach tailored specifically for US residential garage doors, ensuring both your pet’s freedom and your peace of mind.
Can You Safely Install a Cat Door in a Sectional Garage Door?
Before picking up a jigsaw, it is critical to understand that not all garage doors are suitable for pet entrances. Most modern US homes utilize sectional steel or aluminum doors with polyurethane foam insulation cores. According to industry standards referenced in Wikipedia articles on overhead door mechanics, these panels rely on horizontal struts and specific tension points to maintain rigidity during operation.
When Installation Is Safe vs. Risky
| Door Type | Suitability | Key Consideration |
|---|---|---|
| Steel/Aluminum Sectional | Moderate | Must avoid vertical stiles and hinge points |
| Solid Wood Single Panel | High | Easiest to modify; structurally forgiving |
| Fiberglass/Glass Sectional | Low | Prone to cracking; professional assessment needed |
| Insulated Steel Sandwich | Moderate | Requires sealing to prevent thermal bridging |
⚠️ Critical Safety Warning: Never cut through the horizontal reinforcement struts or within 4 inches of hinge brackets. Doing so can cause panel failure, derailment, or injury. Always consult your garage door manufacturer’s warranty terms before modifying the panel, as most warranties void upon unauthorized cutting.
What Tools and Materials Do You Need for Installation?
Gathering the correct supplies prevents mid-project trips to the hardware store and ensures a weather-tight seal. For a standard insulated steel sectional door, you will need:
- Pet Door Kit: Choose an insulated, double-flap model rated for exterior use (e.g., Endura Flap or PetSafe Extreme Weather). Single-flap doors create significant thermal loss in US winters.
- Jigsaw with Metal-Cutting Blade: Bi-metal or carbide-tipped blade rated for 18–22 gauge steel.
- Drill and 3/8″ Metal Drill Bit: For creating starter holes at each corner of the cutout.
- Measuring Tape and Carpenter’s Square: Precision is non-negotiable; even a 1/8″ error can bind the flap.
- Silicone Sealant (Exterior Grade): Paintable, UV-resistant silicone to prevent water intrusion and rust.
- Self-Tapping Metal Screws (#10 x 1″): Typically included in the kit, but verify length matches your door thickness plus frame.
- Safety Gear: ANSI-rated safety glasses, cut-resistant gloves, and hearing protection.
- File or Deburring Tool: To smooth sharp metal edges after cutting.
Budget approximately $80–$180 for a quality insulated pet door and consumables. Professional installation averages $250–$400 if you later decide the DIY route exceeds your comfort level.
How To Install A Cat Door In A Garage Door: Step-by-Step
Follow this precise sequence to ensure structural safety and optimal performance. Set aside 2–3 hours of uninterrupted time.
Step 1: Determine the Correct Placement Height
Measure your cat from shoulder to floor while standing naturally. Add 1–2 inches to this measurement for clearance. Mark this height on the garage door panel. Crucially, verify this mark falls in the center third of a single panel section, away from all struts, hinges, and roller tracks. Use your carpenter’s square to confirm the mark is perfectly level.
Step 2: Create the Cutout Template
Use the paper template provided with your pet door kit. Tape it securely to the marked location. Double-check measurements against the actual frame dimensions—never assume the template is accurate. Trace the outline with a fine-point permanent marker.
Step 3: Drill Starter Holes
Put on safety glasses and gloves. Drill a 3/8″ hole at each inside corner of the traced rectangle. These holes allow your jigsaw blade to enter cleanly without damaging surrounding material. Apply light machine oil to the drill bit to reduce heat buildup in steel.
Step 4: Cut the Opening
Insert the jigsaw blade into a starter hole. Cut along the marked line using steady, moderate pressure—let the blade do the work. Excessive force causes blade deflection and jagged edges. Support the cutout piece with your free hand (gloved!) to prevent it from falling and bending the remaining panel. After cutting, use a metal file to deburr all edges thoroughly. Sharp edges will damage the pet door frame and pose injury risks.
Step 5: Test Fit and Dry Assembly
Insert the pet door frame into the opening without screws. Verify it sits flush and square. Open and close the flap multiple times to ensure no binding occurs. If the fit is tight, carefully file the opening edges—do not force the frame.
Step 6: Seal and Secure
Apply a continuous bead of exterior silicone sealant around the exterior perimeter of the cutout. Insert the frame and press firmly. From the interior side, apply the inner frame and drive self-tapping screws through pre-drilled holes at each corner and midpoint of every side. Wipe away excess sealant immediately. Allow 24 hours of cure time before allowing pet use.
Step 7: Train Your Cat
Never push your cat through the new door. Prop the flap open initially and use high-value treats on both sides. Most cats learn within 3–7 days. Monitor initial uses to ensure the garage environment is safe (no antifreeze spills, secured chemicals, etc.).
Pros and Cons of Garage Door Cat Doors
Understanding trade-offs helps set realistic expectations:
✅ Advantages:
- Provides independent outdoor access without human intervention
- Keeps main house doors sealed, improving HVAC efficiency
- Reduces scratching at primary entry doors
- Insulated models minimize thermal transfer (< 0.5 U-factor)
❌ Disadvantages:
- Voids most garage door manufacturer warranties
- Potential security vulnerability (choose lockable models)
- Wildlife intrusion risk in rural areas (consider microchip-activated doors)
- May require garage door spring recalibration due to added weight (rare for cat-sized doors)
Frequently Asked Questions (FAQ)
Will installing a cat door void my garage door warranty?
In most cases, yes. Nearly all major US manufacturers (Clopay, Amarr, Wayne Dalton) explicitly exclude modifications from warranty coverage. Document your door’s condition pre-installation with photos. Some homeowners opt to purchase a replacement panel specifically for modification to preserve the original warranty.
How do I prevent raccoons or stray animals from entering?
Choose a microchip-activated or magnetic collar-key pet door. These only unlock when detecting your cat’s specific signal. Standard gravity-flap doors offer zero wildlife deterrence. Additionally, install motion-activated lighting near the garage entrance as a secondary deterrent.
Can I install a cat door in an insulated garage door without losing R-value?
Yes, if done correctly. Select a pet door with dual flaps and foam-core construction. After installation, inject expanding foam sealant (low-expansion formula) into any gaps between the door core and pet door frame. Properly sealed installations retain over 90% of the original panel’s insulating value.
What height should the cat door be installed at?
The bottom of the flap opening should sit 1–2 inches above your cat’s shoulder height when standing. For average domestic cats (10–12 lbs), this typically translates to 6–8 inches from the floor. Installing too low invites water ingress; too high discourages use by senior or arthritic cats.
Do I need to reinforce the garage door panel after cutting?
For standard cat doors (under 10″ x 10″) in 24-gauge or thicker steel panels, additional reinforcement is usually unnecessary. However, if your door is lightweight aluminum or the cutout exceeds 12″ in any dimension, install flat steel backing plates (1/8″ thick) behind the frame to distribute stress. Consult a garage door technician if uncertain.
How often should I maintain the cat door?
Inspect seals and flap alignment quarterly. Clean tracks monthly with mild soap and water. Lubricate pivot points annually with silicone spray (never petroleum-based products). Replace weatherstripping every 2–3 years or when cracks appear. Regular maintenance extends lifespan to 8–12 years.
Conclusion
Learning how to install a cat door in a garage door empowers you to enhance your pet’s quality of life while maintaining your home’s functionality and safety. By respecting structural limitations, choosing insulated materials, and following precise installation steps, you create a secure passage that serves both your cat and your household for years to come. Remember: patience during measurement and sealing pays exponential dividends in performance and longevity.
Found this guide helpful? Share it with fellow cat-loving homeowners on Facebook, Pinterest, or Nextdoor! Your share might save someone from a costly garage door repair—or give another kitty the outdoor freedom they deserve. 🐾
Leave a Reply