Introduction
A broken or frayed garage door cable can leave you stranded, unable to access your vehicle or secure your home. It’s a frustrating situation that many homeowners face, but knowing how to fix the cable on a garage door can save you hundreds of dollars in professional repair fees. While this task involves significant safety risks due to high-tension springs, understanding the process helps you make informed decisions about whether to attempt a DIY repair or call a professional. This guide will walk you through everything you need to know, from identifying the problem to completing the repair safely.
Understanding Garage Door Cables: Why They Matter
Before diving into the repair process, it’s crucial to understand what garage door cables do and why they’re essential for proper operation. Garage door cables work in tandem with the torsion or extension springs to lift and lower the heavy door smoothly. These steel cables bear tremendous weight—often supporting doors that weigh between 150 to 400 pounds.
When cables become damaged, frayed, or snap entirely, the door becomes unbalanced and potentially dangerous to operate. According to the International Door Association, cable-related issues account for approximately 15% of all garage door service calls annually. Recognizing early signs of wear can prevent complete failure and costly emergency repairs.
Common Signs Your Garage Door Cable Needs Repair
- Visible fraying or rust on the cable strands
- Uneven movement when the door opens or closes
- Loud snapping sounds during operation
- Door appears crooked or hangs at an angle
- Cable has slipped off the drum or pulley
If you notice any of these warning signs, immediate attention is required to prevent further damage or safety hazards.
Safety First: Critical Precautions Before Starting
Warning: Garage door springs store extremely high levels of tension energy. Improper handling can result in serious injury or death. If you’re uncomfortable with any step, hire a licensed professional.
Before attempting to fix your garage door cable, gather these essential safety items:
- Safety glasses to protect eyes from debris
- Heavy-duty work gloves for hand protection
- Vise grips or locking pliers to secure components
- Stepladder for safe access to upper components
- Winding bars (if dealing with torsion springs)
Never attempt cable repair while the door is under tension. Always ensure the spring system is properly secured before beginning work. The Consumer Product Safety Commission reports over 20,000 garage door-related injuries annually, emphasizing the importance of proper safety protocols.
Step-by-Step Guide: How To Fix The Cable On A Garage Door
Step 1: Disconnect Power and Secure the Door
Begin by unplugging your garage door opener to prevent accidental activation. Next, close the door completely if possible. If the cable is already broken, manually lower the door carefully using both hands, ensuring it descends evenly.
Once closed, place C-clamps or vice grips on the track below the bottom roller on each side. This prevents the door from moving unexpectedly during repair. For additional security, have an assistant hold the door steady.
Step 2: Release Spring Tension Safely
This is the most critical and dangerous step. The method varies depending on your spring type:
For Torsion Springs:
- Insert winding bars into the spring cone holes
- Slowly unwind the spring counterclockwise
- Release tension gradually in quarter-turn increments
- Continue until all tension is relieved
For Extension Springs:
- Locate the safety cable running through the spring
- Carefully disconnect the spring from the pulley system
- Allow the spring to relax completely
If you’re unfamiliar with spring systems, stop here and contact a professional. Learn more about garage door spring mechanics on Wikipedia.
Step 3: Remove the Damaged Cable
With tension released, locate the cable attachment points:
- Bottom bracket: Where the cable connects to the door
- Top drum: Where the cable wraps around the torsion tube
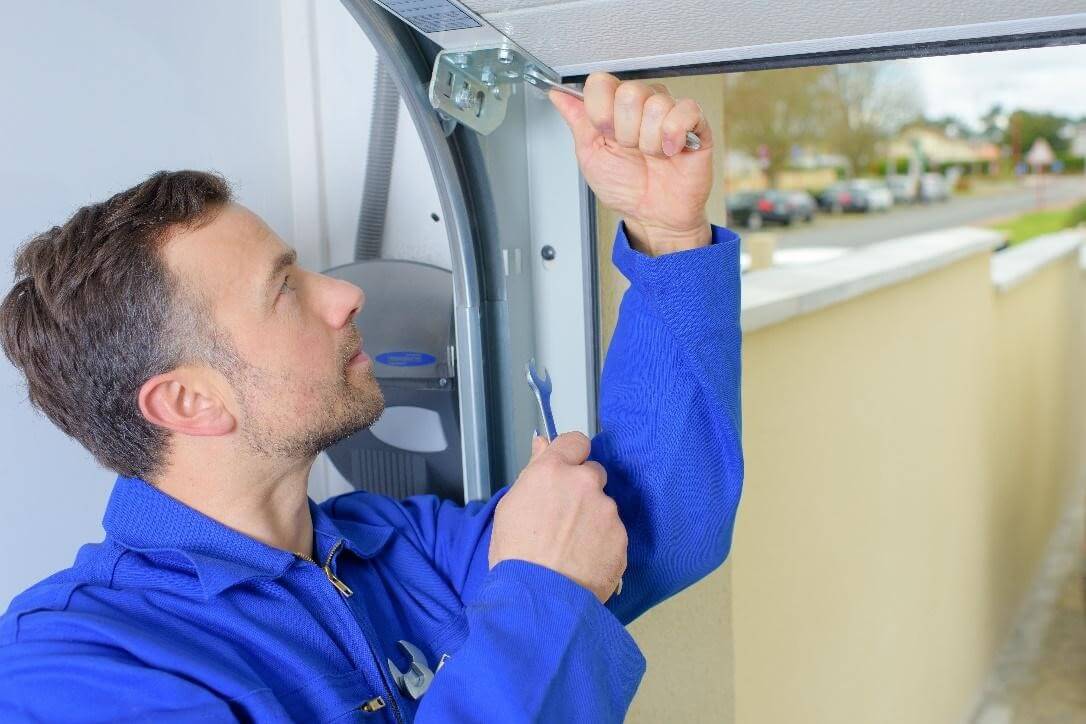
Use pliers to loosen the set screw or bolt securing the cable at the bottom bracket. Carefully unwind the cable from the drum, noting how many wraps it had originally. Take photos for reference during reinstallation.
Inspect the drum for damage or wear. Replace if grooves are deeply worn or cracked.
Step 4: Install the New Cable
Purchase a replacement cable matching your original specifications. Standard residential cables are typically 1/8-inch or 3/16-inch diameter galvanized steel. Measure the old cable length precisely before purchasing.
Installation process:
- Thread one end through the bottom bracket hole
- Secure with the provided bolt or set screw
- Route the cable through the pulley system
- Wrap the cable around the drum, maintaining even tension
- Ensure wraps are tight and parallel without overlapping
Most drums require 3-4 complete wraps for proper operation. Consult your manufacturer’s specifications for exact requirements.
Step 5: Re-tension the Springs
Carefully reverse the tension release process:
For Torsion Springs:
- Insert winding bars into the cone
- Wind clockwise to restore tension
- Follow manufacturer specifications for number of turns
- Typical residential doors require 7-8 quarter turns per spring
For Extension Springs:
- Reconnect the spring to the pulley system
- Ensure safety cables are properly installed
- Verify equal tension on both sides
Step 6: Test and Adjust
Remove the C-clamps securing the door. Manually lift the door halfway and release it. The door should stay in place, indicating proper balance. If it slides down or up, adjust spring tension accordingly.
Reconnect the opener and test automatic operation. Listen for unusual noises and observe smooth, even movement. Make minor adjustments as needed.
When to Call a Professional vs. DIY Repair
| Factor | DIY Repair | Professional Service |
|---|---|---|
| Cost | $20-$50 for parts | $150-$300 including labor |
| Time Required | 2-4 hours | 1-2 hours |
| Skill Level | Intermediate to Advanced | All levels |
| Safety Risk | High | Minimal |
| Warranty | None | Typically 1-year guarantee |
| Tools Needed | Specialized tools required | Professional brings all tools |
Choose DIY if:
- You have experience with mechanical repairs
- You possess proper tools and safety equipment
- The damage is limited to cable replacement only
- You feel confident handling high-tension springs
Call a professional if:
- Springs also need replacement or adjustment
- You’re uncomfortable with any safety procedures
- Multiple components are damaged
- Your door is unusually heavy or large
- Previous repair attempts were unsuccessful
Frequently Asked Questions
Q: How much does it cost to replace a garage door cable?
A: DIY cable replacement costs between $20-$50 for materials, including the cable and necessary hardware. Professional installation ranges from $150-$300, depending on your location and door type. While DIY saves money, professional service includes warranty coverage and ensures proper installation.
Q: Can I replace just one cable or should I replace both?
A: Always replace both cables simultaneously, even if only one appears damaged. Cables experience equal wear and stress during operation. Replacing only one creates imbalance and increases the likelihood of the second cable failing soon after. This approach saves money long-term and ensures balanced door operation.
Q: How often should garage door cables be inspected?
A: Inspect cables monthly for signs of wear, fraying, or rust. Perform a thorough inspection every six months, checking all components including springs, rollers, and tracks. Annual professional maintenance is recommended to identify potential issues before they become major problems. Regular lubrication of moving parts extends cable life significantly.
Q: What causes garage door cables to break?
A: Common causes include normal wear and tear, lack of lubrication, rust corrosion, improper installation, excessive door weight, and spring malfunction. Environmental factors like humidity and temperature fluctuations accelerate deterioration. Poor maintenance is the leading cause of premature cable failure, accounting for nearly 60% of breakdowns according to industry studies.
Q: Is it safe to use my garage door with a broken cable?
A: No, never operate a garage door with a broken or damaged cable. This creates severe safety hazards including sudden door collapse, property damage, and personal injury. The door becomes unbalanced, putting excessive strain on remaining components. Immediately disconnect power and secure the door until repairs are completed.
Q: How long do garage door cables typically last?
A: Quality garage door cables last 7-10 years with proper maintenance. Factors affecting lifespan include usage frequency, climate conditions, maintenance regularity, and initial installation quality. Heavy daily use or harsh weather conditions may reduce lifespan to 5-7 years. Regular inspection and lubrication maximize longevity.
Conclusion
Learning how to fix the cable on a garage door empowers you to handle common repairs confidently while saving significant money. However, always prioritize safety over cost savings. If any aspect of the repair makes you uncomfortable, professional assistance is the wise choice.
Regular maintenance prevents most cable issues. Monthly inspections, proper lubrication, and prompt attention to warning signs extend your garage door system’s life considerably. Remember, a well-maintained garage door operates smoothly, quietly, and safely for years.
Did you find this guide helpful? Share it with friends and neighbors who might benefit from learning how to fix their garage door cables. Follow us on social media for more home maintenance tips and DIY guides!
Leave a Reply