Introduction
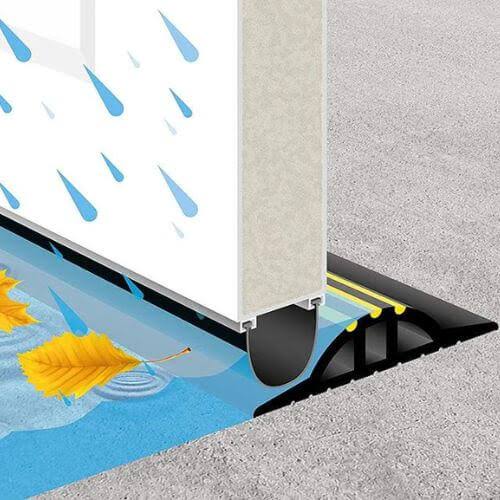
Is water seeping under your garage door during rainstorms? Or perhaps you’ve noticed pests sneaking in through gaps at the base? You are not alone. Millions of homeowners face this issue annually, leading to potential water damage and higher energy bills. Knowing how to fix the bottom of a garage door is essential for maintaining your home’s integrity and security. In this guide, we will walk you through practical, cost-effective solutions to restore your garage door’s bottom seal and structure.
Why Is the Bottom of Your Garage Door Damaged?
Before jumping into repairs, it is crucial to understand why the damage occurred. The bottom section of a garage door bears the brunt of environmental stress. It constantly interacts with the driveway surface, collects debris, and absorbs moisture.
Common causes of damage include:
- Weather Exposure: UV rays can crack rubber seals, while rain causes wood to rot or steel to rust.
- Physical Impact: Accidentally hitting the door with a car or bicycle can dent metal panels or crack wooden frames.
- Pest Infestation: Termites and rodents often target the bottom wooden threshold because it is closest to the ground and often damp.
- Normal Wear and Tear: Over time, the weatherstrip (the rubber seal at the bottom) hardens and loses its flexibility, creating gaps.
According to the International Association of Certified Home Inspectors, regular maintenance of garage door seals can prevent up to 20% of energy loss in attached garages. This highlights why fixing the bottom isn’t just about aesthetics—it’s about efficiency.
Signs You Need to Fix the Bottom of Your Garage Door
How do you know if it’s time for a repair? Look for these red flags:
- Visible Light: If you can see daylight coming through the bottom edge when the door is closed, your seal is compromised.
- Water Pooling: Water enters the garage after heavy rain.
- Drafts: You feel cold air entering the garage during winter.
- Cracked or Brittle Seal: The rubber strip at the bottom is cracked, torn, or missing chunks.
- Rotting Wood: For wooden doors, the bottom panel feels soft or looks discolored.
Step-by-Step: How to Replace a Garage Door Bottom Seal
The most common fix is replacing the weatherstrip. This is a DIY-friendly task that takes less than an hour.
Tools and Materials Needed
- New garage door bottom seal (measure your door width first)
- Utility knife or box cutter
- Screwdriver (Phillips or flathead, depending on your door)
- Pliers
- Soapy water (in a spray bottle)
- Ladder
Step 1: Remove the Old Seal
Start by closing the garage door completely. Locate the retainer channel at the bottom of the door. This is usually an aluminum or steel track that holds the rubber seal in place.
- Use pliers to gently pull out the old rubber seal from the channel.
- If it is stuck, spray some soapy water into the channel to lubricate it.
- Once the rubber is out, check the channel for rust or debris. Clean it thoroughly with a rag.
Step 2: Measure and Cut the New Seal
Measure the exact width of your garage door. Most standard single-car doors are 8–9 feet wide, while double-car doors are 16–18 feet wide.
- Unroll your new weatherstrip.
- Cut it to size using a utility knife. Pro Tip: Cut it slightly longer (by 1 inch) than needed; you can trim the excess later for a perfect fit.
Step 3: Install the New Seal
- Start at one end of the door. Insert the T-shaped or bulbous edge of the new seal into the retainer channel.
- Work your way across the door, pushing the seal firmly into the channel. You may need to use a rubber mallet to tap it gently into place.
- Ensure there are no twists or kinks in the rubber.
Step 4: Secure the Ends
Once the seal is fully inserted, check the ends. If your door has end caps, screw them back in place. If not, ensure the seal is flush with the edges of the door. Trim any excess rubber if necessary.
Step 5: Test the Door
Open and close the garage door slowly. Listen for any scraping sounds. The seal should make light contact with the driveway but not drag heavily. If it drags, you may need to adjust the door’s limit settings on the opener.
How to Fix Rotting Wood at the Bottom of a Garage Door
If you have a wooden garage door, the bottom panel is prone to rot. Here is how to address minor to moderate rot without replacing the entire door.
Assessment
Tap the bottom wood with a screwdriver. If it feels spongy or crumbles, it is rotted.
Repair Process
- Remove Rotted Wood: Use a chisel or oscillating tool to remove all soft, decayed wood until you reach solid material.
- Apply Wood Hardener: Brush a wood hardener chemical onto the remaining solid wood to strengthen it. Let it dry as per the manufacturer’s instructions.
- Fill with Epoxy: Use a two-part epoxy wood filler to rebuild the missing sections. Shape it to match the original profile of the door.
- Sand and Paint: Once the epoxy cures (usually 24 hours), sand it smooth. Prime and paint to match the rest of the door. This seals the wood against future moisture.
Note: If more than 30% of the bottom panel is rotted, consider replacing the entire panel or the door for structural safety.
Fixing Dents in Steel Garage Door Bottoms
Steel doors are durable but can dent. Small dents at the bottom can compromise the seal’s ability to sit flat.
- Small Dents: Use a plunger or a dent-pulling kit. Apply heat with a hairdryer to expand the metal, then pop the dent out from the inside.
- Large Dents: If the dent prevents the door from closing evenly, you may need to replace the bottom panel. Contact a professional for panel replacement, as it involves disconnecting springs and cables, which can be dangerous.
Comparison: Rubber vs. Vinyl Weatherstrips
Choosing the right material for your new seal is critical. Here is a quick comparison:
| Feature | Rubber Seal | Vinyl Seal |
|---|---|---|
| Durability | High (lasts 5–7 years) | Medium (lasts 3–5 years) |
| Flexibility | Excellent in cold weather | Can become brittle in cold |
| Cost | Slightly higher | More affordable |
| Best For | Extreme climates, heavy use | Mild climates, budget repairs |
For most US homeowners, rubber seals are recommended due to their superior resilience against temperature fluctuations.
When to Call a Professional
While DIY fixes are great for seals and minor rot, some issues require expert attention:
- Spring Issues: If the door feels heavy or won’t stay open, the torsion springs may be broken. Never attempt to fix garage door springs yourself. They are under high tension and can cause severe injury.
- Track Misalignment: If the door binds or makes grinding noises, the tracks may be bent.
- Structural Damage: If the bottom panel is severely crushed or separated from the rest of the door.
FAQ Section
Q1: How often should I replace my garage door bottom seal?
A: Generally, every 3–5 years. However, inspect it annually. If you see cracks, tears, or gaps, replace it immediately regardless of age.
Q2: Can I use silicone caulk instead of a weatherstrip?
A: No. Silicone caulk is not flexible enough to withstand the movement of the door and will crack quickly. Always use a dedicated garage door weatherstrip.
Q3: Why is my garage door dragging on the ground after replacing the seal?
A: The new seal might be too thick, or the door’s “down limit” setting on the opener needs adjustment. Consult your opener’s manual to adjust the travel limits slightly.
Q4: Does fixing the bottom seal help with energy bills?
A: Yes. A tight seal prevents cold air from entering in winter and hot air in summer, reducing the load on your HVAC system if your garage is insulated or attached to your home.
Q5: What is the best way to clean the bottom seal before installation?
A: Use a mixture of mild dish soap and warm water. Avoid harsh chemicals like bleach or acetone, which can degrade the rubber or vinyl material.
Conclusion
Learning how to fix the bottom of a garage door is a valuable skill that saves money and protects your home. Whether you are replacing a simple weatherstrip or repairing minor wood rot, these steps ensure your garage remains dry, secure, and energy-efficient. Regular maintenance extends the life of your door and prevents costly repairs down the line.
Did you find this guide helpful? Share it with your neighbors or on social media to help others keep their garages in top shape! If you have further questions, leave a comment below—we love hearing from our readers.
Leave a Reply