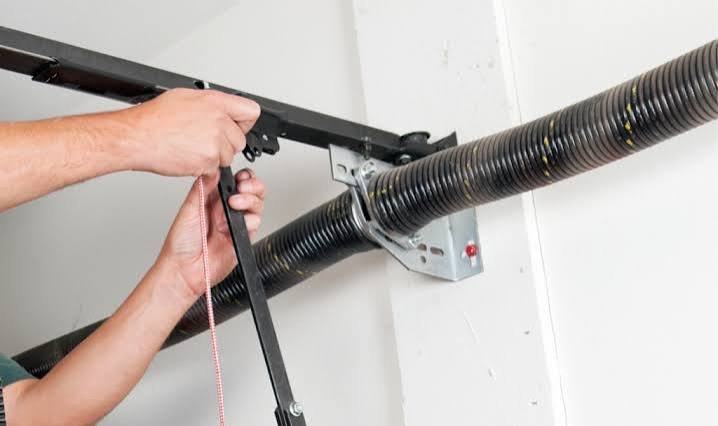
Is your garage door stuck halfway or refusing to open? You’re not alone—broken springs are one of the most common garage door issues homeowners face. Learning how to fix a spring on a garage door can save you hundreds of dollars, but safety must come first. This comprehensive guide will walk you through everything you need to know, from identifying the problem to deciding whether to tackle it yourself or call a professional.
Understanding Garage Door Springs: The Basics
Before attempting any repairs, it’s crucial to understand what you’re dealing with. Garage doors rely on two main types of springs to counterbalance the heavy weight of the door, making it easy to open and close.
Torsion Springs vs. Extension Springs
| Feature | Torsion Springs | Extension Springs |
|---|---|---|
| Location | Mounted above the door opening | Run along both sides of the door tracks |
| Mechanism | Twist to store energy | Stretch to provide lift |
| Lifespan | 15,000–20,000 cycles | 10,000–15,000 cycles |
| Safety Level | More dangerous to repair | Slightly safer but still risky |
| Cost | $200–$400 (professional) | $150–$300 (professional) |
Torsion springs are mounted horizontally above the garage door opening. They work by twisting (torsion) to store mechanical energy. When you open the door, the springs unwind, releasing energy to help lift the door. These are more common in modern homes and are generally considered more durable.
Extension springs, on the other hand, run parallel to the horizontal tracks on both sides of the door. They stretch and contract as the door moves. While slightly less dangerous than torsion springs, they still pose significant risks if handled improperly.
According to the International Door Association, garage door springs account for approximately 70% of all garage door service calls, making them the most frequently replaced component.
Warning Signs Your Garage Door Spring Needs Repair
Identifying the problem early can prevent further damage and potential safety hazards. Here are the most common signs that your garage door spring needs attention:
- The door won’t open or close completely: If your door stops midway or reverses unexpectedly, the spring may have lost tension or broken entirely.
- Loud snapping noise: A sudden bang from the garage often indicates a spring has snapped. This is especially common with extension springs.
- Visible gaps in torsion springs: Look at the spring above your door. If you see a noticeable gap between the coils, it’s broken.
- Door feels extremely heavy: Try lifting the door manually (with the opener disconnected). If it feels unusually heavy, the springs aren’t providing proper counterbalance.
- Cables appear loose or detached: Broken springs often cause cables to slacken or come off their drums.
- Uneven movement: If one side of the door rises faster than the other, one spring may be failing.
Safety First: Critical Precautions Before Starting
This cannot be stressed enough: garage door springs are under extreme tension and can cause serious injury or death if mishandled. According to the Consumer Product Safety Commission, thousands of garage door-related injuries occur annually in the United States, many involving spring repairs.
Essential Safety Equipment
Before considering any repair, gather these items:
- Safety glasses: Protect your eyes from flying debris
- Heavy-duty work gloves: Prevent cuts and improve grip
- Steel-toed boots: Protect your feet from falling components
- Clamping pliers (vise grips): Essential for securing components
- Winding bars: Specifically designed for torsion spring adjustment (never use screwdrivers)
- Stepladder: Sturdy and stable for reaching overhead springs
When NOT to Attempt DIY Repair
You should immediately call a professional if:
- You have torsion springs and lack experience with high-tension systems
- The spring is completely snapped and cables are detached
- You notice damage to multiple components (springs, cables, rollers, and tracks)
- You feel uncertain or uncomfortable at any point
- The door weighs more than 400 pounds
Remember: There’s no shame in calling a professional. Garage door technicians undergo extensive training and have specialized tools to perform repairs safely.
Step-by-Step Guide: How to Fix Extension Springs
If you’ve determined you have extension springs and feel confident proceeding, follow these detailed steps. Never attempt this alone—have a helper present.
Step 1: Disconnect the Garage Door Opener
Pull the emergency release cord to disconnect the opener from the door. This prevents accidental activation during repair.
Step 2: Secure the Door in the Open Position
Use C-clamps or locking pliers to secure the door tracks just below the bottom rollers. This prevents the door from falling while you work.
Step 3: Release Tension Safely
With your helper holding the door steady, carefully unhook the safety cable from the broken spring. Extension springs should always have safety cables running through them—this prevents the spring from becoming a projectile if it breaks.
Step 4: Remove the Broken Spring
Using appropriate wrenches, detach the spring from its mounting brackets. Note how the original spring was installed, including which holes were used for tension adjustment.
Step 5: Install the New Spring
Attach the new spring to the same mounting points. Ensure you use the exact same type and size as the original. Extension springs are color-coded by weight capacity—match the colors precisely.
Step 6: Reattach Safety Cables
Thread the safety cable through the new spring and secure both ends. This is non-negotiable for safety.
Step 7: Test the Balance
Remove the clamps and manually lift the door halfway. It should stay in place without support. If it falls or rises, the tension needs adjustment.
When to Replace vs. Repair
Not every spring issue requires complete replacement. Here’s a quick comparison:
| Issue | Repair Possible? | Recommended Action |
|---|---|---|
| Minor loss of tension | Yes | Adjust tension with winding bars |
| Single broken coil (torsion) | No | Replace entire spring set |
| Completely snapped spring | No | Replace immediately |
| Corrosion or rust | Depends | Replace if structural integrity compromised |
| Loose mounting hardware | Yes | Tighten or replace brackets |
Pro tip: Always replace springs in pairs, even if only one is broken. The other spring has undergone similar wear and will likely fail soon.
Cost Comparison: DIY vs. Professional Service
Understanding the financial implications helps you make an informed decision:
- DIY extension spring replacement: $50–$150 (parts only)
- Professional extension spring replacement: $150–$300
- DIY torsion spring replacement: $75–$200 (parts + specialized tools)
- Professional torsion spring replacement: $200–$400
- Emergency service call: Additional $75–$150
While DIY seems cheaper, consider the value of professional warranty (typically 1–5 years), proper disposal of old springs, and peace of mind knowing the job was done safely.
Frequently Asked Questions
How long do garage door springs typically last?
Most garage door springs last between 7–12 years with normal use (approximately 10,000–20,000 cycles). One cycle equals one complete opening and closing. Factors affecting lifespan include climate, frequency of use, and maintenance practices.
Can I lubricate my garage door springs to extend their life?
Yes, but use caution. Apply a silicone-based lubricant or white lithium grease sparingly to torsion springs twice yearly. Never lubricate extension springs as this can attract dirt and cause premature failure. Avoid WD-40 as it’s not a true lubricant and will evaporate quickly.
What size spring do I need for my garage door?
Spring size depends on your door’s weight, height, and track radius. Check the existing spring for printed specifications, or measure the wire diameter, inside diameter, and length. When in doubt, consult a professional or use an online spring calculator provided by manufacturers.
Is it safe to operate a garage door with a broken spring?
No, absolutely not. Operating a door with a broken spring puts excessive strain on the opener motor, can damage cables and rollers, and creates a serious safety hazard. The door could fall unexpectedly, causing property damage or injury. Keep the door closed and disconnected until repairs are completed.
How often should I inspect my garage door springs?
Inspect your springs monthly for signs of wear, corrosion, or gaps. Perform a balance test quarterly by disconnecting the opener and manually lifting the door halfway—it should remain stationary. Annual professional inspections are recommended for comprehensive maintenance.
Can weather affect garage door spring performance?
Yes, extreme temperatures impact spring performance. Cold weather makes metal brittle and more prone to breaking, while heat can cause expansion and tension changes. If you live in an area with significant temperature fluctuations, consider upgrading to high-cycle springs rated for extreme conditions.
Final Thoughts
Learning how to fix a spring on a garage door empowers you to handle minor issues and make informed decisions about major repairs. However, always prioritize safety over savings. If you have torsion springs or any doubt about your ability to perform the repair safely, contact a licensed garage door technician.
Regular maintenance—including visual inspections, lubrication, and balance testing—can extend spring life and prevent unexpected failures. Remember, a properly functioning garage door spring ensures smooth operation, protects your garage door opener, and keeps your family safe.
Found this guide helpful? Share it with friends and neighbors who might benefit from knowing how to identify and address garage door spring issues. Your share could prevent someone from attempting a dangerous DIY repair!
Disclaimer: This article provides general information only. Always consult a qualified professional for garage door repairs, especially when dealing with high-tension spring systems.
Leave a Reply