Introduction
Is your garage door refusing to open when you press the button? It is one of the most frustrating moments in a homeowner’s day, especially when you are running late or carrying heavy groceries. You are not alone; millions of Americans face this issue annually, but the good news is that you rarely need to call a professional technician immediately.
In this guide, we will walk you through exactly how to fix a Genie garage door opener remote. Whether it is a simple battery issue or a synchronization glitch, we have covered the most effective solutions to get your door moving again safely and efficiently.
Why Is My Genie Remote Not Working?
Before diving into fixes, it is crucial to understand the root cause. Genie garage door openers are known for their durability, but like any electronic device, they are susceptible to wear and tear. According to industry data, nearly 60% of garage door remote failures are due to power issues or signal interference rather than mechanical breakdowns.
Understanding the “why” helps you apply the right “how.” Common culprits include dead batteries, lost programming codes, physical damage to the remote, or interference from LED light bulbs. By identifying the specific symptom, you can skip unnecessary steps and solve the problem faster.
Step 1: Check and Replace the Batteries
The most common reason for a malfunctioning remote is simply depleted power. Even if the LED light on the remote blinks, the voltage might be too low to send a strong signal to the opener motor.
How to Replace the Battery Correctly
- Identify the Battery Type: Most Genie remotes use a CR2032 3V lithium coin cell battery. Some older models may use AA or AAA batteries. Check the back of your remote for the specific type.
- Open the Remote: Use a small flathead screwdriver or a coin to twist open the battery compartment. Be gentle to avoid cracking the plastic casing.
- Remove the Old Battery: Note the orientation of the positive (+) and negative (-) sides.
- Insert the New Battery: Ensure the new battery is seated firmly with the correct polarity.
- Test the Remote: Stand within 10 feet of the garage door and press the button.
Pro Tip: Always use high-quality brand-name batteries. Cheap alternatives often have inconsistent voltage output, which can cause intermittent connectivity issues.
Step 2: Reprogram Your Genie Remote
If fresh batteries do not solve the issue, your remote may have lost its synchronization with the opener unit. This often happens after a power outage or if the remote has been dropped frequently. Reprogramming is the core skill in learning how to fix a Genie garage door opener remote.
The Standard Reprogramming Process
Most modern Genie openers use the “Intellicode” technology, which changes the code every time you use the remote for security. Here is how to reset it:
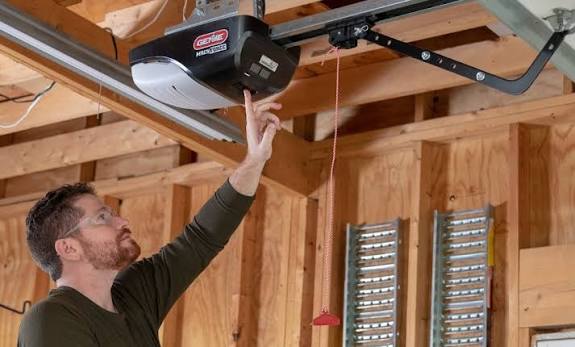
- Locate the Learn Button: Find the “Learn” or “Program” button on your garage door opener motor unit. It is usually located on the back or side of the unit and may be colored purple, orange, or green.
- Clear Old Codes (Optional but Recommended): Press and hold the Learn button for about 10 seconds until the indicator light goes out. This clears all previously programmed remotes. Note: You will need to reprogram all your remotes and keypads after this step.
- Enter Programming Mode: Press the Learn button once briefly. The indicator light should start blinking or turn solid.
- Sync the Remote: Within 30 seconds, press and hold the button on your remote that you want to program. Keep holding it until the opener’s lights flash or you hear two clicks.
- Test the Connection: Press the remote button again to ensure the door operates smoothly.
For more detailed technical specifications on Genie’s encryption technology, you can refer to the general overview of garage door opener security standards on Wikipedia.
Step 3: Check for Signal Interference
Sometimes, the hardware is fine, but the signal is being blocked. This is increasingly common in modern homes due to the proliferation of wireless devices.
Common Sources of Interference
- LED Light Bulbs: Certain non-shielded LED bulbs in the garage opener unit can emit radio frequency noise that jams the remote signal. Try turning off the garage light and testing the remote. If it works, replace the bulb with a Genie-approved LED or an incandescent bulb.
- Wi-Fi Routers: If your router is located directly next to the garage opener, it may cause interference. Try moving the router or changing the Wi-Fi channel.
- Metal Obstructions: Ensure there are no large metal objects or foil-backed insulation blocking the path between the remote and the opener antenna.
Step 4: Inspect for Physical Damage
Drop accidents are inevitable. If your remote has been subjected to impact, internal components may be damaged.
What to Look For
- Cracked Casing: Moisture and dust can enter through cracks, corroding the circuit board.
- Loose Buttons: If the button feels mushy or does not click, the contact pad underneath may be worn out.
- Corroded Contacts: Check the battery terminals for white or green corrosion. Clean them with a cotton swab dipped in rubbing alcohol.
If the circuit board is visibly damaged or water-damaged, repair is often not cost-effective. In such cases, purchasing a universal Genie-compatible remote is a better solution.
Comparison: Repair vs. Replace
When deciding whether to continue troubleshooting or buy a new remote, consider the following factors:
| Feature | Repairing Existing Remote | Buying New Remote |
|---|---|---|
| Cost | Low ($5–$10 for batteries) | Moderate ($20–$40) |
| Time Effort | High (Troubleshooting) | Low (Plug and Play) |
| Reliability | Variable (Depends on damage) | High (Brand new components) |
| Compatibility | Guaranteed (Already paired) | Must verify model number |
Expert Insight: If your remote is more than 10 years old, replacement is generally recommended. Older models lack the rolling code security features of newer units, making them vulnerable to hacking.
FAQ Section
1. How do I know if my Genie remote is broken or if the opener is faulty?
Try using a second remote or the wall-mounted keypad inside the garage. If the wall switch works but the remote does not, the issue is with the remote. If neither works, the problem likely lies with the garage door opener motor or its power source.
2. Can I use a universal remote for my Genie garage door?
Yes, most universal remotes are compatible with Genie openers manufactured after 1997. However, you must ensure the universal remote supports “Intellicode” technology. Always check the packaging for compatibility lists before purchasing.
3. Why does my remote work only when I am very close to the garage?
This is a classic sign of weak batteries or a failing capacitor in the remote. Replace the batteries first. If the issue persists, the remote’s transmitter may be failing, and replacement is advisable.
4. How often should I change the batteries in my Genie remote?
It is recommended to change the batteries once a year as a preventive measure, even if they seem to be working. This prevents unexpected failures during critical moments.
5. What should I do if I lost all my remotes?
You can still program a new remote by accessing the Learn button on the motor unit. If you have a keypad, you can also use it to enter a PIN code to open the door while you wait for a new remote to arrive.
Conclusion
Learning how to fix a Genie garage door opener remote is a valuable skill that saves you time and money. In most cases, the solution is as simple as replacing a battery or reprogramming the device. By following the steps outlined above—checking power sources, eliminating interference, and resetting the code—you can restore functionality to your garage door system quickly.
Remember, regular maintenance extends the life of your garage door components. Keep a spare set of batteries on hand and test your remote monthly to ensure it is ready when you need it.
Did this guide help you get your garage door working again? Share this article with your friends and neighbors on social media to help them troubleshoot their Genie remotes too!
Leave a Reply