Introduction
Discovering a crack in your metal garage door can be alarming. Not only does it compromise your home’s security, but it can also lead to more expensive repairs if left untreated. Whether you’re dealing with a small hairline fracture or a larger split, knowing how to fix a crack in metal garage door properly can save you hundreds of dollars in replacement costs. This comprehensive guide will walk you through proven repair methods that homeowners across the United States have successfully used to restore their garage doors to full functionality.
Understanding Metal Garage Door Cracks: Causes and Types
Before diving into repairs, it’s crucial to understand why cracks occur and what type you’re dealing with. Metal garage doors typically develop cracks due to several common factors:
- Temperature fluctuations: Extreme heat and cold cause metal to expand and contract
- Impact damage: Accidental hits from vehicles or heavy objects
- Corrosion: Rust weakens the metal structure over time
- Manufacturing defects: Poor quality materials or installation issues
- Age and wear: Natural deterioration after years of use
According to the International Association of Certified Home Inspectors, approximately 30% of garage door failures are related to structural damage, including cracks and dents. Understanding the root cause helps prevent future occurrences.
Types of Cracks You Might Encounter
| Crack Type | Characteristics | Repair Difficulty |
|---|---|---|
| Hairline Cracks | Thin, barely visible lines | Easy |
| Surface Cracks | Visible but shallow | Moderate |
| Structural Cracks | Deep, affecting integrity | Difficult |
| Corrosion Cracks | Accompanied by rust | Moderate to Difficult |
Essential Tools and Materials for Repair
Gathering the right supplies before starting ensures a smooth repair process. Here’s what you’ll need:
Basic Tools:
- Wire brush or sandpaper (80-120 grit)
- Clean rags or microfiber cloths
- Putty knife or plastic scraper
- Clamps (if needed for holding pieces)
- Safety glasses and gloves
Repair Materials:
- Metal epoxy or two-part adhesive specifically designed for steel
- Fiberglass mesh patch (for larger cracks)
- Metal filler compound
- Primer suitable for metal surfaces
- Matching paint for finishing
Pro Tip: Invest in high-quality metal epoxy rated for outdoor use. Cheap adhesives may fail within months, requiring repeated repairs.
Step-by-Step Guide: How to Fix a Crack in Metal Garage Door
Step 1: Assess the Damage Thoroughly
Begin by examining the crack carefully. Determine its length, depth, and whether it affects the door’s structural integrity. If the crack is longer than 6 inches or goes completely through the metal panel, consider consulting a professional. For most homeowner-repairable cracks, proceed with caution.
Clean the area around the crack using a wire brush to remove loose paint, rust, and debris. This preparation is critical for proper adhesion of repair materials.
Step 2: Prepare the Surface
Surface preparation determines the success of your repair. Follow these specific steps:
- Sand the area: Use 80-grit sandpaper to roughen the surface extending 2 inches beyond the crack on all sides
- Remove dust: Wipe clean with a damp cloth, then dry thoroughly
- Degrease: Apply rubbing alcohol to eliminate any oil residues
- Let dry: Allow 15-20 minutes for complete drying
Important: Never skip this step. Poor surface preparation leads to failed repairs within weeks.
Step 3: Apply Metal Epoxy or Filler
For hairline and small cracks (under 3 inches):
- Mix the two-part metal epoxy according to manufacturer instructions
- Apply a thin layer directly into the crack using a putty knife
- Press firmly to ensure the epoxy penetrates deep into the fracture
- Smooth the surface slightly above the surrounding area to account for shrinkage
For larger cracks requiring reinforcement:
- Cut fiberglass mesh to size, covering the crack with 1-inch overlap on each side
- Apply epoxy to the prepared surface
- Press the mesh into the wet epoxy
- Cover with another layer of epoxy, feathering edges smoothly
Allow the epoxy to cure for the recommended time—typically 24 hours at room temperature (68-72°F). Cold temperatures significantly extend curing time.
Step 4: Sand and Smooth the Repair
Once fully cured:
- Start with 120-grit sandpaper to level the repaired area
- Progress to 220-grit for a smoother finish
- Feather the edges so there’s no noticeable transition
- Wipe away all dust with a tack cloth
The goal is creating a seamless surface ready for priming and painting.
Step 5: Prime and Paint for Protection
Final protection prevents future corrosion and matches your door’s appearance:
- Apply metal-specific primer to the repaired area
- Let dry according to product instructions (usually 2-4 hours)
- Apply 2 coats of matching exterior-grade paint
- Allow 24 hours between coats for best results
Choose paint formulated for metal surfaces and outdoor conditions. This final step extends your repair’s lifespan significantly.
When to Call a Professional
While DIY repairs work for many situations, certain scenarios require expert attention:
- Cracks affecting the door’s structural framework
- Multiple cracks appearing simultaneously
- Damage near hinges, springs, or operating mechanisms
- Doors showing signs of warping or misalignment
- Repairs that have failed previously
Professional garage door technicians have specialized tools and expertise for complex repairs. The average cost ranges from $150-$400, which may be worthwhile for extensive damage.
Preventing Future Cracks in Your Metal Garage Door
Prevention is always better than cure. Implement these strategies to protect your investment:
Regular Maintenance Schedule:
- Inspect your door monthly for early signs of damage
- Lubricate moving parts quarterly with silicone-based lubricant
- Check weatherstripping annually and replace when worn
- Clean the door surface twice yearly to prevent corrosion buildup
Environmental Protection:
- Install proper drainage to prevent water accumulation
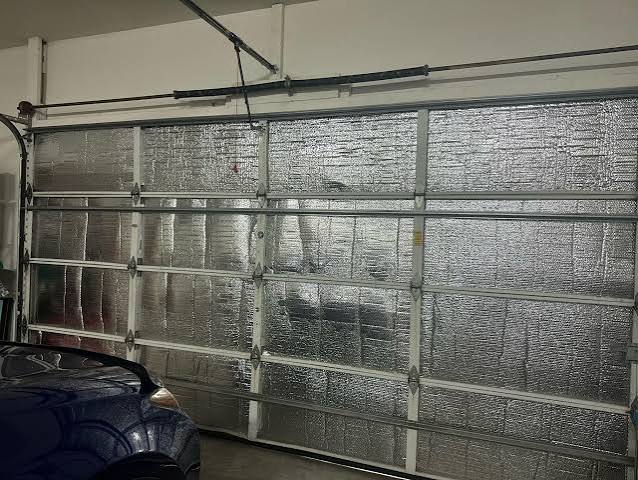
- Consider adding insulation to reduce temperature-related stress
- Apply protective wax coating annually for extra corrosion resistance
Usage Best Practices:
- Avoid slamming the door or forcing it when obstructed
- Keep the track clean and properly aligned
- Address minor dents promptly before they develop into cracks
According to industry experts, regular maintenance can extend a metal garage door’s lifespan by 5-10 years beyond its expected service life.
Frequently Asked Questions
Q: Can I use regular household glue to fix a metal garage door crack?
A: No, standard household adhesives lack the strength and weather resistance needed for metal garage door repairs. Always use epoxy or filler specifically formulated for metal surfaces and outdoor conditions. These products withstand temperature extremes, moisture, and vibration that regular glues cannot handle.
Q: How long does a metal garage door crack repair typically last?
A: With proper preparation and quality materials, repairs should last 3-5 years minimum. Factors affecting longevity include the crack’s original cause, environmental conditions, and maintenance practices. Regular inspections help catch any issues before they worsen.
Q: Is it safe to drive my car if the garage door has a crack?
A: Small, superficial cracks generally don’t pose immediate safety risks. However, avoid using the door if the crack affects structural components, causes misalignment, or continues growing. When in doubt, consult a professional to assess safety concerns.
Q: What’s the difference between fixing a crack and replacing the panel?
A: Repairing is cost-effective for minor damage, typically costing $20-$50 in materials. Panel replacement becomes necessary when cracks compromise structural integrity, affect multiple panels, or when repairs exceed 30% of the panel’s surface. Replacement costs range from $200-$600 per panel depending on material and style.
Q: Will insurance cover garage door crack repairs?
A: Coverage depends on the cause of damage. Insurance typically covers cracks resulting from covered events like storms, vandalism, or accidents. However, damage from normal wear, age, or lack of maintenance usually isn’t covered. Review your policy or contact your insurer for specific details.
Q: Can I paint over a repaired crack immediately?
A: No, rushing the painting process compromises the repair. Wait for the epoxy or filler to fully cure (usually 24 hours), then apply primer and allow it to dry completely before painting. Proper timing ensures maximum adhesion and durability of your finished repair.
Conclusion
Learning how to fix a crack in metal garage door empowers you to maintain your home’s security and appearance without breaking the bank. By following this comprehensive guide, you’ve gained the knowledge to assess damage, prepare surfaces properly, apply quality repair materials, and protect your work for lasting results.
Remember, successful repairs depend on thorough preparation, quality materials, and patience during the curing process. Don’t rush any step, and always prioritize safety when working with garage doors.
If you found this guide helpful, please share it with friends and neighbors who might face similar challenges. Your experience could save someone else time, money, and frustration. Have questions or success stories? Leave a comment below—we’d love to hear from you!
Stay proactive with your garage door maintenance, and it will serve you reliably for years to come.
Leave a Reply