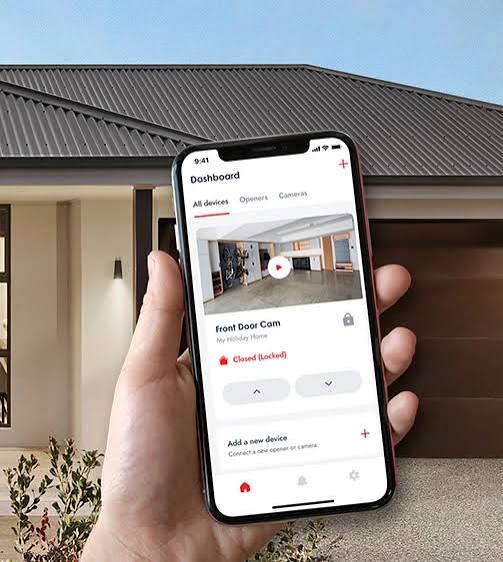
Have you ever pulled into your driveway only to realize you left the garage door wide open? Or perhaps you’ve lain in bed at night, worrying if you remembered to close it before heading out. You are not alone. In today’s fast-paced world, convenience and peace of mind are paramount. Fortunately, learning how to control my garage door with my phone is no longer a futuristic dream—it is a simple, affordable reality that can transform your daily routine and enhance your home security.
Why Smart Garage Control Is a Game-Changer
Before diving into the technical steps, it is essential to understand why this upgrade matters. Traditional garage door openers rely on radio frequency remotes. While functional, they lack feedback. You press the button, but you never truly know if the door closed unless you go look.
Smart garage controllers bridge this gap. They connect your existing opener to your home Wi-Fi network, allowing you to monitor status, receive alerts, and operate the door from anywhere in the world. According to recent home automation trends, over 40% of smart home users prioritize security devices, with garage access being a critical entry point for burglars. By digitizing this access, you gain total visibility.
Method 1: Using a Dedicated Smart Garage Hub (Easiest Solution)
The most reliable way to achieve phone control is by installing a smart garage hub. These devices act as a bridge between your traditional opener and your smartphone.
How It Works
A smart hub connects to your garage door opener’s motor unit via a simple wired connection. It then communicates with your home Wi-Fi router. Once set up, you use a proprietary app to send signals to the hub, which triggers the door.
Top Recommended Devices
| Device | Compatibility | Key Feature | Price Range |
|---|---|---|---|
| Chamberlain myQ | Most major brands | Video integration available | $30–$100 |
| Tailwind | Universal | No extra sensors needed | $80–$120 |
| Meross Smart Hub | Wi-Fi enabled openers | Budget-friendly | $25–$40 |
Step-by-Step Installation Guide
- Check Compatibility: Ensure your garage door opener was manufactured after 1993. Most modern openers have safety sensors and standard terminal blocks.
- Power Down: Unplug your garage door opener to ensure safety during installation.
- Mount the Hub: Place the smart hub within 10 feet of your opener motor. Use the included adhesive or screws.
- Connect Wires: Locate the two terminals on your opener labeled “Push Button” or “Wall Console.” Connect the two wires from the smart hub to these terminals. Polarity usually does not matter for simple trigger switches.
- Restore Power: Plug the opener back in.
- App Setup: Download the manufacturer’s app (e.g., myQ, Meross). Create an account and follow the in-app instructions to connect the hub to your Wi-Fi. Note: Ensure your garage has strong Wi-Fi signal strength. If not, consider a Wi-Fi extender.
For more technical details on wireless communication protocols used in these devices, you can refer to the Internet of Things overview on Wikipedia.
Method 2: Upgrading to a Native Smart Garage Door Opener
If your current opener is older than 15 years, it might be time for a full replacement. Newer models come with built-in Wi-Fi and smartphone connectivity.
Benefits of Native Integration
- Cleaner Aesthetic: No external hubs or dangling wires.
- Enhanced Security: Built-in encryption and rolling code technology.
- Voice Control: Seamless integration with Amazon Alexa, Google Assistant, and Apple HomeKit.
Popular Models
- LiftMaster 87504-267: Features battery backup and ultra-quiet belt drive.
- Chamberlain B970: Offers myQ technology out of the box.
While this option is more expensive ($300–$600), it eliminates the need for third-party adapters and often comes with extended warranties.
Method 3: DIY Solutions with Raspberry Pi or Arduino
For tech-savvy users who love customization, building your own controller is a viable option. This method requires coding knowledge and hardware skills.
What You Need
- Raspberry Pi Zero W or ESP8266 module.
- Relay module (5V).
- Jumper wires.
- Python or C++ coding skills.
Basic Logic
You program the microcontroller to listen for HTTP requests from a custom app or web interface. When a request is received, the GPIO pin triggers the relay, which mimics pressing the wall button.
Warning: This method voids warranties and poses safety risks if not installed correctly. Always use insulated tools and double-check wiring. Only attempt this if you are comfortable working with low-voltage electronics.
Critical Security Considerations
Controlling your garage door with your phone introduces digital risks. Hackers could potentially exploit weak passwords or unsecured Wi-Fi networks.
Best Practices for Safety
- Use Strong Passwords: Avoid “123456” or “password.” Use a mix of uppercase, lowercase, numbers, and symbols.
- Enable Two-Factor Authentication (2FA): Most smart garage apps offer 2FA. Enable it immediately. This adds a layer of protection by requiring a code from your phone alongside your password.
- Update Firmware Regularly: Manufacturers release patches to fix security vulnerabilities. Set your app to auto-update.
- Secure Your Wi-Fi: Use WPA3 encryption on your home router. Change the default admin password of your router.
Troubleshooting Common Issues
Even the best systems encounter glitches. Here is how to handle common problems.
- Door Not Responding: Check your Wi-Fi signal in the garage. If it is weak, install a range extender. Also, verify that the hub is powered on.
- App Shows “Offline”: Restart your router and the smart hub. Unplug the hub for 10 seconds, then plug it back in.
- Delayed Response: This is often due to internet latency. Ensure no large downloads are consuming bandwidth on your network.
FAQ Section
Q1: Can I control my garage door if my internet is down?
A: Most smart hubs require an internet connection to communicate with your phone. However, some advanced models offer local control via Bluetooth if you are within range. Without internet, remote access will not work, but your physical remote and wall button will still function.
Q2: Is it safe to let family members access my garage via the app?
A: Yes, most apps allow you to create multiple user profiles. You can grant access to family members and revoke it instantly if needed. This is safer than sharing physical remotes, which can be lost or copied.
Q3: Will a smart garage controller work with my old opener?
A: Likely yes. As long as your opener has a standard “push button” terminal block (common in units made after 1993), most universal hubs like Chamberlain myQ or Tailwind will work. Check the manufacturer’s compatibility list before purchasing.
Q4: Does controlling the garage door with my phone drain my battery?
A: Negligibly. The app runs in the background but uses minimal data and power. The primary battery consumption comes from screen usage when you actively open the app.
Q5: Can I integrate my garage door with other smart home devices?
A: Absolutely. Most smart garage controllers support IFTTT (If This Then That), allowing you to create automations. For example, you can set your lights to turn on when the garage door opens, or lock your front door when the garage closes.
Conclusion
Learning how to control my garage door with my phone is one of the most impactful upgrades you can make to your home. It offers unparalleled convenience, enhanced security, and peace of mind. Whether you choose a simple smart hub, a new native opener, or a DIY project, the benefits far outweigh the costs.
Imagine never wondering if you closed the garage again. Imagine letting your dog walker in while you are at work. Imagine your lights turning on automatically as you arrive home. These are not just luxuries; they are practical improvements to your quality of life.
Ready to upgrade? Share this guide with friends and family who are still stuck in the past with their clunky remotes. Let’s build smarter, safer homes together. Don’t forget to comment below with your favorite smart home hack!
Leave a Reply