Introduction
There are few things more frustrating than pulling into your driveway at night only to be greeted by darkness because your garage light has failed. If you are searching for how to change light bulb in Genie garage door opener, you are likely dealing with this exact inconvenience and want a safe, quick solution without calling a technician. Replacing this bulb is a straightforward DIY task, but using the wrong type or skipping safety steps can damage your opener’s logic board or void your warranty. This guide will walk you through the process with expert precision, ensuring your garage is bright and your equipment remains protected.
Safety First: Preparing Your Genie Opener for Maintenance
Before you even touch a ladder, understanding the safety protocols is non-negotiable. Garage door openers combine high-voltage electricity with moving mechanical parts, creating a unique hazard environment. According to electrical safety standards referenced in Wikipedia’s Electrical Safety article, working on any fixed electrical appliance requires verifying that power is isolated to prevent shock or accidental activation.
Essential Safety Checklist
- Disconnect Power: Unplug the opener from the ceiling outlet or turn off the dedicated circuit breaker. Do not rely solely on the wall switch.
- Allow Cooling Time: Incandescent and halogen bulbs can reach temperatures exceeding 200°F (93°C). Wait at least 15 minutes after the last use before handling.
- Secure Your Ladder: Use a fiberglass ladder (non-conductive) placed on stable, level ground. Never overreach while changing the bulb.
- Wear Protection: Safety glasses protect against glass shards if an old bulb breaks during removal.
- Verify Model Number: Locate the model number on the motor head. Different Genie models (e.g., ChainMax, SilentMax, StealthDrive) have varying lens designs and wattage limits.
Expert Note: “The most common cause of premature bulb failure in garage openers is vibration combined with incorrect wattage. Always verify the maximum wattage rating printed inside the light cover before installing a new bulb.” — Certified Garage Door Technician Best Practices
What Type of Bulb Does My Genie Garage Door Opener Use?
Selecting the correct bulb is arguably more important than the installation itself. Using an incompatible bulb is the leading cause of repeated failures and potential damage to the opener’s internal circuitry.
Compatible Bulb Types Comparison
| Bulb Type | Max Wattage | Vibration Resistant | RF Interference Risk | Lifespan | Best For |
|---|---|---|---|---|---|
| Genie LED Bulb | 10W (60W equiv) | Yes | None | 25,000+ hrs | All Genie Models |
| Rough Service Incandescent | 60W | Moderate | Low | 1,000–2,000 hrs | Older Models Only |
| Standard LED (Non-Garage) | 8–12W | No | High | Variable | Not Recommended |
| CFL Spiral | 14W | No | Moderate | 8,000 hrs | Obsolete/Avoid |
| Halogen | N/A | No | Low | 2,000 hrs | Avoid (Heat Risk) |
Why Genie-Specific LED Bulbs Are Superior
Modern Genie openers are designed with sensitive radio frequency receivers. Standard household LEDs often emit electromagnetic interference (EMI) that disrupts the remote signal range. Genie-branded LED bulbs are specifically shielded to prevent this interference while providing superior vibration resistance. They also generate significantly less heat, protecting the plastic light lens from yellowing or cracking over time.
If you own an older Genie model manufactured before 2015, check your manual carefully. Some legacy units specify incandescent-only due to the way their light relay circuits are designed. Installing an LED in these units may result in flickering or complete failure to illuminate.
Step-by-Step: How To Change Light Bulb In Genie Garage Door Opener
Now that you have the correct bulb and have observed all safety precautions, follow this detailed procedure. This tutorial applies to most Genie belt-drive and chain-drive models with standard snap-on or screw-in light covers.
Step 1: Access the Light Lens Cover
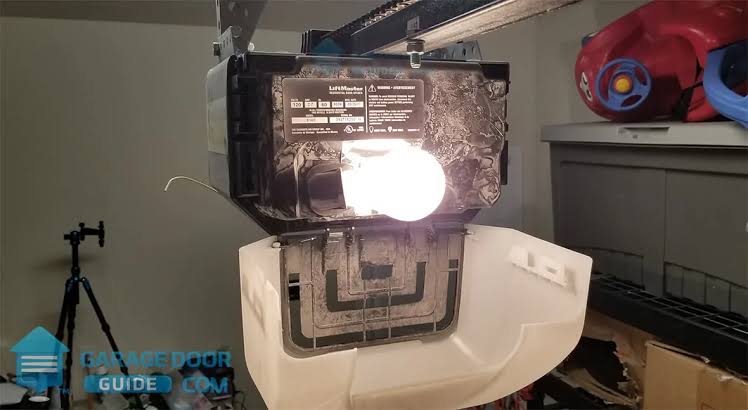
Identify your lens type. Most modern Genie units feature a snap-on translucent lens located on the bottom or side of the motor housing. Gently press the release tab(s) and swing the lens downward. For older models with a screw-retained lens, use a Phillips-head screwdriver to remove the single retaining screw. Do not force the lens, as aged plastic becomes brittle and can crack easily.
Step 2: Remove the Old Bulb
With the power confirmed OFF and the bulb cooled, grasp the old bulb firmly but gently. Rotate counterclockwise approximately 90 degrees for bayonet-style sockets, or unscrew fully for standard Edison bases. If the bulb is stuck, do not squeeze harder. Wrap a rubber jar grip or cloth around the base for traction. If the bulb is broken in the socket, use needle-nose pliers to carefully extract the base remnant—only after confirming zero voltage with a non-contact tester.
Step 3: Inspect the Socket and Wiring
Before installing the new bulb, take 30 seconds to inspect the socket contacts. Look for:
- Corrosion or blackening: Indicates arcing or moisture intrusion
- Bent center tab: Gently lift with pliers if flattened (power OFF!)
- Loose wire connections: Tighten terminal screws if accessible
- Melted plastic: Sign of previous over-wattage; socket may need replacement
This inspection prevents installing a new bulb into a compromised socket that will fail immediately.
Step 4: Install the New Bulb Correctly
Insert the new Genie-compatible LED bulb into the socket. Hand-tighten only—never use tools or excessive force. For bayonet bases, align the pins, push in, and rotate clockwise until locked. Ensure the bulb seats fully and does not wobble. Verify the wattage/equivalence marking matches your opener’s specifications one final time.
Step 5: Reassemble and Test
Reattach the light lens, ensuring all tabs click securely or the retaining screw is snug (do not overtighten). Restore power at the breaker or plug. Activate the light via the wall console and remote. The bulb should illuminate instantly without flickering. Test your remote range from outside the garage to confirm no RF interference exists.
Troubleshooting: Light Still Not Working After Replacement?
If you’ve followed every step correctly and the light remains dark, the issue lies elsewhere. Here is a diagnostic framework:
- Test the Bulb Elsewhere: Screw the new bulb into a known-working lamp to rule out a defective unit.
- Check the Light Relay: Listen for a faint click when activating the light. No click suggests a failed relay on the logic board.
- Inspect the Wall Console: A faulty wall button or wiring short can prevent the light signal from reaching the opener.
- Review Timer Settings: Many Genie models have adjustable auto-off timers (typically 3–5 minutes). The light may simply be timing out faster than expected.
- Logic Board Failure: If multiple symptoms exist (erratic behavior, unresponsive remotes, intermittent lighting), the main control board may require professional replacement.
Critical Warning: Never bypass the light socket or hardwire a bulb directly to test functionality. This eliminates built-in safety protections and creates serious fire and electrical hazards.
Frequently Asked Questions (FAQ)
Q1: Can I use any LED bulb in my Genie garage door opener?
No. While physically compatible, many standard LEDs emit radio frequency interference that reduces your remote’s effective range. Always use Genie-certified LED bulbs or those explicitly labeled “garage door opener compatible” with EMI shielding. Check your owner’s manual for specific recommendations tied to your model number.
Q2: Why does my Genie opener light keep burning out every few weeks?
Premature failure typically stems from three causes: excessive vibration (use rough-service or LED bulbs), over-wattage (never exceed 60W incandescent equivalent), or a failing socket/logic board. Switch to a Genie LED bulb first; if failures continue, the socket contacts or internal relay likely need professional service.
Q3: Is it safe to change the bulb myself, or should I hire a professional?
Changing the bulb is a safe DIY task if you disconnect power first and follow the steps outlined above. However, if you discover damaged wiring, melted components, or the light still fails after proper replacement, contact a certified Genie dealer. Electrical diagnostics beyond basic bulb swapping require specialized training and equipment.
Q4: How do I reset the light timer on my Genie garage door opener?
Timer adjustment varies by model. On most Genie units, press and hold the “Light” button on the wall console for 10 seconds until the light blinks, then release. Each subsequent press cycles through 3-minute intervals (3, 6, 9 minutes). Consult your specific model’s manual for exact programming sequences, as newer Intellicode models differ from legacy systems.
Q5: Can I upgrade my old Genie opener to LED lighting if it originally used incandescent?
In most cases, yes—but verify compatibility first. Genie offers retrofit LED kits for many pre-2015 models. If your opener uses a proprietary socket or has a known LED incompatibility noted in the manual, stick with rough-service incandescent bulbs rated for garage door use. When in doubt, contact Genie customer support with your model number for definitive guidance.
Q6: Does changing the bulb affect my garage door opener warranty?
No, replacing the light bulb with a manufacturer-approved bulb does not void your warranty. However, damage caused by using over-wattage bulbs, non-compatible LEDs that cause RF damage, or improper installation techniques may not be covered. Always retain proof of purchase for approved replacement bulbs.
Conclusion
Mastering how to change light bulb in Genie garage door opener empowers you to maintain both safety and convenience in one of your home’s most-used spaces. By selecting the correct Genie-compatible LED bulb, following proper safety protocols, and performing a quick socket inspection during each replacement, you extend the life of your opener while ensuring reliable illumination for years to come. Remember: the right bulb isn’t just about brightness—it’s about protecting your investment and maintaining optimal system performance.
Found this guide helpful? Share it on Facebook, Pinterest, or your neighborhood Nextdoor group to help fellow homeowners avoid costly service calls and dark garages. Tag a friend who’s been complaining about their garage light—we’d love to brighten their day too! 💡🔧
Leave a Reply