Introduction
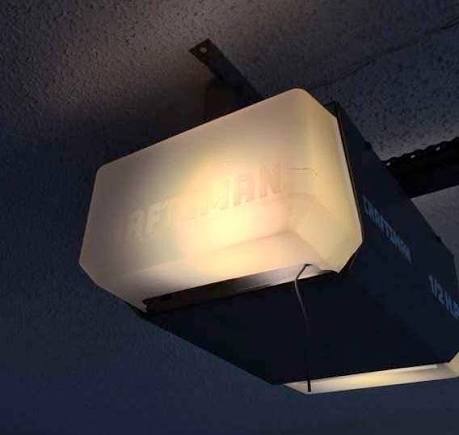
There are few things more frustrating than pulling into your driveway at night only to be greeted by darkness because your garage light has failed. If you are wondering how to change light bulb in Craftsman garage door opener, you are not alone; this is one of the most common maintenance tasks for homeowners. Fortunately, replacing the bulb is a simple, five-minute fix that restores safety and visibility without requiring professional help. This guide will walk you through every step with empathy and precision, ensuring you get the job done right the first time.
Why Your Craftsman Garage Door Light Matters for Safety
Before grabbing a ladder, it is important to understand why this small component is critical. According to the National Safety Council, falls are the leading cause of non-fatal injuries in the home, and poor lighting is a primary contributing factor. A functioning garage door opener light isn’t just about convenience; it is a vital safety feature that illuminates trip hazards, deters intruders, and allows your opener’s safety sensors to function optimally in low-light conditions.
When you master how to change light bulb in Craftsman garage door opener, you are actively maintaining the safety ecosystem of your home. Many modern Craftsman units also use the light circuit as a diagnostic tool; if the light blinks or fails prematurely, it can indicate electrical issues or vibration problems within the opener itself.
What Type of Bulb Does a Craftsman Garage Door Opener Use?
Using the wrong bulb is the number one reason replacements fail quickly. Craftsman openers generally fall into two categories regarding lighting technology.
Standard Incandescent vs. LED Compatibility
| Feature | Incandescent (A19) | LED (Garage Door Specific) |
|---|---|---|
| Wattage Limit | Max 60W (Check Manual) | Usually 8W–12W Equivalent |
| Vibration Resistance | Low (Filament breaks easily) | High (Solid state construction) |
| Lifespan | 1,000 – 2,000 Hours | 15,000 – 25,000 Hours |
| RF Interference | None | Possible (If non-shielded) |
| Heat Output | High | Negligible |
Note: Always verify your specific model’s manual. Some older Craftsman models explicitly warn against using standard LEDs due to potential radio frequency interference with the remote control signal.
For most users, upgrading to a “garage door opener specific” LED bulb is the best choice. These bulbs are specially shielded to prevent signal interference and are built with reinforced bases to withstand the constant vibration of the opener motor. As noted in general electrical engineering principles documented on Wikipedia, LEDs convert energy more efficiently and lack the fragile filament found in traditional bulbs, making them inherently superior for high-vibration environments like garage door openers.
Step-by-Step: How to Change Light Bulb in Craftsman Garage Door Opener
Follow these precise steps to ensure safety and proper installation. Do not skip the safety precautions.
1. Disconnect Power and Secure the Area
Safety must come first. Locate the power cord for your Craftsman opener and unplug it from the ceiling outlet. If your unit is hardwired, turn off the corresponding circuit breaker at your main panel. Place a sturdy stepladder directly beneath the opener to avoid overreaching. Never attempt this repair while the unit is energized.
2. Remove the Old Bulb Carefully
Allow the existing bulb to cool completely if it was recently on. Gently grasp the base of the bulb (not the glass) and turn it counter-clockwise. If the bulb is stuck, do not force it, as breaking glass inside the socket creates a significant hazard. Instead, use a rubber jar grip or a dedicated bulb changer tool to increase friction without applying excessive pressure.
3. Inspect the Socket and Contacts
Before inserting the new bulb, take 30 seconds to inspect the socket. Look for signs of scorching, corrosion, or bent brass contacts. If the center tab appears flattened, gently pry it upward with a non-conductive tool (like a plastic spudger) to ensure solid contact with the new bulb. A loose connection is often mistaken for a bad bulb.
4. Install the Correct Replacement Bulb
Insert your verified replacement bulb (preferably a vibration-resistant LED rated for garage door openers). Turn it clockwise until snug. Do not overtighten. Over-torquing can crack the bulb base or damage the internal socket wiring. Hand-tight plus a quarter turn is typically sufficient.
5. Restore Power and Test Functionality
Plug the unit back in or restore breaker power. Operate the garage door using your wall console. The light should activate automatically. Test the remote controls to ensure no RF interference exists. If using an LED and your remotes lose range, switch to a rough-service incandescent or a premium shielded LED immediately.
Troubleshooting: Light Still Not Working After Replacement?
If you have successfully learned how to change light bulb in Craftsman garage door opener but the fixture remains dark, the issue likely lies elsewhere.
- Check the Logic Board Relay: On many Craftsman models, the light is controlled by an internal relay on the logic board. If you hear a faint click when activating the light but nothing illuminates (even with a known-good bulb), the relay may have failed.
- Inspect Wiring Harness: Vibrations can loosen the wire harness connecting the light socket to the main board. Reseat all connections firmly.
- Verify Wattage Compliance: Using a bulb exceeding the manufacturer’s wattage rating can trigger an internal thermal protector or blow a fuse on the logic board. Always adhere to the printed limit near the socket.
- Test with Multimeter: For advanced DIYers, testing voltage at the socket terminals (with power restored and extreme caution) confirms whether electricity is reaching the fixture. Only attempt this if you are experienced with live electrical testing.
Frequently Asked Questions (FAQ)
Can I use any LED bulb in my Craftsman garage door opener?
No. Standard household LEDs can emit electromagnetic interference that disrupts your garage door remote’s signal range. Always choose LEDs specifically labeled “garage door opener compatible” or “RF shielded.” These undergo testing to ensure they won’t interfere with the 315MHz or 390MHz frequencies used by Craftsman remotes.
Why does my new bulb burn out so quickly?
Premature failure is almost always caused by vibration. Garage door openers generate significant mechanical shock during operation. Standard bulbs cannot withstand this. Switch to a vibration-rated LED or a “rough service” incandescent bulb designed for industrial applications. Also, ensure the opener is properly balanced and mounted to reduce excess shaking.
Is there a reset button for the garage door opener light?
Most Craftsman openers do not have a dedicated light reset button. However, some newer models with smart features allow light settings adjustment via the MyQ app or wall console menu. Consult your owner’s manual for model-specific programming instructions. If the light is completely unresponsive after bulb replacement, the issue is typically hardware-related, not software-related.
What is the maximum wattage for Craftsman garage door opener lights?
The vast majority of Craftsman openers are rated for a maximum of 60 watts for incandescent bulbs. Exceeding this can melt the socket housing or damage the logic board. When using LED equivalents, check the package for actual wattage draw (usually 8–12W), not the “equivalent” brightness rating. Never install a 75W or 100W bulb unless your manual explicitly permits it.
Can I bypass the automatic light timer?
On most Craftsman units, the light duration is adjustable between 1.5 to 4.5 minutes via DIP switches or menu settings on the motor unit. You cannot permanently disable the auto-off feature as it is a safety and energy-saving design. Refer to your manual for adjustment procedures specific to your model number.
Should I hire a professional to change the bulb?
Changing the bulb itself is a basic homeowner task requiring no special skills. However, if troubleshooting reveals logic board failure, wiring damage, or persistent electrical issues, hiring a certified garage door technician is strongly recommended. Electrical repairs beyond bulb replacement carry risk and may void warranties if performed incorrectly.
Conclusion
Mastering how to change light bulb in Craftsman garage door opener empowers you to maintain a safer, more functional home with minimal effort and expense. By selecting the correct vibration-resistant bulb, following safe installation procedures, and understanding basic troubleshooting, you eliminate darkness-related hazards and extend the life of your opener system. Remember, this small act of maintenance reflects responsible homeownership and protects everyone who enters your garage.
Found this guide helpful? Share it on Facebook, Pinterest, or Nextdoor to help fellow homeowners tackle this common repair confidently! Tag a friend who’s been complaining about their dark garage — they’ll thank you later. Safe fixing! 💡🔧
Leave a Reply