Introduction
Is your garage door waking up the entire neighborhood with its loud, grinding noise every time you leave for work? You are not alone, and upgrading your system is easier than you might think. This comprehensive, step-by-step guide will show you exactly how to change garage door opener from chain to belt, giving you the peace, quiet, and smooth operation your home deserves.
How To Change Garage Door Opener From Chain To Belt Safely
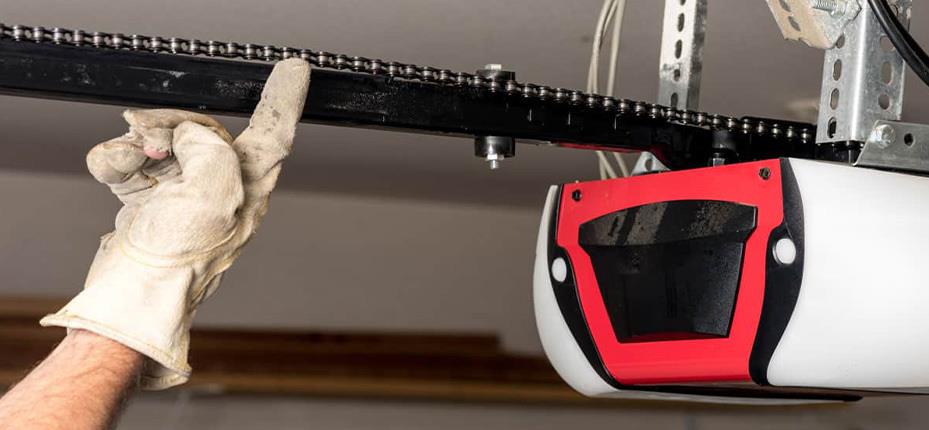
Before diving into the physical work, it is crucial to understand the core differences between the two systems. A chain drive uses a metal chain (similar to a bicycle chain) to pull the trolley that moves the door. In contrast, a belt drive uses a reinforced rubber or fiberglass belt.
According to industry data, belt drive systems operate at approximately 50 decibels, which is comparable to a quiet conversation. Chain drives, on the other hand, can reach 70 decibels or more, akin to a vacuum cleaner. This significant noise reduction is the primary reason homeowners seek to upgrade. Furthermore, belt drives experience less vibration, which translates to reduced wear and tear on your garage door’s rollers, tracks, and hinges over time.
Chain Drive vs. Belt Drive: A Quick Comparison
To help you make an informed decision, here is a clear breakdown of how the two systems compare:
| Feature | Chain Drive Opener | Belt Drive Opener |
|---|---|---|
| Noise Level | Loud (70+ dB) | Very Quiet (~50 dB) |
| Maintenance | Requires regular lubrication | Virtually maintenance-free |
| Durability | Extremely high, handles heavy doors well | High, but belts may need replacement after 10+ years |
| Cost | Budget-friendly ($150–$250) | Premium ($250–$400+) |
| Best For | Detached garages, budget-conscious buyers | Attached garages, bedrooms above the garage |
Expert Insight: “For homes with living spaces directly above or adjacent to the garage, a belt drive is not just a luxury; it is a practical necessity for maintaining a comfortable indoor environment,” notes John Mitchell, a certified garage door technician with over 15 years of field experience.
Can You Convert a Chain Drive to a Belt Drive?
A common question among DIYers is whether they can simply swap the chain for a belt on their existing motor. The short answer is: it depends on the manufacturer, but replacement is usually better.
While a few specific brands offer proprietary “conversion kits,” they are rare and often cost nearly as much as a brand-new unit. Moreover, older chain drive motors may lack the modern safety features (like battery backup and smartphone connectivity) found in new belt drive models. Therefore, the most cost-effective and reliable method to achieve your goal is to replace the entire opener unit.
Tools and Materials You Will Need
Preparation is the key to a smooth DIY project. Gather these tools before you begin to avoid mid-project trips to the hardware store:
- 6-foot stepladder (for safe overhead access)
- Adjustable wrenches (7/16-inch and 9/16-inch are standard)
- Socket set and ratchet
- Screwdrivers (both flathead and Phillips #2)
- Locking pliers or C-clamps (to secure the garage door)
- Safety glasses and work gloves
- A helper (garage door motors weigh between 30 to 50 lbs)
- New belt drive garage door opener (ensure it matches your door’s weight and height requirements)
Step-by-Step Guide: Replacing Your Opener
Follow these concrete steps to ensure a safe and successful installation.
Step 1: Disconnect Power and Release the Door
Safety first. Unplug the existing garage door opener from the wall outlet. If it is hardwired, turn off the corresponding circuit breaker. Next, pull the red emergency release cord (usually a rope with a red handle) down and toward the door. This disengages the trolley from the opener carriage, allowing you to move the door manually.
Step 2: Support the Garage Door
Manually lift the garage door until it is fully open. Once open, secure the door to the tracks using two C-clamps or locking pliers. Place them on the vertical tracks just 2 inches above the bottom rollers. This prevents the door from accidentally crashing down while you work, which is a critical safety measure.
Step 3: Remove the Old Chain Drive Opener
- Disconnect the arm (the metal bar connecting the opener to the door) from the trolley.
- Unbolt the header bracket (the metal plate mounted high on the wall above the door) from the rail.
- With the help of your assistant, support the weight of the motor unit. It typically weighs 30 to 50 lbs.
- Remove the bolts or straps securing the motor unit to the ceiling joists. Carefully lower the old unit and set it aside.
Step 4: Install the New Belt Drive Opener
- Assemble the new rail on the floor according to the manufacturer’s instructions. Ensure the reinforced belt is properly threaded and tensioned.
- Lift the new motor unit onto your stepladder or have your helper hold it in place.
- Secure the motor unit to the ceiling joists using the provided mounting brackets and heavy-duty lag screws. Ensure it is level.
- Attach the rail to the header bracket on the wall above the garage door.
Step 5: Connect the Trolley and Adjust the Limits
- Reconnect the new opener’s arm to the trolley and the bracket on the top section of the garage door.
- Plug the new unit into the wall outlet.
- Follow the specific manual to set the travel limits (how far the door opens and closes) and the force settings. Most modern units use digital dials where a 1/4 turn equals a specific increment of force adjustment.
- Test the door by pressing the wall button. Observe the opening and closing cycles to ensure smooth, quiet operation without binding.
Authoritative Context: The evolution of these safety and drive mechanisms has been well-documented. For a deeper dive into the mechanical history and standardization of these devices, you can explore the comprehensive overview on Garage door openers.
Frequently Asked Questions (FAQ)
Q1: Can you convert a chain drive garage door opener to a belt drive without replacing the whole unit?
A: In most cases, no. While a few niche manufacturers offer conversion kits, they are uncommon. Replacing the entire opener is generally safer, more cost-effective, and ensures you get modern safety features like auto-reverse and battery backup.
Q2: Is a belt drive garage door opener worth the extra cost?
A: Absolutely. If your garage is attached to your home or has a bedroom above it, the noise reduction alone (up to 70% quieter) makes the belt drive worth the investment. It also requires less maintenance since rubber belts do not need regular lubrication like metal chains.
Q3: How long does it take to change a chain drive to a belt drive?
A: For an average DIYer with a helper, the entire process—from removing the old unit to testing the new one—typically takes between 2 to 4 hours. First-timers should allocate a full afternoon to work without rushing.
Q4: Do I need a professional to change my garage door opener?
A: Not necessarily. If you are comfortable using basic hand tools, working on a ladder, and following detailed instructions, this is a highly manageable DIY project. However, if your garage door springs are damaged or the door is unusually heavy, hiring a professional is strongly recommended for safety reasons.
Q5: Will a new belt drive opener work with my existing garage door?
A: Yes, garage door openers are universally compatible with standard sectional garage doors. You just need to ensure the new opener’s horsepower (typically 1/2 HP or 3/4 HP) is sufficient for the weight and size of your specific door.
Conclusion
Learning how to change garage door opener from chain to belt is one of the most rewarding home improvement projects you can tackle. Not only will you eliminate that annoying metallic grinding noise, but you will also reduce long-term maintenance and add a layer of modern convenience to your daily routine. With the right tools, a helper, and this guide, you can achieve a professional-quality result in just a few hours.
Did you find this guide helpful? Share this article on Facebook, Twitter, or Pinterest to help your friends and family discover the secret to a quieter, smoother garage door! If you have any questions or tips from your own DIY experience, leave a comment below—we love hearing from our community.
Leave a Reply