Introduction
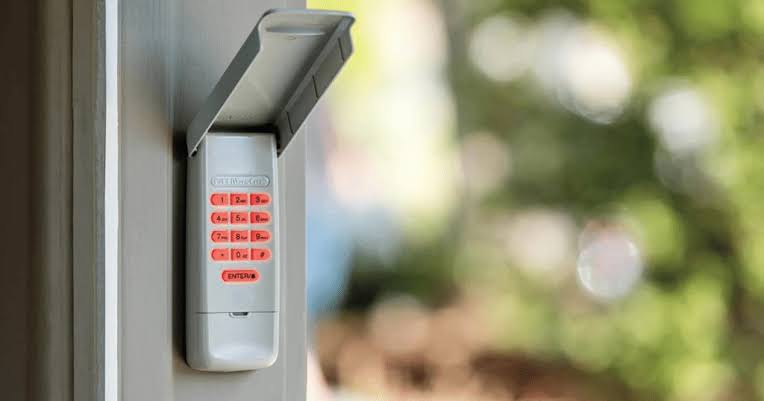
Losing track of your old garage door PIN or moving into a new home can feel overwhelming, but updating it is much simpler than you might think. If you are wondering how to change code on Chamberlain garage door opener keypad, you are in the right place. This quick, empathetic, and step-by-step guide will help you secure your home and regain total peace of mind in just a few minutes.
How to Change Code on Chamberlain Garage Door Opener Keypad: The Basics
Before diving into the buttons and blinking lights, it is helpful to understand why this process matters. Your garage door is often the largest entry point to your home. According to home security experts and data from the FBI’s Uniform Crime Reporting program, securing secondary entry points like garages is a top recommendation for preventing property crimes.
By learning how to change code on Chamberlain garage door opener keypad, you actively neutralize the risk of unauthorized access from old codes, previous homeowners, or guesswork. Modern Chamberlain openers are designed with user-friendly programming interfaces, meaning you do not need to be a tech expert to get this done.
What You Need Before You Start Programming
To ensure a smooth programming experience, gather the following items and information:
- A sturdy step ladder: You will need safe access to the garage door opener motor unit mounted on the ceiling.
- Your Chamberlain wireless keypad: Ensure it is within range of the motor unit.
- Fresh batteries: A weak 9V or AA battery (depending on your model) can interrupt the programming signal.
- Your desired 4-digit PIN: Choose a code that is easy for your family to remember but hard for strangers to guess (avoid “1234” or your birth year).
Identify Your “Learn” Button Color
Chamberlain openers use a color-coded “Learn” or “Smart” button to dictate the programming sequence. Locate this button on the back or side of the motor unit. It will be one of four colors:
- Yellow: Often indicates older Security+ models.
- Purple: Common in Security+ 2.0 models.
- Red: Found in many MyQ-enabled smart openers.
- Orange: Typically used in newer, advanced Wi-Fi-enabled models.
Note: If your opener has a red “Learn” button and a rectangular antenna, it may be a discontinued model that requires a specific legacy procedure. Check your manual if unsure.
Step-by-Step: How to Change Code on Chamberlain Garage Door Opener Keypad
Follow these concrete, numbered steps to successfully program your new PIN.
Step 1: Clear the Old Memory (Optional but Recommended)
If you suspect the old code is compromised, clear the opener’s memory. Press and hold the “Learn” button on the motor unit for 6 full seconds. The indicator LED next to the button will turn off, confirming that all previous remote and keypad codes have been erased. Warning: This means you will need to reprogram all your existing remotes.
Step 2: Wake Up the Keypad
Go to your wireless keypad outside the garage. Enter your existing PIN (if you know it) or proceed directly to Step 3 if you are starting fresh.
Step 3: Initiate Programming Mode on the Keypad
Enter your new 4-digit PIN of choice on the keypad. Immediately after entering the fourth number, press and hold the “ENTER” (or “SEND”) button.
Step 4: Sync with the Motor Unit
While still holding the “ENTER” button, walk over to the motor unit. Press the color-coded “Learn” button once and release it immediately. The LED light on the motor unit will blink or turn solid, indicating it is listening for a signal.
Step 5: Finalize the Connection
Return to the keypad and release the “ENTER” button. Press the “ENTER” button one more time within 30 seconds. The motor unit’s light should flash or you will hear a distinct click, confirming the new code is saved.
Step 6: Test the System
Wait for the motor unit light to stop blinking. Go back to the keypad, enter your new 4-digit PIN, and press “ENTER”. The garage door should activate immediately.
Chamberlain Wireless Keypad: Pros vs. Cons
To help you understand the value of your device, here is a quick text-based infographic comparing its features.
| Feature | Advantage (Pros) | Limitation (Cons) |
|---|---|---|
| Security | Uses rolling code technology to prevent code grabbing. | Requires battery replacement every 1–2 years. |
| Convenience | Allows keyless entry for family, dog walkers, or deliveries. | Signal range can be blocked by thick metal doors or extreme weather. |
| Compatibility | Works seamlessly with most Chamberlain and LiftMaster openers. | Older models may require a full memory wipe to add a new keypad. |
Expert Insight: Modern garage door openers utilize rolling code technology to prevent code grabbing, ensuring your new PIN changes its digital signature every time you use it, keeping hackers at bay.
Troubleshooting Common Chamberlain Keypad Issues
Even with careful steps, minor hiccups can occur. Here is how to resolve them quickly:
- Issue: The keypad light does not blink after pressing “ENTER”.
Solution: Replace the battery. Ensure the battery terminals are clean and making solid contact. - Issue: The motor unit light blinks, but the door does not move.
Solution: You may have missed the 30-second window. Repeat Steps 3 to 5, moving a bit faster between the keypad and the motor unit. - Issue: The “Learn” button LED turns off immediately when pressed.
Solution: The logic board may be faulty, or the button itself is stuck. Try pressing it firmly but gently. If it persists, consult a professional technician. - Issue: Intermittent operation (works sometimes, fails others).
Solution: Check for wireless interference. LED light bulbs in the garage can sometimes emit frequencies that disrupt the keypad signal. Try turning off the opener’s light bulbs to test.
Frequently Asked Questions (FAQ)
1. How do I reset my Chamberlain keypad if I forgot the code?
If you have forgotten the PIN, you cannot retrieve it. Instead, you must clear the opener’s memory by holding the “Learn” button on the motor unit for 6 seconds until the light goes out. After that, follow the standard programming steps to set a brand-new 4-digit PIN.
2. Can I program multiple Chamberlain keypads to one opener?
Yes, absolutely. Most Chamberlain garage door openers can support up to 3 to 6 wireless keypads, along with multiple handheld remotes. Simply repeat the programming steps for each additional keypad, assigning a unique 4-digit PIN to each one for better access tracking.
3. Why is my Chamberlain garage door keypad not working after changing the code?
This usually happens for three reasons: the battery is dead, the 30-second programming window expired, or the “Learn” button was held too long (which erases all codes). Double-check your battery, ensure you are pressing the “Learn” button only once, and try the process again.
4. Does changing the keypad code erase my handheld remote controls?
Not necessarily. If you only program a new keypad without holding the “Learn” button for 6 seconds, your existing remotes will continue to work. However, if you perform a full memory wipe, you will need to reprogram your remotes as well.
5. How often should I change my garage door opener code?
Home security professionals recommend changing your garage door code at least once a year, or immediately after a major life event (e.g., moving into a new home, a contractor finishing work, or losing a keypad).
Conclusion
Knowing how to change code on Chamberlain garage door opener keypad is a fundamental skill for modern homeowners. It takes less than five minutes, requires no special tools, and dramatically enhances your household’s security posture. By following the clear steps above, identifying your Learn button color, and testing the system, you can ensure your garage remains a safe, controlled entry point.
Did you find this guide helpful? Share this article on Facebook, Twitter, or Pinterest to help your friends and family secure their homes, too! If you have any questions or unique Chamberlain models, drop a comment below and our team will be happy to assist you.
Leave a Reply