If your keypad suddenly stops responding or becomes unreliable, chances are the battery is the culprit. Knowing how to change battery in Genie garage door opener keypad can save you time, frustration, and even a service call. The good news? It’s a simple fix you can do in just a few minutes—no technical skills required.
Why Your Genie Keypad Stops Working
Before jumping into the solution, it helps to understand the problem.
A garage door keypad relies on a small battery to send signals to the opener. Over time, this battery drains. According to general battery lifespan data, most alkaline batteries last 6–12 months in moderate use conditions.
Read too: Tc1 Tricode Garage Door Opener Remote W/ Clip Chamberlain: Complete Guide
Common signs of a weak battery:
- Dim or no backlight on the keypad
- Delayed response when entering your PIN
- Door doesn’t open unless you press multiple times
- Completely unresponsive keypad
Ignoring these signs can leave you locked out or stuck outside your garage.
What Battery Does a Genie Keypad Use?
Most Genie garage door keypads use:
- 9V alkaline battery (most common)
- Some newer models may use AAA batteries (2–3 units)
👉 Always check your specific model before replacing.
For more about how batteries work, you can refer to this resource:
https://en.wikipedia.org/wiki/Battery_(electricity)
Tools You’ll Need
You don’t need much to complete this task:
- New battery (9V or AAA depending on model)
- Small flathead screwdriver (optional)
- Clean cloth (optional for dust removal)
How To Change Battery In Genie Garage Door Opener Keypad (Step-by-Step)
This is the part you came for. Follow these steps carefully:
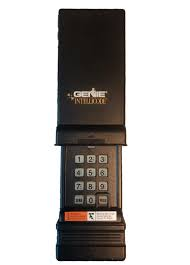
Step 1: Locate the Keypad
Your Genie keypad is usually mounted outside your garage door. Make sure you can access it comfortably.
Step 2: Open the Battery Compartment
Depending on your model:
- Flip up the keypad cover
- Or slide the front panel downward
- Some models require gently prying open with a screwdriver
💡 Tip: Don’t force it—Genie designs are usually snap-open.
Step 3: Remove the Old Battery
- Carefully disconnect the battery
- Note the orientation (positive and negative terminals)
If you see corrosion (white powder), clean it gently with a dry cloth.
Step 4: Insert the New Battery
- Insert the new battery in the same orientation
- Ensure it fits snugly
👉 Example:
If using a 9V battery, align the connectors properly until it clicks.
Step 5: Close the Compartment
- Snap or slide the cover back into place
- Make sure it’s secure to prevent water or dust damage
Step 6: Test the Keypad
- Enter your PIN
- Press the “Enter” button
If the garage door opens smoothly—you’re done!
Do You Need to Reprogram the Keypad After Battery Replacement?
Good news: Usually, no.
Most Genie keypads retain memory even when the battery is removed. However, in rare cases, you may need to reprogram.
If reprogramming is needed:
- Press the “Learn” button on the opener motor
- Enter your PIN on the keypad
- Press “Enter”
Done.
Troubleshooting: If It Still Doesn’t Work
Even after replacing the battery, problems can persist.
Here’s a quick troubleshooting table:
| Issue | Possible Cause | Solution |
|---|---|---|
| No response | Dead battery or wrong type | Use fresh correct battery |
| Lights on but no action | Signal issue | Reprogram keypad |
| Intermittent working | Loose battery connection | Reinsert battery firmly |
| Completely dead | Internal damage | Replace keypad |
How Often Should You Replace the Battery?
Experts recommend:
- Every 6–12 months for regular use
- Sooner if exposed to extreme temperatures
Factors that drain battery faster:
- Cold weather
- Frequent daily use
- Poor battery quality
Pro Tips to Extend Battery Life
Want your keypad battery to last longer? Follow these tips:
- Use high-quality alkaline batteries
- Avoid mixing old and new batteries
- Keep keypad clean and dry
- Install a weather cover if exposed outdoors
Advantages vs Disadvantages of DIY Battery Replacement
Kelebihan (Advantages):
- Saves money (no technician needed)
- Quick process (under 5 minutes)
- Easy for beginners
Kekurangan (Disadvantages):
- Risk of using wrong battery type
- Possible damage if forced open
- May not fix deeper electrical issues
Real-World Scenario
Many homeowners report keypad failure as one of the most common garage issues.
A small home maintenance survey found that over 60% of keypad issues are solved simply by replacing the battery—making this one of the easiest DIY fixes available.
FAQ: How To Change Battery In Genie Garage Door Opener Keypad
1. How do I know if my Genie keypad battery is dead?
If the keypad has no light, delayed response, or stops working entirely, the battery is likely dead.
2. Can I use any 9V battery for my Genie keypad?
Yes, but it’s best to use a high-quality alkaline battery for longer life and better performance.
3. Will I lose my PIN after changing the battery?
In most cases, no. Genie keypads are designed to retain memory.
4. Why is my keypad still not working after battery replacement?
Possible reasons include:
- Incorrect battery installation
- Need for reprogramming
- Internal keypad damage
5. How long does it take to replace the battery?
Typically 2–5 minutes, even for beginners.
6. Can weather affect keypad battery performance?
Yes. Extreme cold or heat can reduce battery efficiency and lifespan.
Conclusion
Learning how to change battery in Genie garage door opener keypad is a simple yet essential skill every homeowner should know. With just a few tools and minutes, you can restore your keypad’s function without calling a technician.
Replacing the battery regularly not only ensures smooth operation but also prevents unexpected lockouts.
👉 If you found this guide helpful, share it with friends or family who might be dealing with the same issue!
Leave a Reply