Is your garage door refusing to open during a power outage, leaving you stranded in the driveway? Don’t worry—learning how to change battery for Chamberlain garage door opener is a quick, simple fix that will restore your peace of mind and keep your home secure. Many homeowners panic when the power goes out, but with a little preparation, you can easily tackle this maintenance task yourself without calling an expensive technician.
How To Change Battery For Chamberlain Garage Door Opener: Essential Preparation
Before diving into the physical replacement process, it is crucial to understand why this maintenance task is so important and gather the right tools. According to the International Door Association (IDA), over 70% of homeowners use their garage door as their primary entrance, making a functional opener essential for daily life. When the main power goes out, the backup battery is your only lifeline to get your car out or secure your home.
To ensure a smooth and safe process, gather the following tools and materials before you begin:
- A fresh 12V sealed lead-acid (SLA) battery or a compatible lithium-ion replacement (always check your specific model number).
- A Phillips-head screwdriver (required if your model has a screwed battery cover).
- Safety gloves and protective eyewear to protect against potential acid leaks.
- A sturdy step ladder to safely reach the motor unit mounted on your ceiling.
Pro Tip: Always purchase a battery from a reputable brand or directly from the manufacturer to ensure longevity and safety. Using low-quality, uncertified batteries can lead to internal leaks, corrosion, or even premature failure during a critical power outage.
What Type of Battery Does a Chamberlain Garage Door Opener Use?
Not all batteries are created equal, and using the wrong one can severely damage your opener’s internal circuit board. Most modern Chamberlain models equipped with a battery backup system utilize a 12V sealed lead-acid (SLA) battery or a specialized lithium-ion pack.
To determine the exact type and size you need, look closely at the label on your existing battery. It will clearly state the voltage (almost always 12V) and the capacity, which is measured in Ampere-hours (commonly 4.5Ah, 5.0Ah, or 5.5Ah).
Here is a quick comparison to help you choose the right replacement:
| Battery Type | Pros | Cons |
|---|---|---|
| OEM Chamberlain Battery | Guaranteed compatibility, comes with a manufacturer warranty, plug-and-play installation. | Slightly more expensive than generic hardware store options. |
| Aftermarket SLA Battery | Highly cost-effective, widely available in local auto parts or hardware stores. | May have a shorter lifespan, and warranty claims can be complicated. |
| Lithium-Ion Upgrade | Lighter weight, significantly longer lifespan, holds charge better in extreme temperatures. | Higher upfront cost, requires strict model compatibility checks. |
For more technical background on how these motorized systems integrate with your home’s infrastructure, you can read about the general mechanics and history of a garage door opener on Wikipedia.
Step-by-Step Guide: Replacing the Battery Safely
Now that you have your tools and the correct battery, let’s walk through the physical replacement process. Follow these numbered steps carefully to avoid any electrical issues or voiding your warranty.
Step 1: Disconnect the Main Power Source Safety must always come first! Unplug the garage door opener from the electrical ceiling outlet.
If your unit is hardwired directly into your home’s electrical system, go to your breaker box. Turn off the specific circuit breaker that supplies power to the opener. This crucial step prevents any accidental electrical shocks while you work.
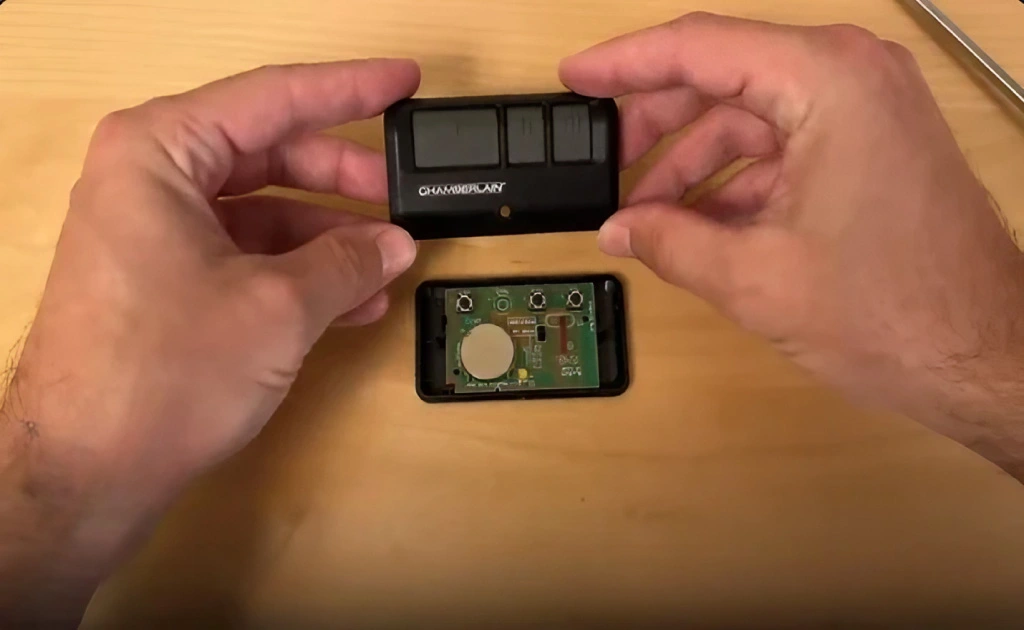
Step 2: Locate the Battery Compartment Using your step ladder, look at the back or the side of the main motor unit. The battery compartment is usually a small, rectangular plastic cover.
On many Chamberlain models, it is located on the rear panel and is clearly labeled with a battery icon or the words “Battery Backup.”
Step 3: Remove the Old Battery Carefully If the plastic cover is held in place by screws, use your Phillips-head screwdriver to remove them and set them aside safely. Gently pull the old battery out of its housing.
You will see two wires connected to the battery terminals—a red wire (positive) and a black wire (negative).
- Carefully disconnect the black wire first, followed by the red wire.
- Important Note: Never let the exposed wire ends touch each other or any metal parts of the opener housing, as this can cause a dangerous short circuit.
Disposal Note: Dispose of the old battery responsibly. Lead-acid batteries contain hazardous materials and should never be thrown in the regular trash. Most local hardware stores offer free battery recycling programs.
Step 4: Install the New Battery Take your new battery and connect the wires in the exact reverse order to ensure proper polarity.
- Attach the red wire to the positive (+) terminal first.
- Attach the black wire to the negative (-) terminal second.
Push the connectors firmly to ensure the connections are tight and secure. Gently place the battery back into the compartment and secure the plastic cover with the screws you removed earlier. Ensure the room temperature where you are working is between 10–30°C (50–86°F) for optimal handling.
Step 5: Restore Power and Run a Diagnostic Test Plug the garage door opener back into the electrical outlet or turn the circuit breaker back on. The unit will likely emit a short beep or flash a light to indicate that it recognizes the new, fully charged battery.
To properly test the system, unplug the opener again (or turn off the breaker) to simulate a real power outage. Press your remote control or the wall button. The door should operate smoothly and without hesitation. If it works perfectly, plug the main power back in, and your maintenance task is complete!
How Do You Know When the Battery Needs Replacing?
Recognizing the early warning signs of a failing battery can save you from the frustration of being locked out of your garage. Chamberlain openers are ingeniously designed to alert you when the backup power is running low.
- Audible Beeping: The most common and obvious sign is a repetitive beeping sound. If your opener beeps every few seconds, it is a clear, undeniable indicator that the battery is depleted and needs immediate replacement.
- Flashing Status Lights: Look closely at the motor unit’s control panel. If the backup battery LED light is flashing or glowing yellow/orange instead of a solid green, it is begging for attention.
- Failure During Outages: If the door simply does not open when the main power is cut, the battery has likely reached the absolute end of its lifespan.
Generally, a standard backup battery lasts between 1 to 3 years, depending on usage frequency and environmental factors. If your garage is poorly insulated and experiences extreme temperature fluctuations (consistently below 10°C/50°F or above 30°C/86°F), the battery’s chemical lifespan may be significantly reduced.
Frequently Asked Questions
How often should I replace the battery in my Chamberlain garage door opener? Most manufacturers and industry experts recommend replacing the backup battery every 1 to 3 years. However, if you notice the warning beeps or the door fails during a scheduled power outage test, you should replace it immediately, regardless of its age.
Can I use any generic battery for my Chamberlain garage door opener? While you can use third-party batteries to save money, it is highly recommended to use the exact specifications listed in your user manual (usually a 12V 4.5Ah or 5.0Ah SLA battery). Using a battery with the wrong voltage or amperage can permanently damage the opener’s sensitive internal circuit board.
What happens if I ignore a dead battery and don’t replace it? If you ignore a dead battery, your garage door will simply not open during a power outage, trapping your vehicles inside. Additionally, a completely dead, old lead-acid battery can sometimes leak corrosive sulfuric acid, which can severely damage the metal contacts inside the battery compartment.
Will changing the battery erase my remote control settings? No, changing the backup battery will not erase your remote control settings or the keypad codes. The logic board has a separate, small capacitor that retains the memory even when the main power and backup battery are disconnected. However, if you unplug the unit for an extended period, you might need to reprogram your remotes.
Why is my Chamberlain garage door opener beeping continuously? A continuous beep usually indicates that the backup battery is completely dead and needs immediate replacement. However, if the beeping persists after installing a brand-new battery, the issue might be with the logic board or the battery compartment contacts being corroded. Clean the contacts with a dry cloth and try again.
Is it safe to change the battery myself without professional help? Yes, it is perfectly safe for a homeowner to change the battery as long as you disconnect the main 120V power source first. The backup battery itself operates at a low, safe 12 volts, which is not dangerous to touch, but short-circuiting the terminals with a metal tool can cause sparks.
Conclusion
Learning how to change battery for Chamberlain garage door opener is an essential, empowering home maintenance skill that ensures your family’s safety, security, and daily convenience. By following this comprehensive, step-by-step guide, you can easily replace the backup battery, avoid frustrating power-outage lockouts, and significantly extend the overall lifespan of your garage door system.
Did you find this guide helpful and easy to follow? Please share this article on your social media to help your friends, family, and neighbors keep their garage doors running smoothly all year round!
Leave a Reply