Introduction
Is your garage door struggling to open or making loud noises? You might have a broken torsion spring. Knowing how to change a torsion spring on a garage door can save you hundreds of dollars in repair costs. However, this task involves high tension and significant risk if not handled correctly. This guide will walk you through the process safely, ensuring you understand every step before attempting the repair yourself.
Understanding Torsion Springs: Why They Matter
Before diving into the replacement process, it’s crucial to understand what torsion springs do and why they are critical to your garage door’s operation.
What Is a Torsion Spring?
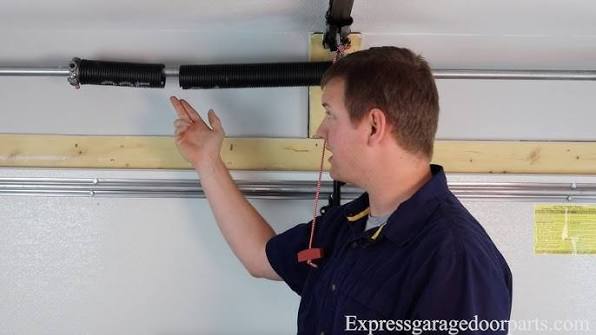
A torsion spring is a tightly wound metal coil located above your garage door. It stores mechanical energy when the door is closed and releases it to help lift the heavy door. Without a functioning torsion spring, your garage door opener would struggle—or fail entirely—to lift the door.
Signs Your Torsion Spring Needs Replacement
- Loud bang or snap: A sudden noise often indicates a spring has broken.
- Door won’t open: The door feels extremely heavy or doesn’t move at all.
- Visible gap: You may see a visible separation in the spring coil.
- Uneven movement: The door tilts or moves unevenly during operation.
According to industry experts, torsion springs typically last between 10,000 to 20,000 cycles, which translates to roughly 7–10 years of average use. If your spring is older than this, proactive replacement is wise.
Safety First: Essential Precautions
Warning: Replacing a torsion spring is one of the most dangerous DIY home repairs. The springs are under extreme tension and can cause serious injury or death if mishandled. If you’re unsure, hire a professional.
Required Safety Gear
- Safety glasses: Protect your eyes from flying debris.
- Heavy-duty gloves: Prevent cuts and improve grip.
- Steel-toed boots: Shield your feet from falling tools or parts.
- Clamping pliers (Vise-Grips): Essential for securing the shaft.
Tools You’ll Need
| Tool | Purpose |
|---|---|
| Winding bars (2) | To wind and unwind the spring safely |
| Socket wrench set | For removing bolts and brackets |
| Clamping pliers | To secure the torsion shaft |
| Ladder | To reach the spring assembly |
| Tape measure | To verify spring dimensions |
Step-by-Step Guide: How to Change a Torsion Spring on a Garage Door
Follow these steps carefully. Do not skip any safety precautions.
Step 1: Disconnect the Garage Door Opener
Pull the emergency release cord to disconnect the opener from the door. This prevents accidental activation while you work. Manually close the door completely.
Step 2: Secure the Torsion Shaft
Insert clamping pliers on both sides of the spring cone to prevent the shaft from rotating unexpectedly. This is a critical safety step.
Step 3: Release Tension from the Old Spring
Insert a winding bar into one of the holes on the winding cone. Slowly unwind the spring by turning the bar counterclockwise. Use two winding bars for better control. Repeat until all tension is released.
Expert Tip: Never remove the winding bar until the spring is fully unwound. The stored energy can cause severe injury.
Step 4: Remove the Old Spring
Once the tension is released, unbolt the spring from the center bracket and slide it off the torsion shaft. Note the orientation and number of coils for reference.
Step 5: Install the New Spring
Slide the new spring onto the torsion shaft, ensuring it matches the old spring’s specifications (wire size, length, and coil count). Secure it to the center bracket with bolts.
Step 6: Wind the New Spring
Insert the winding bars into the winding cone. Turn clockwise to add tension. Most residential doors require 7–8 full turns, but check your manufacturer’s specifications. Use a tape measure to ensure both springs (if dual) are wound equally.
Step 7: Test the Door
Remove the clamping pliers. Reconnect the garage door opener. Slowly open the door manually first to check balance. The door should stay in place when halfway open. If it does, the tension is correct.
Common Mistakes to Avoid
- Using improper tools: Screwdrivers or makeshift bars can slip, causing injury.
- Incorrect winding: Too much or too little tension affects door performance.
- Ignoring spring specifications: Using the wrong spring size can damage your door system.
- Skipping safety gear: Always wear protective equipment.
For more detailed technical specifications on garage door components, refer to Wikipedia’s article on garage doors.
Cost Comparison: DIY vs. Professional Repair
| Factor | DIY Replacement | Professional Service |
|---|---|---|
| Cost | $50–$150 (parts only) | $200–$400 (labor + parts) |
| Time | 2–4 hours | 1–2 hours |
| Risk | High (if inexperienced) | Low (trained technicians) |
| Warranty | None | Typically 1–5 years |
While DIY saves money, consider your skill level and comfort with high-tension systems.
FAQ Section
Q1: How long does it take to change a torsion spring?
A: For an experienced DIYer, it takes 2–4 hours. Beginners may take longer. Professionals typically complete the job in 1–2 hours.
Q2: Can I replace just one torsion spring?
A: If your system has two springs, it’s recommended to replace both simultaneously. Even if one appears functional, the other is likely near the end of its lifespan.
Q3: What happens if I wind the spring too much?
A: Over-winding increases tension, causing the door to slam shut or strain the opener. Under-winding makes the door heavy and difficult to lift.
Q4: How do I know the correct spring size?
A: Check the label on the old spring or measure its wire diameter, length, and coil count. Consult your garage door manual or manufacturer’s website.
Q5: Is it safe to do this alone?
A: It’s strongly advised to have a helper assist you, especially when handling winding bars and securing the shaft. Two sets of hands improve safety and efficiency.
Q6: How often should torsion springs be replaced?
A: Every 7–10 years or after 10,000–20,000 cycles. Regular inspections can help identify wear early.
Conclusion
Learning how to change a torsion spring on a garage door empowers you to handle common repairs confidently. By following this guide, prioritizing safety, and using the right tools, you can successfully replace a broken spring and restore your garage door’s functionality. Remember, if you feel uncertain at any point, don’t hesitate to call a professional. Your safety is paramount.
Did you find this guide helpful? Share it with friends or family who might need it! Follow us on social media for more home maintenance tips and DIY tutorials.
Disclaimer: This article is for informational purposes only. Always prioritize safety and consult a professional if you’re unsure about any step.
Leave a Reply