Introduction
Is there anything more frustrating than standing in the rain, pressing your garage door remote button repeatedly, only to hear silence? It is a common household annoyance that disrupts your daily routine and can even leave you locked out of your own home. If you are wondering how to change a battery in a garage door remote, you are in the right place.
Most of the time, the issue isn’t a broken motor or a complex electrical failure; it is simply a depleted power source. Replacing the battery is a quick, inexpensive fix that takes less than five minutes. In this guide, we will walk you through the process, help you identify the correct battery type, and troubleshoot common issues so you can get back to your life without hassle.
Why Does My Garage Door Remote Stop Working?
Before diving into the replacement process, it is helpful to understand why these devices fail. Garage door remotes are small, battery-operated transmitters that send radio frequency (RF) signals to your garage door opener. Over time, the chemical energy in the battery degrades, leading to weaker signals.
According to industry standards, most lithium coin-cell batteries have a shelf life of 5–10 years, but once installed in a device used daily, they typically last between 6 to 12 months. Factors such as extreme temperatures in your car or garage can accelerate this depletion.
If your remote requires you to be unusually close to the door to make it work, or if the LED light on the remote appears dimmer than usual, these are classic signs that the battery is nearing the end of its life. Addressing this early prevents the inconvenience of being stranded.
Tools and Materials You Will Need
You do not need a professional toolkit to handle this task. In fact, you likely have everything you need in your kitchen drawer or junk drawer. Here is what you should gather before starting:
- The Correct Replacement Battery: (See the section below for identification).
- A Small Flathead Screwdriver: Often used for prying open casings.
- A Coin: Useful for twisting open certain battery compartments.
- A Clean Cloth: To wipe away any dust or corrosion inside the compartment.
Pro Tip: Always have a spare battery on hand. They are inexpensive and having one ready ensures you are never caught off guard.
Step 1: Identify Your Battery Type
Not all garage door remotes use the same battery. Using the wrong type can damage the device or simply fail to work. The two most common types are:
1. CR2032 Lithium Coin Cell
This is the most prevalent battery type for modern remotes (brands like LiftMaster, Chamberlain, and Genie). It is a flat, silver, coin-shaped battery.
- Voltage: 3 Volts
- Lifespan: Typically 1–2 years with regular use.
2. AA or AAA Alkaline Batteries
Older models or larger “keychain” style remotes may use standard cylindrical batteries.
- Voltage: 1.5 Volts each
- Configuration: Usually requires 2 batteries inserted in series.
To confirm which one you need, open your remote (see Step 2) and look at the old battery. The model number (e.g., CR2032, CR2025, or LR44) is almost always printed on the positive side. If the text is worn off, consult your garage door opener’s manual or search for your remote’s model number online.
Note: While CR2032 and CR2025 look similar, the CR2032 is thicker. For more detailed technical specifications on battery standards, you can refer to Wikipedia’s page on Lithium batteries to understand the chemistry and safety ratings involved.
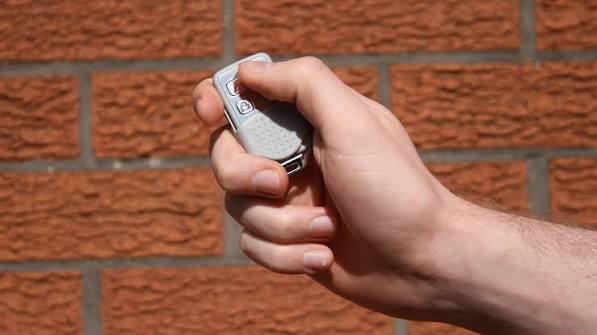
Step 2: Open the Remote Control
Opening the remote is the trickiest part, as manufacturers design them to be durable and water-resistant. There are generally two methods:
Method A: The Slide-Out Tray
Some remotes have a small latch or slider on the bottom or side.
- Locate the sliding mechanism.
- Push it firmly in the direction of the arrow.
- The battery tray should pop out gently.
Method B: The Pry-Open Case
Most modern remotes are sealed units.
- Look for a small seam along the edge of the remote.
- Insert your small flathead screwdriver or a coin into the notch.
- Gently twist or pry the two halves apart. Do not force it, as plastic clips can break easily.
- Work your way around the edge until the case separates.
Step 3: Remove the Old Battery
Once the case is open, locate the battery.
- Note the orientation of the battery. Look for the + (positive) and – (negative) markings.
- If it is a coin cell, it may be held in place by a small metal clip. Gently slide the battery out from under the clip.
- If it is an AA/AAA battery, simply pull it out of the slot.
Safety Check: Inspect the battery compartment for any white or green crusty residue. This is corrosion caused by leaking batteries. If present, wipe it clean with a dry cloth or a cotton swab dipped in a tiny amount of vinegar. Corrosion can prevent the new battery from making proper contact.
Step 4: Insert the New Battery
Now, insert your fresh battery.
- For Coin Cells: Ensure the positive side (+) is facing up (usually visible). Slide it under the metal clip until it clicks into place.
- For AA/AAA: Align the positive and negative ends according to the diagram inside the compartment.
Crucial Detail: Do not touch the battery surface with oily fingers, as this can reduce conductivity. Handle it by the edges if possible.
Step 5: Reassemble and Test
- Snap the two halves of the remote back together. Ensure all clips are engaged securely.
- Stand within 10 feet of your garage door.
- Press the button. You should see a small LED light flash on the remote.
- Listen for the garage door motor to engage.
If the door opens, congratulations! You have successfully learned how to change a battery in a garage door remote. If it does not work, proceed to the troubleshooting section below.
Troubleshooting: What If It Still Doesn’t Work?
Even with a new battery, issues can persist. Here is a quick comparison of potential problems and solutions:
| Problem | Possible Cause | Solution |
|---|---|---|
| LED Light Does Not Flash | Battery inserted incorrectly | Remove battery, flip it, and reinsert. |
| LED Flashes, Door Doesn’t Move | Remote lost synchronization | Reprogram the remote to the opener. |
| Intermittent Signal | Dirty contacts | Clean battery terminals with a pencil eraser. |
| No Response at All | Dead Opener Motor | Check if the wall switch works. If not, check the breaker. |
Reprogramming Your Remote
If the battery is new but the remote isn’t communicating, it may have lost its code. Most openers have a “Learn” button located on the motor unit hanging from the ceiling.
- Press the “Learn” button on the motor unit (the light will blink).
- Within 30 seconds, press the button on your remote.
- The light on the motor should flash or turn off, indicating success.
Frequently Asked Questions (FAQ)
Q1: How often should I change my garage door remote battery?
There is no fixed rule, but most homeowners replace them every 12 to 18 months. If you notice the range decreasing or the LED light dimming, it is time for a change regardless of how long it has been.
Q2: Can I use a rechargeable battery in my garage door remote?
It is generally not recommended. Standard rechargeable NiMH batteries have a lower voltage (1.2V) compared to alkaline (1.5V) or lithium (3V) batteries. This lower voltage may not provide enough power for the remote to transmit a strong signal to the opener. Stick to disposable lithium or alkaline batteries for reliability.
Q3: What do I do with the old battery?
Do not throw lithium or alkaline batteries in the regular trash. They contain chemicals that can harm the environment. Take them to a local recycling center, many hardware stores (like Home Depot or Lowe’s), or battery drop-off kiosks found in supermarkets.
Q4: Why does my remote work sometimes and not others?
This is often a sign of a dying battery. As the voltage drops, the signal strength becomes inconsistent. It could also indicate interference from other electronic devices or LED light bulbs in your garage that emit radio frequency noise. Try changing the battery first; if the issue persists, consider switching to “garage door friendly” LED bulbs.
Q5: Is it dangerous to open the remote?
No, it is not dangerous. However, be gentle with the plastic casing. Forcing it open can break the locking tabs, leaving you with a loose remote that may fall apart in your pocket or car.
Conclusion
Learning how to change a battery in a garage door remote is a simple yet essential skill for every homeowner. It saves you the cost of calling a technician and the frustration of being locked out. By following the steps outlined above—identifying the correct battery, carefully opening the case, and ensuring proper installation—you can keep your home access seamless and secure.
Remember, a little preventative maintenance goes a long way. Keep a spare battery in your kitchen drawer, and you will never be stuck in the driveway again.
Did you find this guide helpful? Share it with your friends and family on social media to help them troubleshoot their own garage door woes. A simple share can save someone else from a rainy-day headache!
Leave a Reply